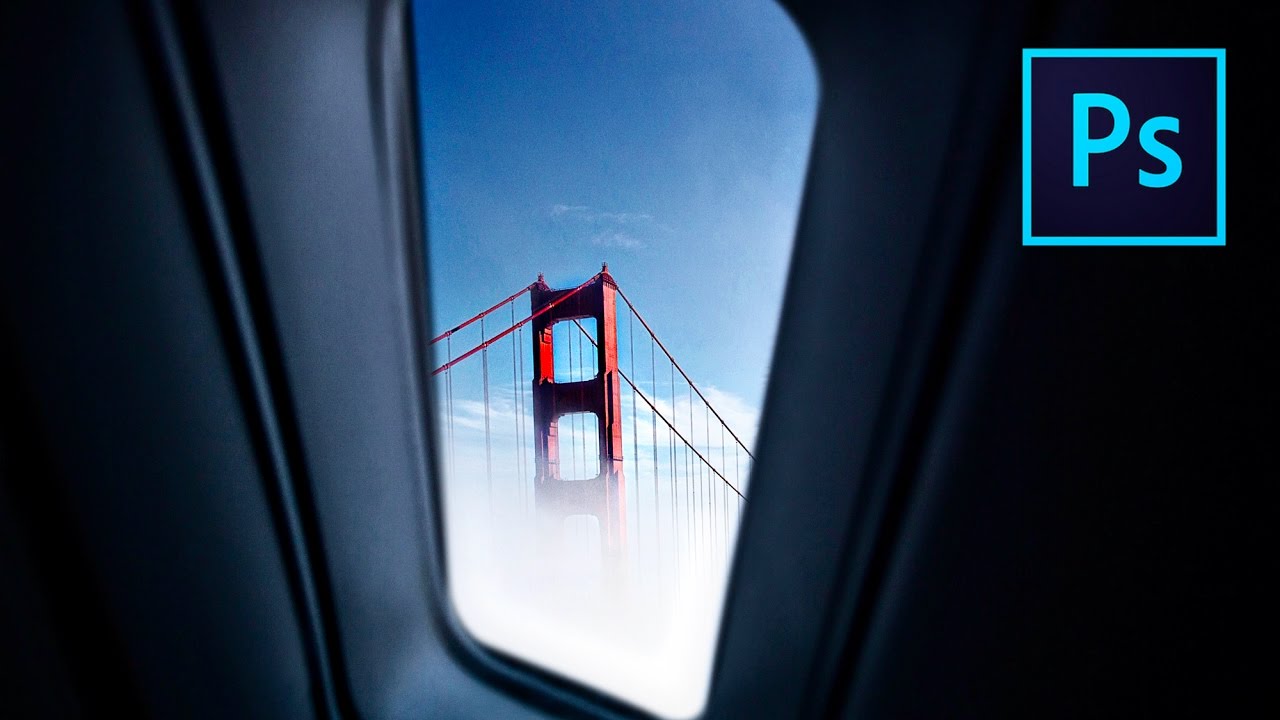
Every Sunday morning I do a photo walk around Seattle, and I come back with about two hundred shots. Maybe ten of them are genuinely interesting. A handful have great light but a cluttered background. A few have a compelling subject and a completely dead sky. For years I either published the mediocre version or deleted the file entirely. It took watching other photographers talk openly about compositing for me to realize there was a third option.
In this Peter McKinnon tutorial, he tackles the question that makes a lot of photographers uncomfortable: is editing something into a photo cheating? His answer is a flat no, and honestly, I agree. The tools exist. Artists use them. The goal is a better image, not a documentary record of exactly what your camera saw on a cloudy Tuesday. Watch the full tutorial on YouTube if you want to follow along with his exact files, but everything below is written so you can replicate the technique on any photo of your own.
The specific project he walks through is replacing the view through an airplane window. He shot over the Arctic Circle, which already looks stunning, but the technique applies just as well when your window view is a tarmac or a parking garage. That boring shot becomes a frame, and the frame is the whole point.
Step 1: Set Up Your Layers and Name Everything
 Photoshop layers panel with background renamed to “window”
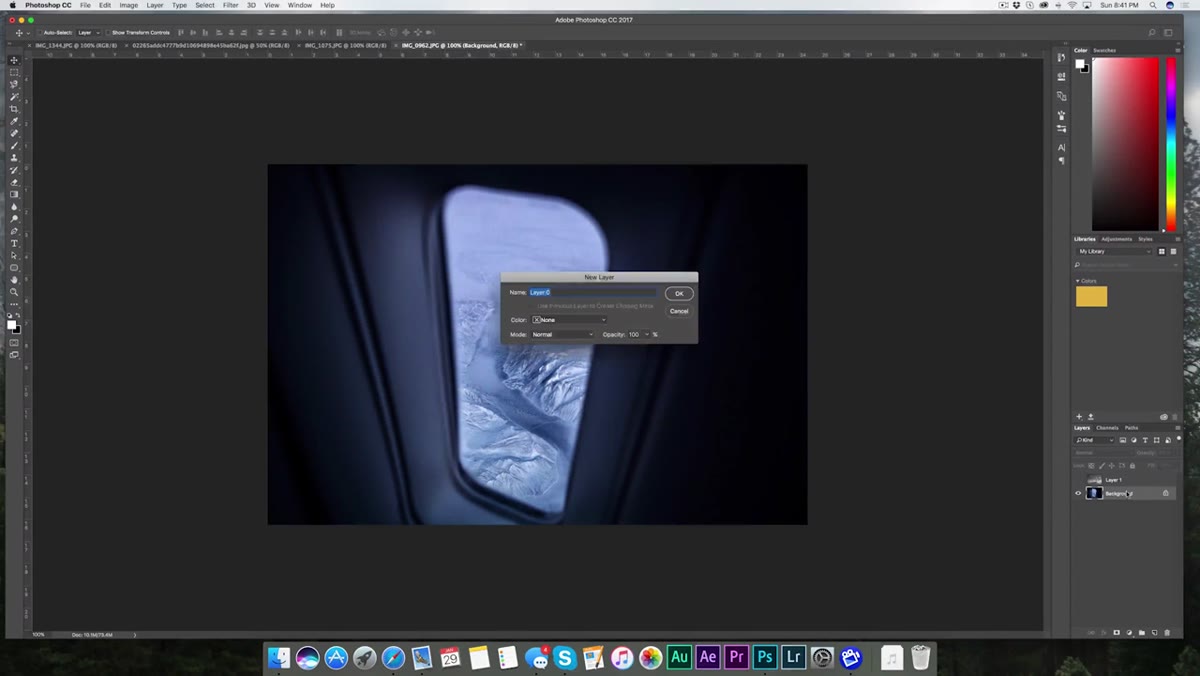
Open your base photo in Photoshop. Before you do anything else, double-click the background layer in the Layers panel and rename it to something descriptive. McKinnon calls his “window,” which makes sense because the entire image is functioning as a frame. This sounds trivial, but once you start stacking three or four layers, an unlabeled “Background copy 2” will cost you real time later. Paste your replacement image (the cityscape, the skyline, whatever you’re dropping in) into the document as a separate layer, then toggle its visibility off for now. You won’t need it until the mask is ready.
Photoshop layers panel with background renamed to “window”
Open your base photo in Photoshop. Before you do anything else, double-click the background layer in the Layers panel and rename it to something descriptive. McKinnon calls his “window,” which makes sense because the entire image is functioning as a frame. This sounds trivial, but once you start stacking three or four layers, an unlabeled “Background copy 2” will cost you real time later. Paste your replacement image (the cityscape, the skyline, whatever you’re dropping in) into the document as a separate layer, then toggle its visibility off for now. You won’t need it until the mask is ready.
Step 2: Draw the Mask Shape with the Rounded Rectangle Tool
 Rounded rectangle tool selected in left toolbar
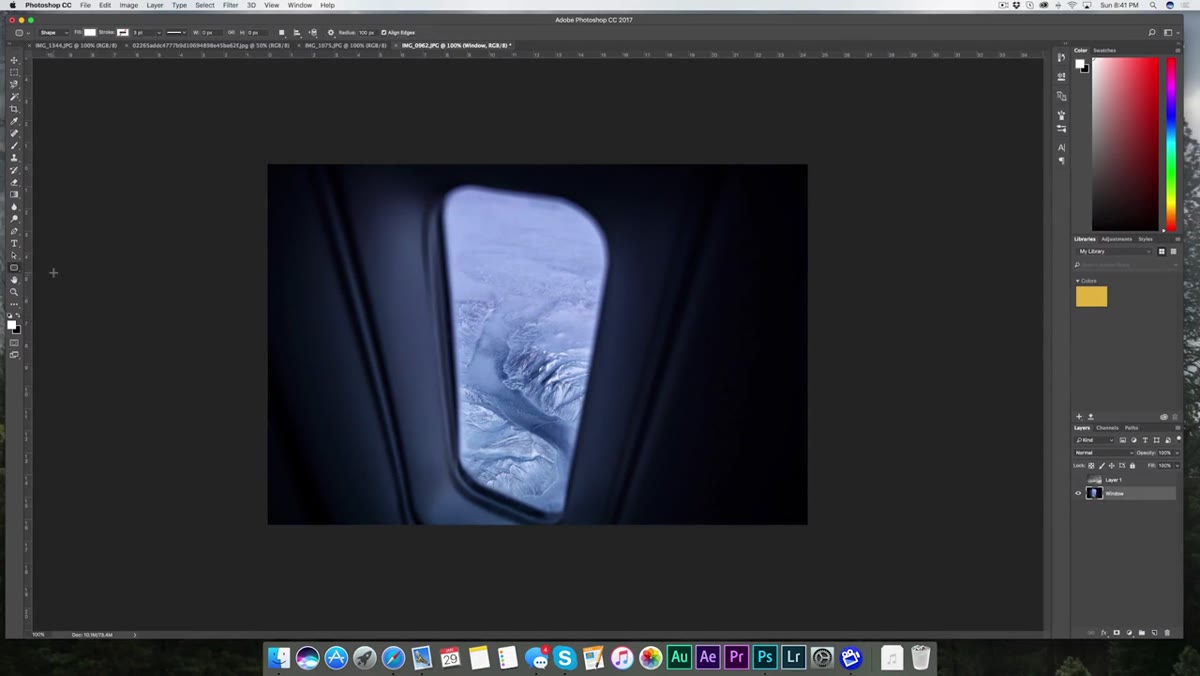
Find the Rounded Rectangle Tool in the left toolbar. It usually lives grouped with the regular Rectangle Tool. Draw a shape that roughly matches the interior boundary of your window, the actual glass area, not the frame around it. Don’t stress about perfection here because you’ll be reshaping it in the next step. Hit Enter to commit the shape. What you’re building is a mask, which is essentially a hole cut into your layer stack that lets whatever is below it show through. Think of it like a picture frame sitting on top of your background image.
Rounded rectangle tool selected in left toolbar
Find the Rounded Rectangle Tool in the left toolbar. It usually lives grouped with the regular Rectangle Tool. Draw a shape that roughly matches the interior boundary of your window, the actual glass area, not the frame around it. Don’t stress about perfection here because you’ll be reshaping it in the next step. Hit Enter to commit the shape. What you’re building is a mask, which is essentially a hole cut into your layer stack that lets whatever is below it show through. Think of it like a picture frame sitting on top of your background image.
Step 3: Resize and Rotate the Shape to Fit the Window
 Transform box active around rectangle shape layer
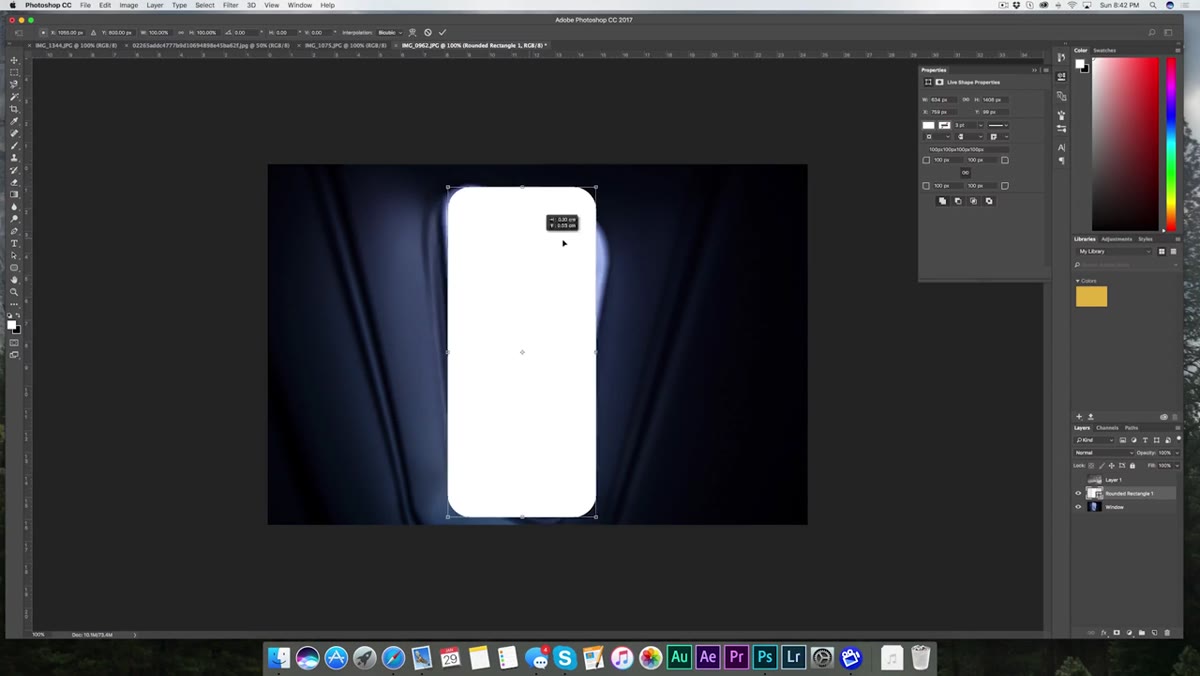
With your shape layer selected, press Command+T (Ctrl+T on Windows) to enter Free Transform mode. Before you start dragging anything, lower the shape layer’s opacity to around 30 percent. This lets you see the window edge underneath so you can actually gauge how well your shape aligns with it. Rotate the shape to match the angle of the window. Airplane windows are rarely perfectly straight in the frame, especially if you’re shooting handheld at 35,000 feet. Get the rotation close, then move on to the perspective correction in the next step before you finalize anything.
Transform box active around rectangle shape layer
With your shape layer selected, press Command+T (Ctrl+T on Windows) to enter Free Transform mode. Before you start dragging anything, lower the shape layer’s opacity to around 30 percent. This lets you see the window edge underneath so you can actually gauge how well your shape aligns with it. Rotate the shape to match the angle of the window. Airplane windows are rarely perfectly straight in the frame, especially if you’re shooting handheld at 35,000 feet. Get the rotation close, then move on to the perspective correction in the next step before you finalize anything.
Step 4: Warp the Corners to Match the Window’s Perspective
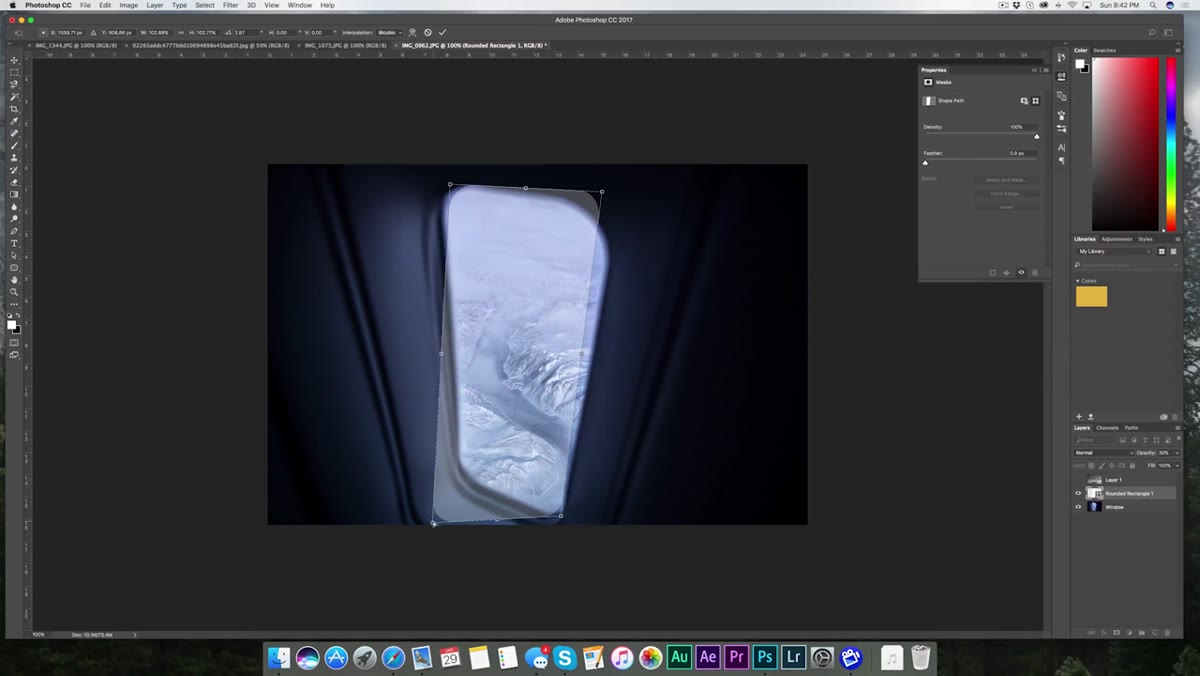 Command-dragging corner handles to match window shape
Here’s the step that makes or breaks the illusion. A rectangle is mathematically perfect. Your airplane window is not. It has perspective distortion, slight barrel distortion from your lens, and probably some asymmetry from the angle you were shooting. To fix this, hold down Command (Mac) or Ctrl (Windows) while dragging each corner handle individually. This breaks the transform into a free warp and lets you push each corner independently. Work around the window edge, pulling each corner just slightly past the visible frame of the glass. Overlapping the frame slightly is intentional because it ensures there’s no gap between the edge of your mask and the physical window frame in the photo. When the shape matches the window shape as closely as possible, press Enter to commit.
Command-dragging corner handles to match window shape
Here’s the step that makes or breaks the illusion. A rectangle is mathematically perfect. Your airplane window is not. It has perspective distortion, slight barrel distortion from your lens, and probably some asymmetry from the angle you were shooting. To fix this, hold down Command (Mac) or Ctrl (Windows) while dragging each corner handle individually. This breaks the transform into a free warp and lets you push each corner independently. Work around the window edge, pulling each corner just slightly past the visible frame of the glass. Overlapping the frame slightly is intentional because it ensures there’s no gap between the edge of your mask and the physical window frame in the photo. When the shape matches the window shape as closely as possible, press Enter to commit.
Step 5: Use the Shape as a Mask on Your Background Layer
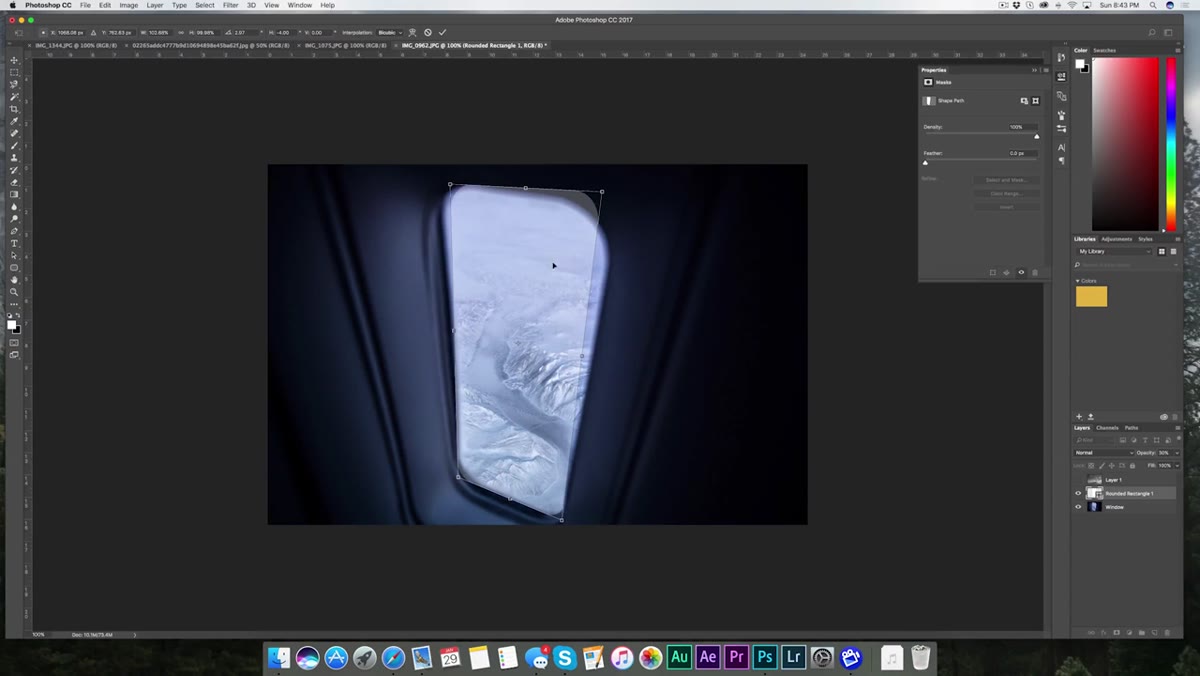 Mask applied to window layer in layers panel
Now you’ll link the shape to your background layer as a clipping mask. Select both the shape layer and your renamed background layer, then use the Layer menu to create a clipping mask, or hold Option (Mac) / Alt (Windows) and click between the two layers in the panel. The shape now defines what part of the background image is visible. Turn the opacity of the shape back up to 100 percent. At this point your background photo should appear only within the boundary of the shape you drew.
Mask applied to window layer in layers panel
Now you’ll link the shape to your background layer as a clipping mask. Select both the shape layer and your renamed background layer, then use the Layer menu to create a clipping mask, or hold Option (Mac) / Alt (Windows) and click between the two layers in the panel. The shape now defines what part of the background image is visible. Turn the opacity of the shape back up to 100 percent. At this point your background photo should appear only within the boundary of the shape you drew.
Step 6: Reveal the Replacement Image Behind the Window
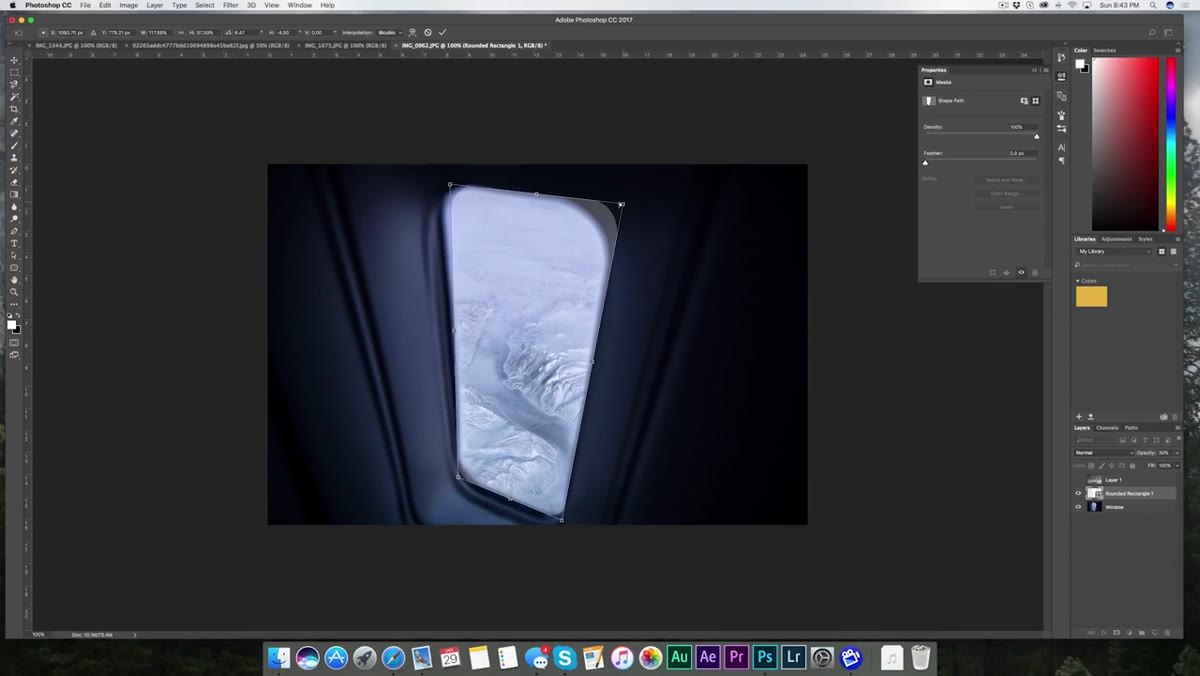 Paris skyline layer toggled on below window layer
Toggle the visibility of your replacement image layer back on and position it below your masked background layer in the stack. Move and scale it until the part you want is showing through the window shape. McKinnon experiments with a few options here, including the Golden Gate Bridge and Las Vegas, before landing on Paris. The beauty of this approach is that you can swap the replacement layer out in seconds to try different backgrounds without redoing any of the masking work. Scale the replacement image so the most interesting part of the skyline sits in the center of the window frame.
Paris skyline layer toggled on below window layer
Toggle the visibility of your replacement image layer back on and position it below your masked background layer in the stack. Move and scale it until the part you want is showing through the window shape. McKinnon experiments with a few options here, including the Golden Gate Bridge and Las Vegas, before landing on Paris. The beauty of this approach is that you can swap the replacement layer out in seconds to try different backgrounds without redoing any of the masking work. Scale the replacement image so the most interesting part of the skyline sits in the center of the window frame.
A Note on Making It Actually Believable
The technical steps above will get you a composite. Getting it to look like it belongs in the same photo is a separate challenge, and it’s where I’ve learned the most from my own trial and error. The single biggest giveaway in window composites is lighting mismatch. If your cabin interior is lit with warm, slightly yellow artificial light and your replacement skyline is a crisp blue midday scene, the brain notices something is off even if the viewer can’t name exactly what. I always try to source replacement images that were shot in roughly the same ambient conditions as the original. A stormy sky behind a plane shot in flat overcast light reads as real. A golden hour skyline behind a fluorescent-lit cabin shot does not. Spend as much time selecting the right replacement image as you do on the masking itself.
The other thing worth practicing is how McKinnon handles the reflection in his downtown Toronto example. When lightning is composited into the sky, he also adds a subtle reflection of that lightning into the glass of a nearby building. That kind of secondary detail is what separates a composite that makes people pause from one that makes people suspicious.
The big idea here isn’t really about airplane windows. It’s about using every tool available to close the gap between what you saw and what you felt when you took the shot. A gray overcast parking lot view doesn’t capture what it felt like to be at altitude, watching a city slide by below you. A dramatic skyline composite might. That emotional truth is worth chasing.
Watch the full tutorial on YouTube to see McKinnon’s layer workflow in real time, including the Toronto lightning composite that he uses to open the video. It goes fast, but seeing the layer stack move is worth it.
Comments (2)
Bookmarked. Coming back to this one for sure.
Been doing this wrong for years apparently. Thanks for the wake-up call.
Leave a Comment