There’s a scenario every portrait photographer runs into eventually: you’re shooting somewhere that isn’t ideal, the natural light is flat and unforgiving, and your client is expecting something that looks like it belongs on an album cover. I’ve been there more times than I want to count. For a long time, my instinct was to just work with whatever the ambient light gave me and fix it in post. The results were fine. Fine is not the same as great.
That’s exactly why this tutorial from Joel Grimes stopped me mid-scroll. Grimes is a commercial advertising photographer with over 35 years of experience, and in this breakdown he shows how to take a portrait from “acceptable” to genuinely dramatic using one strobe, one modifier, and a few intentional decisions. Watch the full tutorial on YouTube if you want to follow along with the video, but everything below is written so you can execute this technique on your own shoot without needing to pause and rewind.
The subject is a musician named Kelvin, and the location is a room with a piano. Not exactly a purpose-built studio. That’s the point. Grimes treats it like a real-world commission, and watching how he problem-solves is just as valuable as the lighting setup itself.
Step 1: Shoot the Natural Light Version First
 Natural light portrait of subject beside piano, flat and blown out
Before touching any artificial light, Grimes shoots the scene exactly as it exists. His camera is a Canon EOS R5 with a 50mm f/1.4 lens, and he keeps the aperture at 1.4 throughout the entire session. The natural light shot gives him something important: a reference point. It shows him exactly what the ambient is doing and where it falls short.
Natural light portrait of subject beside piano, flat and blown out
Before touching any artificial light, Grimes shoots the scene exactly as it exists. His camera is a Canon EOS R5 with a 50mm f/1.4 lens, and he keeps the aperture at 1.4 throughout the entire session. The natural light shot gives him something important: a reference point. It shows him exactly what the ambient is doing and where it falls short.
In his case, the subject’s face had decent exposure but the background went flat and blown out. The image wasn’t bad, but it wasn’t interesting either. Shooting this baseline image before adding any gear is a habit worth building into your own workflow. You can’t know what you need to fix if you don’t first see what you’re working with.
Step 2: Identify the Direction of Natural Light
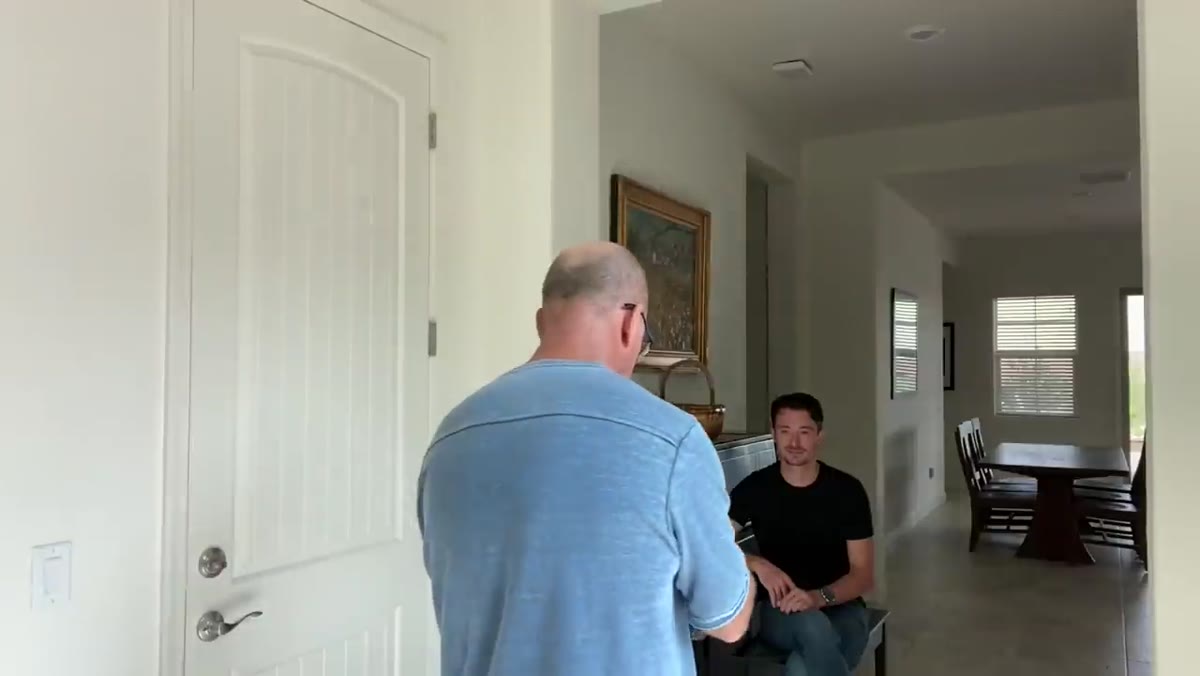
 Grimes gesturing toward window light direction in the room
This is the step most beginners skip, and it’s arguably the most important one. Before placing his strobe, Grimes reads the room. He identifies which direction the existing light is already traveling, because his entire lighting strategy depends on it.
Grimes gesturing toward window light direction in the room
This is the step most beginners skip, and it’s arguably the most important one. Before placing his strobe, Grimes reads the room. He identifies which direction the existing light is already traveling, because his entire lighting strategy depends on it.
The principle here is simple: don’t fight the natural light, join it. When you push your artificial light in the same direction the ambient is already going, the image reads as believable to the viewer’s eye. The strobe amplifies what’s already there rather than creating a competing source that looks tacked on. Look at your subject’s face. The highlight side tells you where the light is coming from. That’s where your strobe goes.
Step 3: Set Up One Strobe With a Large Softbox
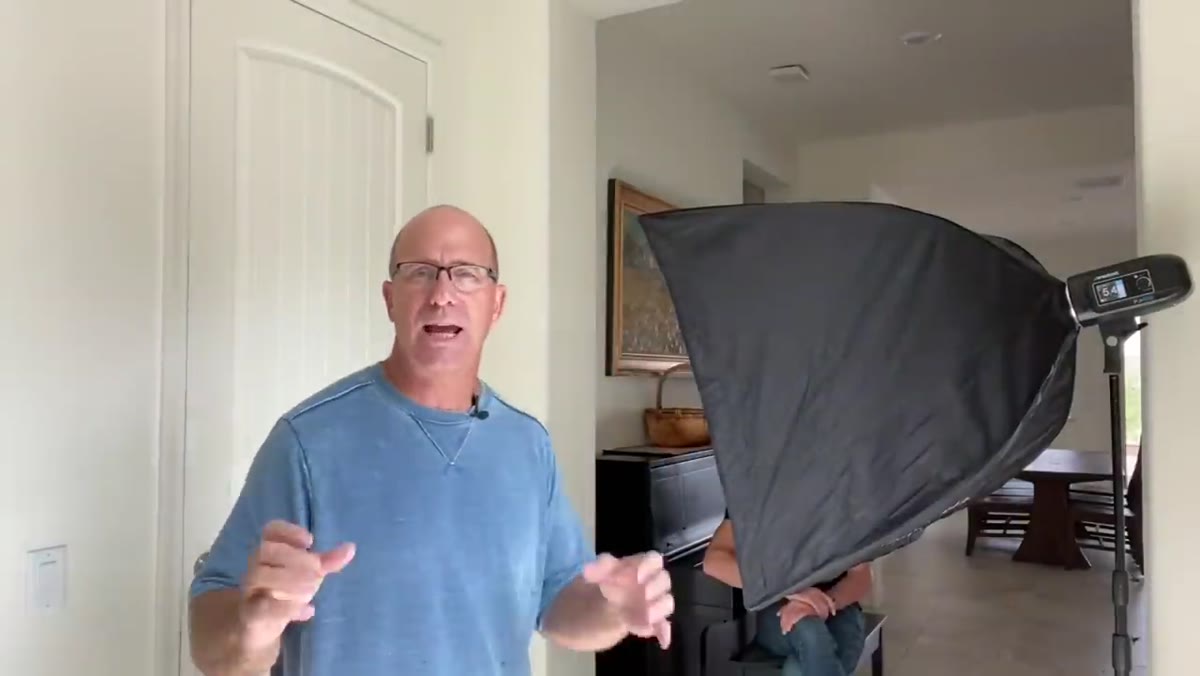
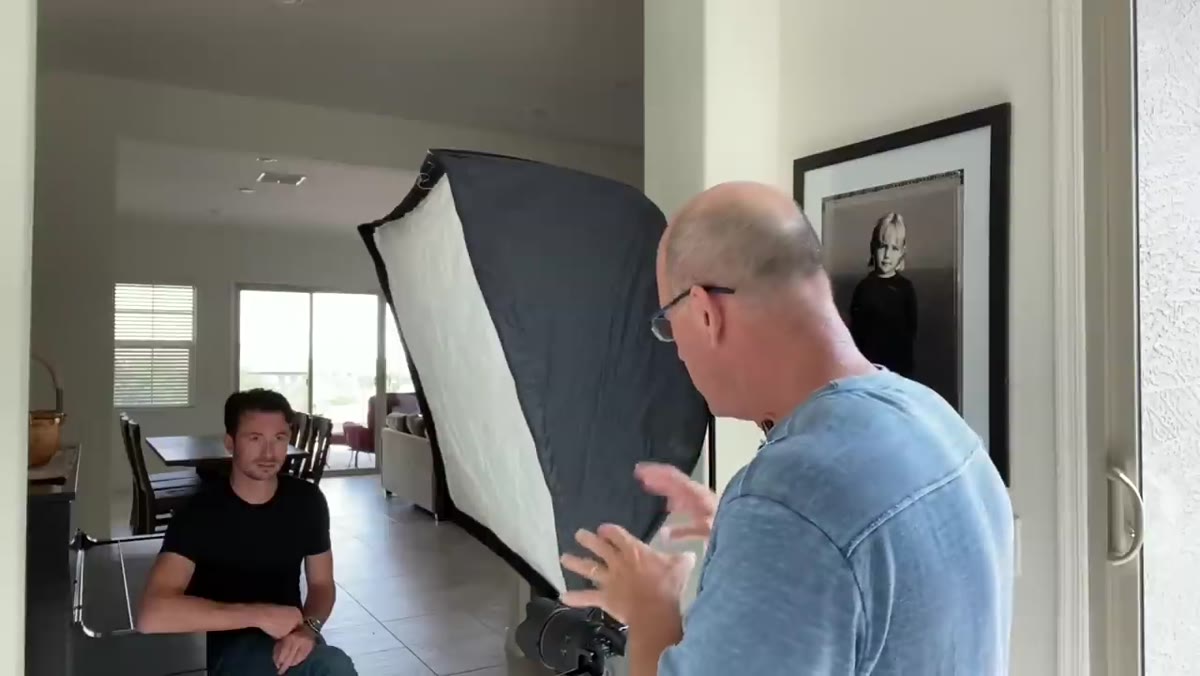
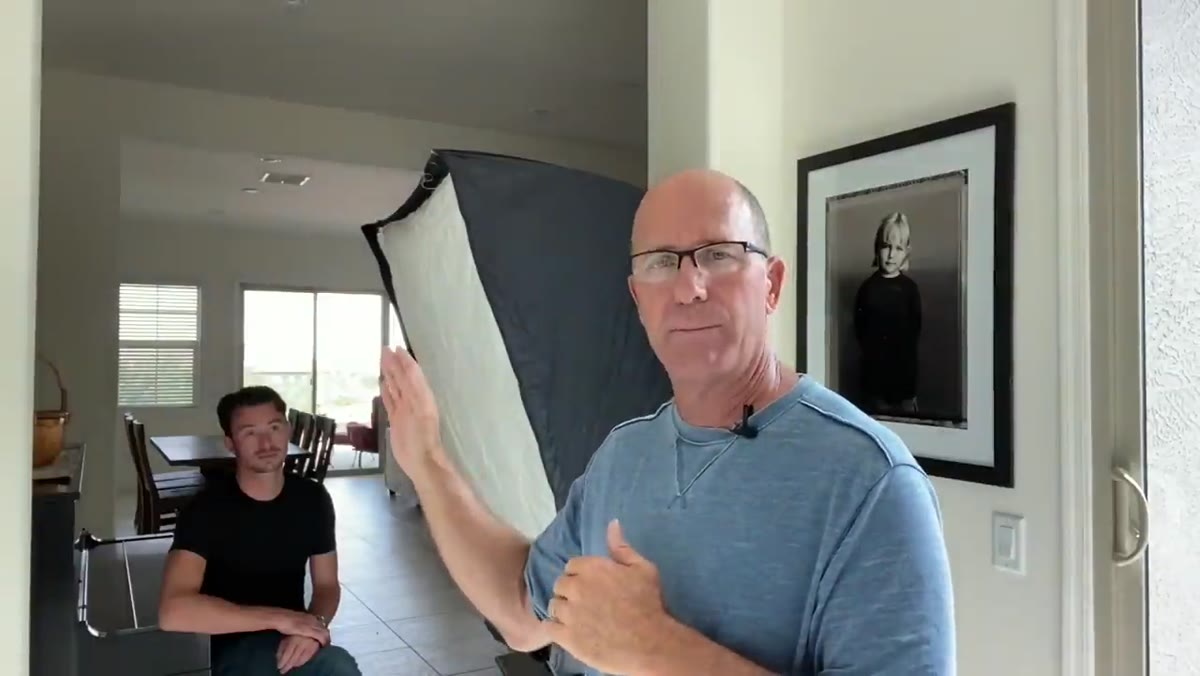
 Westcott FJ400 strobe with large softbox positioned beside subject
Grimes uses a Westcott FJ400 strobe paired with a 3x4 foot softbox. You don’t need that exact gear, but the size of the modifier matters. A larger softbox wraps light around the subject more softly, which is what separates a dramatic portrait from a harsh one. He positions it to push light in the same direction as the window, reinforcing the existing shadow fall on the far side of the subject’s face.
Westcott FJ400 strobe with large softbox positioned beside subject
Grimes uses a Westcott FJ400 strobe paired with a 3x4 foot softbox. You don’t need that exact gear, but the size of the modifier matters. A larger softbox wraps light around the subject more softly, which is what separates a dramatic portrait from a harsh one. He positions it to push light in the same direction as the window, reinforcing the existing shadow fall on the far side of the subject’s face.
The modifier size also gives you flexibility. With a 3x4 softbox, you can move it closer for a softer, more wrapping effect or pull it back for something more directional. For a dramatic portrait like this one, closer tends to win.
Step 4: Enable High Speed Sync on Your Strobe
 Camera trigger and strobe settings showing high speed sync mode enabled
Because Grimes is shooting wide open at f/1.4, he needs to use a shutter speed above his camera’s native sync speed. Most cameras have a flash sync speed somewhere between 1/200 and 1/250 of a second. Shooting above that without the right setting causes a black banding across the frame.
Camera trigger and strobe settings showing high speed sync mode enabled
Because Grimes is shooting wide open at f/1.4, he needs to use a shutter speed above his camera’s native sync speed. Most cameras have a flash sync speed somewhere between 1/200 and 1/250 of a second. Shooting above that without the right setting causes a black banding across the frame.
The fix is High Speed Sync (HSS), which he enables both on the strobe itself and on the wireless trigger. He dials his shutter speed up to 1/800 of a second, which lets him maintain that f/1.4 aperture and control the ambient exposure without fighting the flash. If you’re shooting with strobes in daylight or near bright windows, HSS is non-negotiable once you go above sync speed. Check your trigger and strobe manual to confirm they both support it, and make sure both are set to the same channel and group.
Step 5: Block Reflected Light With a Black Flag
 Black foam core panel placed opposite softbox to block wall bounce
Here’s the detail that separates a good lighting setup from a great one. Grimes notices immediately that the white wall opposite his softbox is going to bounce light back onto the shadow side of Kelvin’s face. That bounce fill flattens the contrast and kills the drama he’s after.
Black foam core panel placed opposite softbox to block wall bounce
Here’s the detail that separates a good lighting setup from a great one. Grimes notices immediately that the white wall opposite his softbox is going to bounce light back onto the shadow side of Kelvin’s face. That bounce fill flattens the contrast and kills the drama he’s after.
His solution is a black piece of foam core, positioned on the opposite side of the subject from the softbox. This flags the reflected light and forces the shadows to stay dark and defined. Foam core is one of the cheapest tools in a photographer’s kit and one of the most useful. Keep a black panel and a white panel in your car if you’re doing any location work. The difference it makes is not subtle.
What I’d Add From My Own Shoots
Grimes is working in a single room with a controlled environment, which makes it easier to isolate these variables. On location, especially outdoors or in mixed-space interiors, the equation gets messier. One thing I’ve learned shooting on location in all kinds of conditions is to bring a way to raise your softbox higher than you think you’ll need. A light that’s too low flattens the face. Getting it up and angling it down at roughly 45 degrees gives you that Rembrandt-style shadow under the nose and cheekbone that makes a face look three-dimensional. Grimes’s results in the tutorial show this even if he doesn’t spell out the exact angle. When you watch the final image, notice where the shadows land and reverse-engineer the height from there.
Also: if you only have one strobe and can’t afford a large softbox right now, a shoot-through umbrella gets you closer to that quality of light than you might expect. It’s not the same, but it’s a real step up from bare flash.
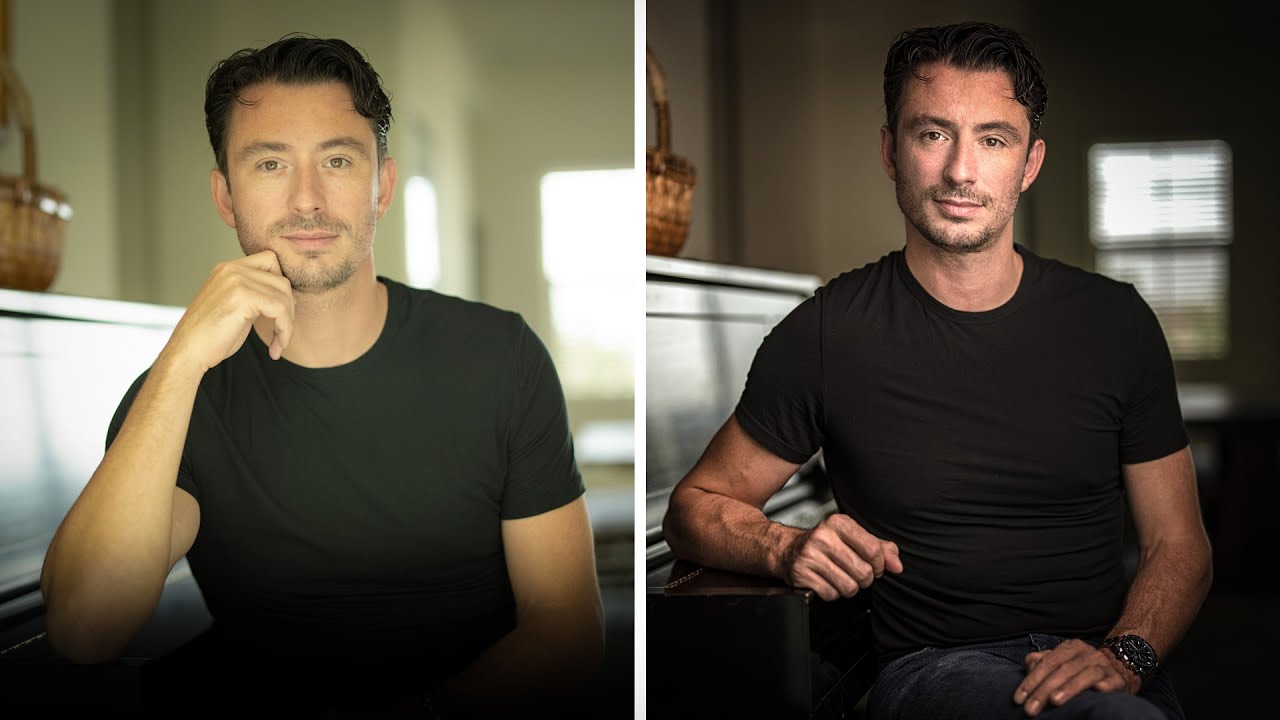
The single most important thing this tutorial reinforced for me is that dramatic lighting is mostly about what you subtract, not just what you add. One well-placed light plus one flag to control the bounce did more for this portrait than any amount of additional gear would have. Strip it down, make intentional decisions, and the image will show it.
Watch the full tutorial on YouTube to see the before-and-after comparison and watch Grimes work through his adjustments in real time. It’s one of those videos worth watching twice.
Comments
Leave a Comment