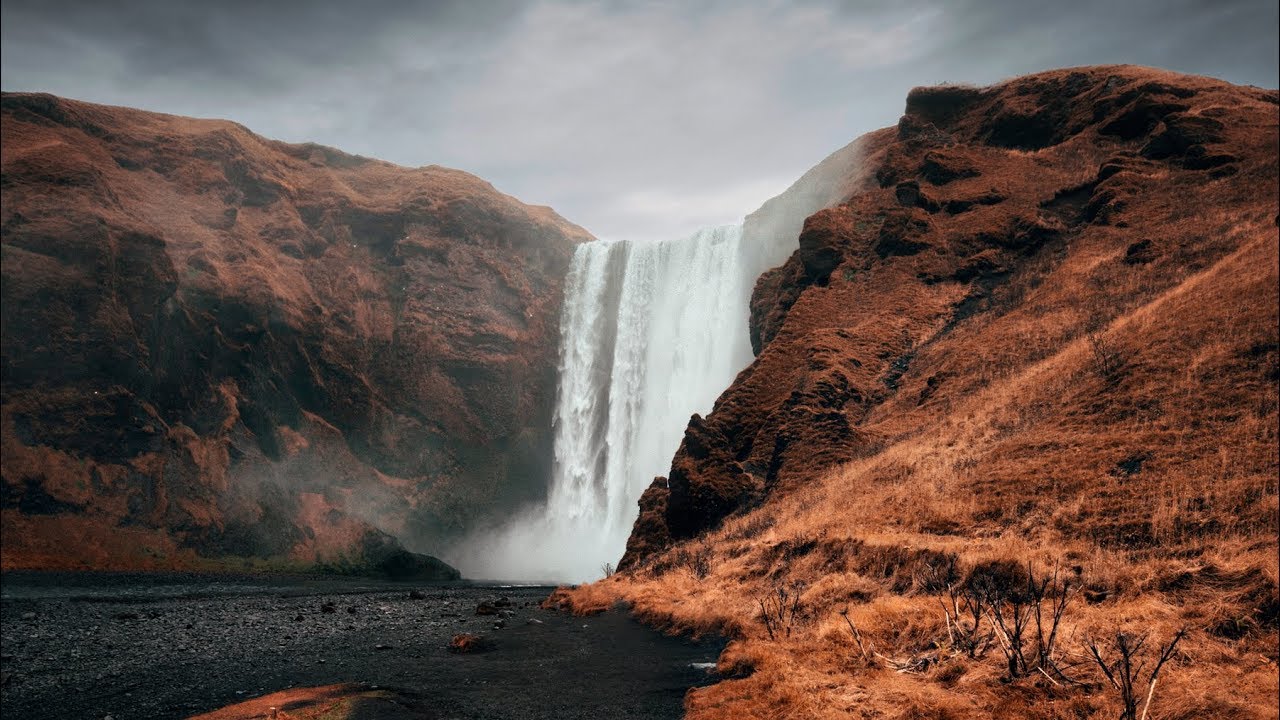
I once spent an entire vacation trying to get a single clean shot of a waterfall. No tourists. No stray elbows. Just water, rocks, and light. I missed dinner more than once. And the frustrating part is, I didn’t have to do any of that. The fix was sitting in Photoshop the whole time, and it takes about two minutes once you know where to look.
That’s exactly what Peter McKinnon breaks down in his tutorial on removing people from photos, and it’s one of those techniques that feels almost too easy once you see it. Watch the full tutorial on YouTube if you want to follow along directly. For everyone who learns better by reading first, here’s the full walkthrough with everything you need to actually do this yourself.
Before we get into it, one quick note on the “is this cheating” question: Peter addresses it, and I agree with his take. Photography is art. You’re making creative decisions from the moment you choose where to stand and when to press the shutter. Removing a stranger who wandered into your landscape shot isn’t misrepresenting reality in any meaningful way. It’s finishing the image you set out to make. With that settled, here’s how to do it.
Step 1: Take Multiple Exposures of the Same Scene
 Photographer explaining the “shoot multiple frames” concept
The whole technique depends on having more than one frame to work with. Before you even open an editing program, the real work happens at the shoot. Take anywhere from five to ten photos of the same scene, keeping your camera as steady as possible. A tripod helps, but even handheld shots will work if they’re close in framing.
Photographer explaining the “shoot multiple frames” concept
The whole technique depends on having more than one frame to work with. Before you even open an editing program, the real work happens at the shoot. Take anywhere from five to ten photos of the same scene, keeping your camera as steady as possible. A tripod helps, but even handheld shots will work if they’re close in framing.
The goal is simple: in each frame, the people in your scene will be in slightly different positions. When you stack and blend those frames in Photoshop, the software can pull the clean background from whichever frame doesn’t have a person standing in that spot. This is why it works so well on busy tourist locations. You don’t need to wait for a miracle gap in the crowd. You just need enough frames that every part of the scene is unobstructed in at least one of them.
Step 2: Open All Frames as Layers in Photoshop
 Multiple image files being loaded into Photoshop as layers
In Photoshop, go to File, then Scripts, then Load Files into Stack. This lets you select all your source images at once and automatically loads each one as its own layer inside a single document. Make sure “Attempt to Automatically Align Source Images” is checked before you click OK. This is especially important if you were shooting handheld, because it corrects for any slight shifts between frames.
Multiple image files being loaded into Photoshop as layers
In Photoshop, go to File, then Scripts, then Load Files into Stack. This lets you select all your source images at once and automatically loads each one as its own layer inside a single document. Make sure “Attempt to Automatically Align Source Images” is checked before you click OK. This is especially important if you were shooting handheld, because it corrects for any slight shifts between frames.
Once it loads, you’ll have a layer stack in your Layers panel with each photo sitting on top of the last. Don’t touch the order or visibility yet. The next step is where the actual magic happens.
Step 3: Select All Layers and Convert to Smart Object
 Layers panel with all frames selected before Smart Object conversion
Click the top layer in your Layers panel, then hold Shift and click the bottom layer to select all of them at once. Then go to Layer, then Smart Objects, then Convert to Smart Object. All your layers will collapse into a single Smart Object layer. This might feel counterintuitive since you’re merging everything, but the Smart Object is what allows the next step to work.
Layers panel with all frames selected before Smart Object conversion
Click the top layer in your Layers panel, then hold Shift and click the bottom layer to select all of them at once. Then go to Layer, then Smart Objects, then Convert to Smart Object. All your layers will collapse into a single Smart Object layer. This might feel counterintuitive since you’re merging everything, but the Smart Object is what allows the next step to work.
Keep the Smart Object selected. Now go to Layer, then Smart Objects again, and this time choose Stack Mode, then Median.
Step 4: Apply the Median Stack Mode
 Stack Mode menu open with Median option highlighted
This is the step that does the heavy lifting. The Median stack mode looks at every pixel position across all your source frames and calculates the middle value. Because the people in your photos are moving between frames, they don’t appear consistently in the same pixel positions. The static background, however, does. The Median mode essentially votes them out.
Stack Mode menu open with Median option highlighted
This is the step that does the heavy lifting. The Median stack mode looks at every pixel position across all your source frames and calculates the middle value. Because the people in your photos are moving between frames, they don’t appear consistently in the same pixel positions. The static background, however, does. The Median mode essentially votes them out.
When you apply it, Photoshop renders the result and in most cases, the people just disappear. What you’re left with is a clean composite of the background. The more frames you shot, the more reliable this is. With five or more images, the results are typically very clean with no manual masking needed at all.
Step 5: Clean Up Any Remaining Artifacts
 Final composited image with minor remaining artifacts visible
Median does most of the work, but depending on your scene, you may have a ghost or a partial figure that didn’t fully disappear. This usually happens when someone was standing in the exact same spot across too many frames for Median to override. For those cases, you have a couple of options.
Final composited image with minor remaining artifacts visible
Median does most of the work, but depending on your scene, you may have a ghost or a partial figure that didn’t fully disappear. This usually happens when someone was standing in the exact same spot across too many frames for Median to override. For those cases, you have a couple of options.
The quickest fix is the Spot Healing Brush or Content-Aware Fill. Select the area with a lasso, go to Edit, then Fill, and choose Content-Aware. Photoshop will sample the surrounding pixels and fill in the gap convincingly. For larger patches, the Clone Stamp tool gives you more control. Sample a clean area of background nearby, adjust your brush opacity down to around 80%, and paint over the problem spot in short strokes rather than one big swipe.
Step 6: Flatten and Export
 Final cleaned image ready for export in Photoshop
Once you’re happy with the result, go to Layer, then Flatten Image to merge everything into one final layer. From there, export as you normally would. If you’re heading to Lightroom for color grading, File then Export as a TIFF gives you the most flexibility. If you’re going straight to Instagram or web, a high-quality JPEG works fine.
Final cleaned image ready for export in Photoshop
Once you’re happy with the result, go to Layer, then Flatten Image to merge everything into one final layer. From there, export as you normally would. If you’re heading to Lightroom for color grading, File then Export as a TIFF gives you the most flexibility. If you’re going straight to Instagram or web, a high-quality JPEG works fine.
What I’d Add From My Own Experience
One thing Peter doesn’t dig into heavily is that this technique works beautifully on a phone, too. I’ve done a version of this using the Google Photos long exposure feature on my Pixel, and while it’s less precise than the Photoshop method, it handles light foot traffic surprisingly well. For the full control that the tutorial describes, Photoshop is the right tool. But if you’re traveling light and just want to experiment with the concept, your phone camera burst mode plus a free app like Snapseed or even Lightroom Mobile can get you partway there.
The other thing I always remind my students: label your source images before you import them. If something goes wrong or looks off in the final composite, you’ll want to go back and check individual frames. Keeping them organized saves a frustrating round of hunting through your camera roll.
The single most important thing to take away from this technique is that the editing starts before you open any software. Shooting multiple frames intentionally, with a steady hand and consistent framing, is what makes everything else work. The Photoshop steps are almost mechanical once you have good source material.
Watch the full tutorial on YouTube to see Peter walk through this in real time with actual before and after images. Seeing the Median effect render live is genuinely satisfying, and it’ll make the steps above click faster than reading about them ever could.
Comments
Leave a Comment