Every Sunday morning I take a photo walk around whatever corner of Seattle I land in, and if there’s one problem I’ve carried with me from shoot to shoot over the years, it’s this: I come home with a wildlife shot where the bird or animal looks muddy and flat against a background that’s somehow brighter and busier than the subject itself. It’s frustrating because you know the moment was good. The light was there. The animal cooperated. But the camera just didn’t see it the way your eyes did.
That’s exactly the problem Matt Kloskowski tackles in this tutorial, and his fix is so straightforward it almost feels like cheating. He calls it “flipping the scene” - the idea of intentionally brightening your subject while darkening the background to create the kind of separation that portrait photographers get from studio lights. Wildlife photographers don’t have that luxury in the field, so we do it in post. Watch the full tutorial on YouTube
Matt says he applies some version of this technique to 80 to 90 percent of his wildlife images, and honestly, after watching this, I went back through a folder of heron shots from last spring and understood immediately why half of them hadn’t worked. Here’s how to do it.
Step 1: Crop First, Edit Second
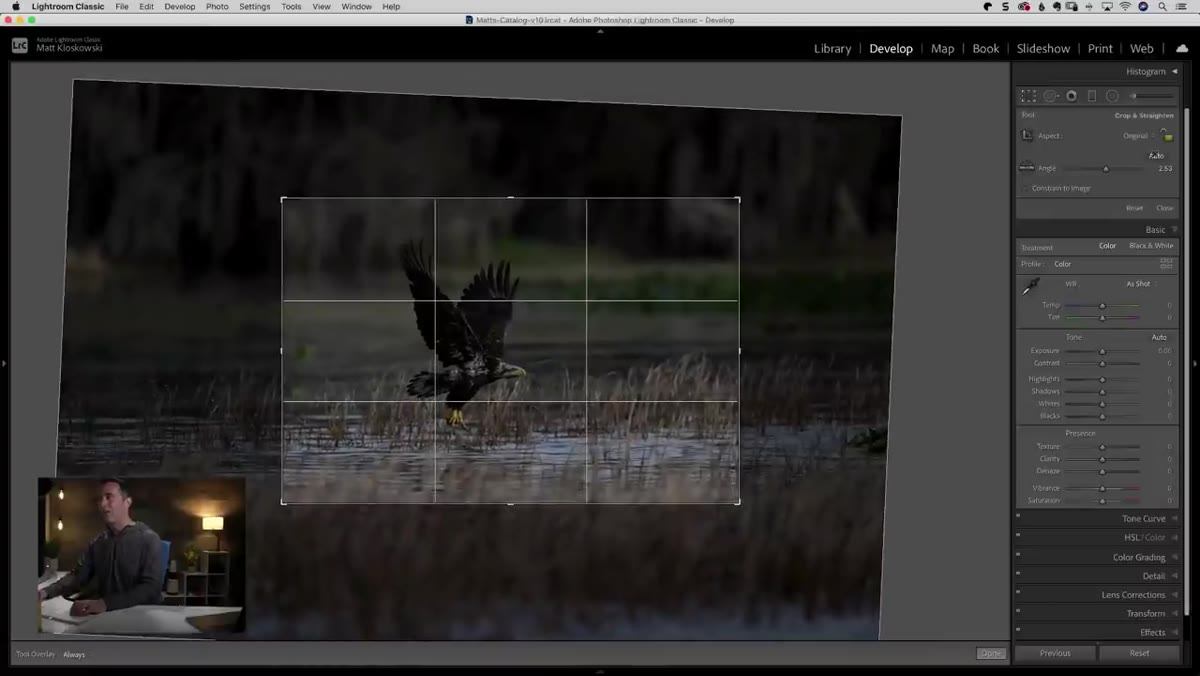 Eagle photo open in Lightroom, crop tool active
Before touching any light or color sliders, crop your image. Matt opens with a straight-out-of-camera eagle shot and goes right to the crop tool, and this order matters more than it seems. Cropping changes the visual weight of everything in the frame, including how prominent the background feels relative to your subject. If you crop after you’ve already done your brightness adjustments, you may find the balance shifts and you have to redo your work.
Eagle photo open in Lightroom, crop tool active
Before touching any light or color sliders, crop your image. Matt opens with a straight-out-of-camera eagle shot and goes right to the crop tool, and this order matters more than it seems. Cropping changes the visual weight of everything in the frame, including how prominent the background feels relative to your subject. If you crop after you’ve already done your brightness adjustments, you may find the balance shifts and you have to redo your work.
For wildlife and bird photography especially, you’ll almost never be close enough to the subject, so a significant crop is usually part of the process. Give your subject a little room to “move into” - if the bird or animal is facing left, leave more space on the left side of the frame. You don’t need a specific output size unless you’re printing; for social or web use, crop to what looks right visually.
Step 2: Identify the Real Problem Before You Start Fixing
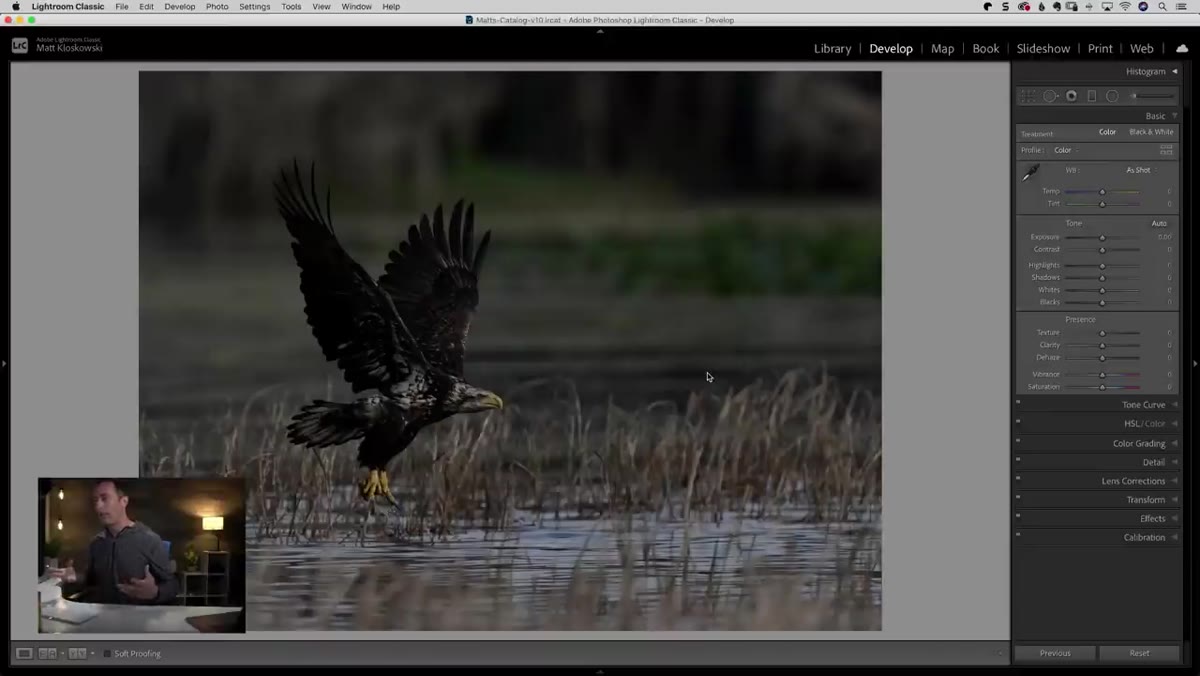 Before image showing bright background vs darker eagle subject
Take a moment to look at your image and diagnose what’s actually happening. In Matt’s eagle photo, the wings are dark and the water and sky behind the bird are brighter - which means your eye naturally travels to the background instead of the subject. This is the core problem the technique is designed to solve.
Before image showing bright background vs darker eagle subject
Take a moment to look at your image and diagnose what’s actually happening. In Matt’s eagle photo, the wings are dark and the water and sky behind the bird are brighter - which means your eye naturally travels to the background instead of the subject. This is the core problem the technique is designed to solve.
Resist the urge to just grab the Exposure slider and drag it up. Matt does this in the tutorial as a demonstration of why it doesn’t work: a global brightness increase lifts the whole image evenly, which can make things feel flat and overexposed. What you want is targeted control - brighter where the subject is, darker everywhere else.
Step 3: Try the Quick Brush Method (and Know Its Limits)
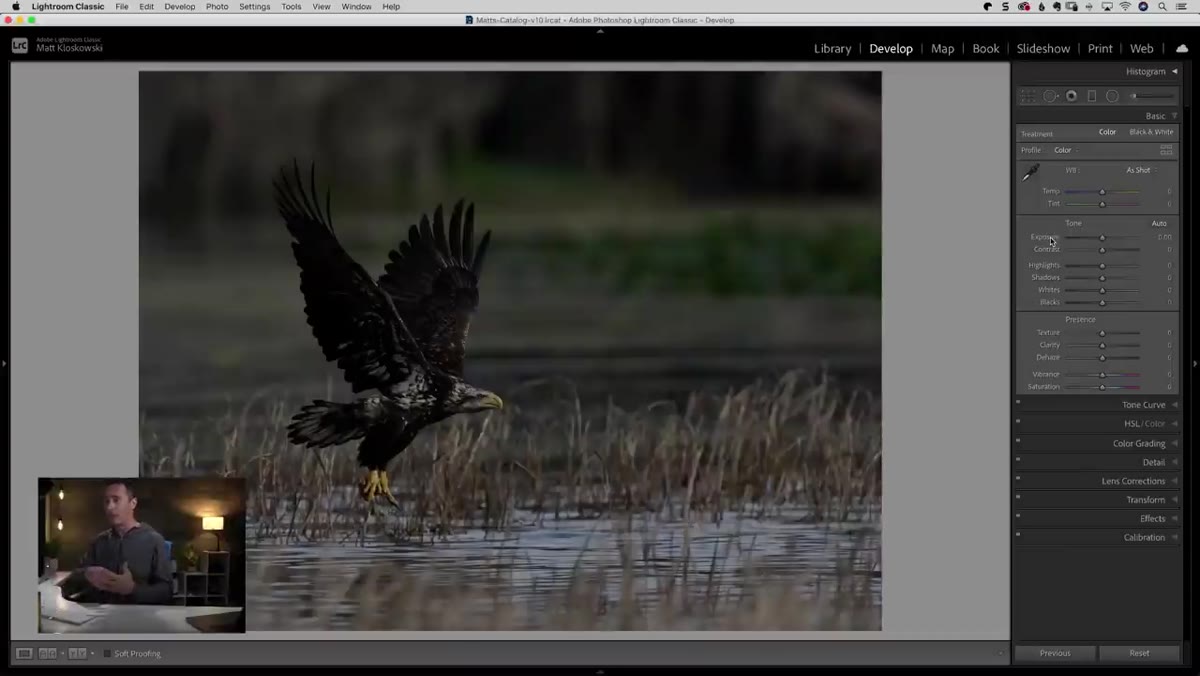 Adjustment brush painting over eagle with exposure increased
The faster approach Matt covers first is the Adjustment Brush in Lightroom Classic or Adobe Camera Raw. Crank the Exposure value up in the brush settings, then paint directly over your subject. To help the brush stay on your subject and off the background, hold Command on Mac or Control on PC while you paint. This activates Auto Mask mode, which uses edge detection to keep your strokes from bleeding into areas of contrasting color or tone.
Adjustment brush painting over eagle with exposure increased
The faster approach Matt covers first is the Adjustment Brush in Lightroom Classic or Adobe Camera Raw. Crank the Exposure value up in the brush settings, then paint directly over your subject. To help the brush stay on your subject and off the background, hold Command on Mac or Control on PC while you paint. This activates Auto Mask mode, which uses edge detection to keep your strokes from bleeding into areas of contrasting color or tone.
This method works and is genuinely useful for a quick turnaround, but Matt is upfront about its weakness: the edges. For anything you’re posting small - a social media thumbnail, a web gallery, a phone screen - the edge quality is fine and nobody will notice. But if you’re heading toward a large print, the masked edges won’t hold up under close inspection. So use this method based on your final output size, not as a blanket rule.
Step 4: Use the Range Mask for Cleaner Results
 Luminance Range Mask panel open in Lightroom adjustment settings
The technique Matt actually recommends for most situations involves a more targeted selection method built into the Adjustment Brush: the Luminance Range Mask. After you paint a broad stroke over the general area of your subject with the brush, scroll down in the brush panel and look for the Range Mask dropdown. Switch it from “None” to “Luminance.”
Luminance Range Mask panel open in Lightroom adjustment settings
The technique Matt actually recommends for most situations involves a more targeted selection method built into the Adjustment Brush: the Luminance Range Mask. After you paint a broad stroke over the general area of your subject with the brush, scroll down in the brush panel and look for the Range Mask dropdown. Switch it from “None” to “Luminance.”
This tells Lightroom to only apply your adjustment to pixels within a specific brightness range that you define. Since your wildlife subject and your background are often at different tonal values, you can use the Luminance slider to zero in on just the tones that belong to your subject. It’s a much more natural-looking edge than anything you’ll get from painting alone, because it’s based on actual pixel data rather than your hand movement.
Step 5: Darken the Background to Complete the Flip
 New adjustment brush active, negative exposure applied to background
Here’s the second half of the technique that makes the “flip” name make sense. Create a new Adjustment Brush, this time set to a negative Exposure value, and paint across the background. You’re not trying to make the background black - just enough of a pull-down to make it feel secondary to your subject. Matt also suggests adding a little negative Clarity or Dehaze to the background brush to soften and separate it further.
New adjustment brush active, negative exposure applied to background
Here’s the second half of the technique that makes the “flip” name make sense. Create a new Adjustment Brush, this time set to a negative Exposure value, and paint across the background. You’re not trying to make the background black - just enough of a pull-down to make it feel secondary to your subject. Matt also suggests adding a little negative Clarity or Dehaze to the background brush to soften and separate it further.
The combination of a brighter subject and a slightly dimmed background is what creates the illusion of separation and depth that your camera couldn’t capture in the moment. It mimics the effect of a photographer who had a strobe on their subject - which is exactly the point.
A Note From My Own Practice
I’ve started applying this workflow to my phone shots too, which sounds ridiculous until you remember that some editing apps like Lightroom Mobile have the same masking tools. The underlying principle doesn’t care what camera took the photo. What it cares about is whether your subject reads as the most important thing in the frame.
One adjustment I make that Matt doesn’t specifically mention: after I do the subject brightening pass, I come back and add a subtle Radial Filter around the whole subject with a feathered vignette set to darken the outside. It reinforces the same effect at a broader level and saves me time painting into corners.
The single most important idea to take away from this technique is that the camera records what’s there, but editing is where you direct attention. A bright background competing with your subject isn’t a failed photo - it’s an unfinished one. Flip the scene, and suddenly the viewer sees exactly what you wanted them to see.
Watch the full tutorial on YouTube - Matt walks through the full edit on a real eagle photo and shows exactly how far to push each slider.
Comments
Leave a Comment