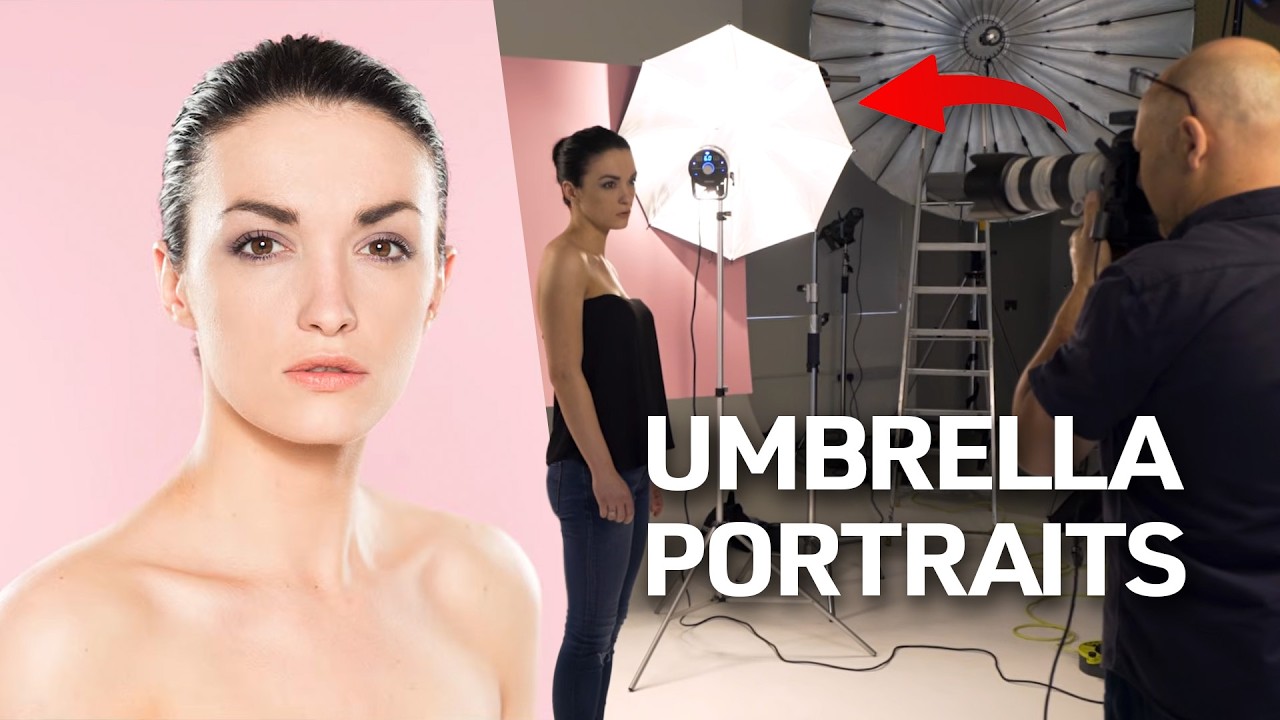
High-key portraits have a way of looking either effortlessly polished or completely blown out, and for a long time I landed firmly in the second camp. I kept chasing that bright, punchy, almost-editorial look, and kept getting images that were just… overexposed messes. The missing piece wasn’t better gear. It was understanding what each light was actually contributing before touching a power dial.
Watch the full tutorial on YouTube
In this Visual Education tutorial, the photographer breaks down a three-light high-key setup aimed at producing something close to a pop album cover aesthetic. What makes it worth your time isn’t the gear list. It’s the way he demonstrates how shifting the balance between lights changes the entire mood of the image. That’s the kind of thinking that transfers to every portrait session you’ll ever shoot.
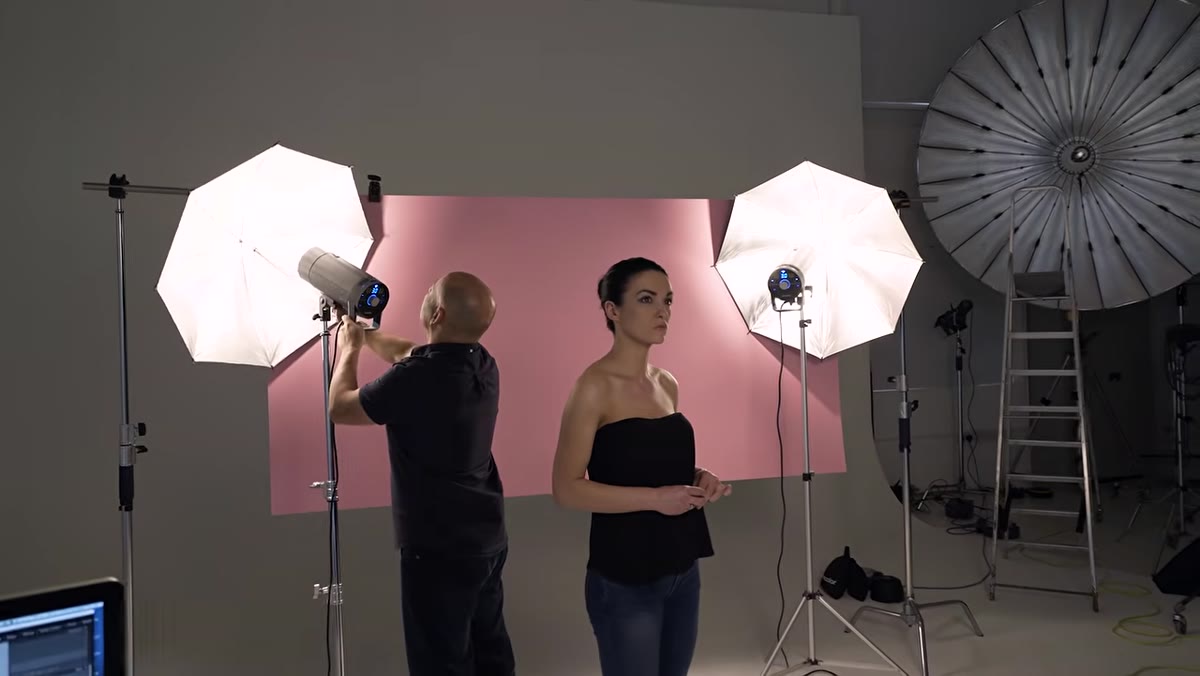
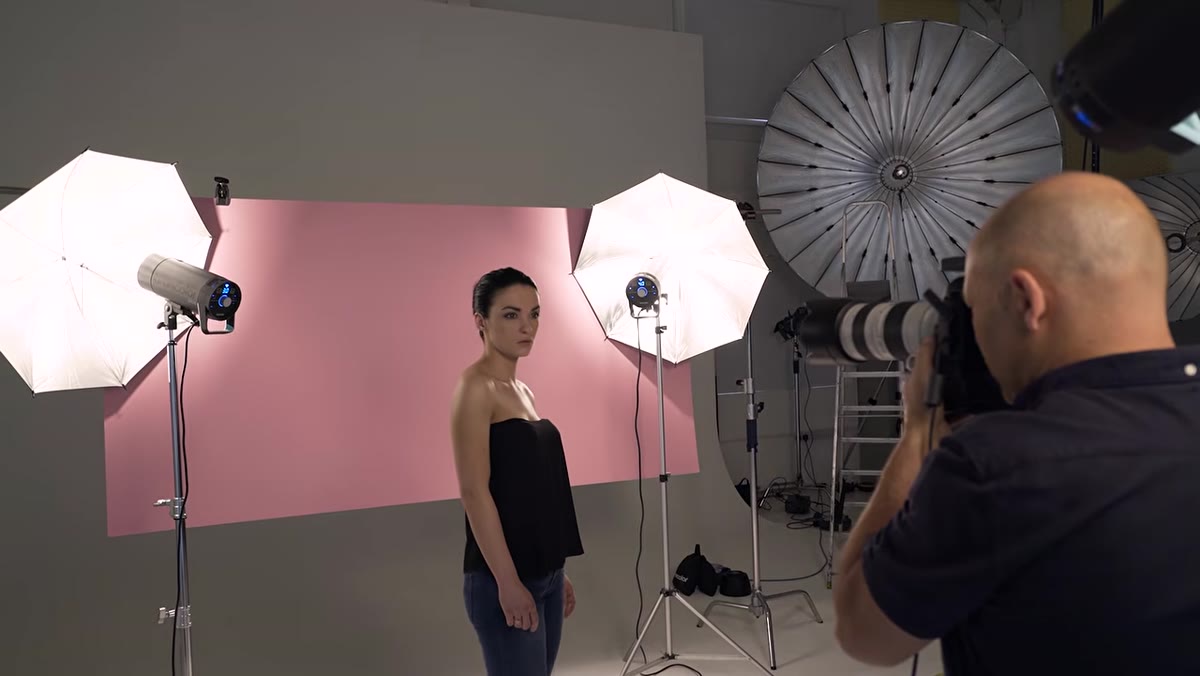
The full setup uses two silver umbrellas positioned behind the model for rim lighting, and a single deep Focus 110 umbrella out front as the key and fill. A painted pink hardboard panel sits behind the model as a background. That’s it. Three lights, one background panel, and a 70-200mm zoom lens shooting at the 70mm end. Let’s walk through exactly how it comes together.
Step 1: Position Your Two Rear Rim Lights
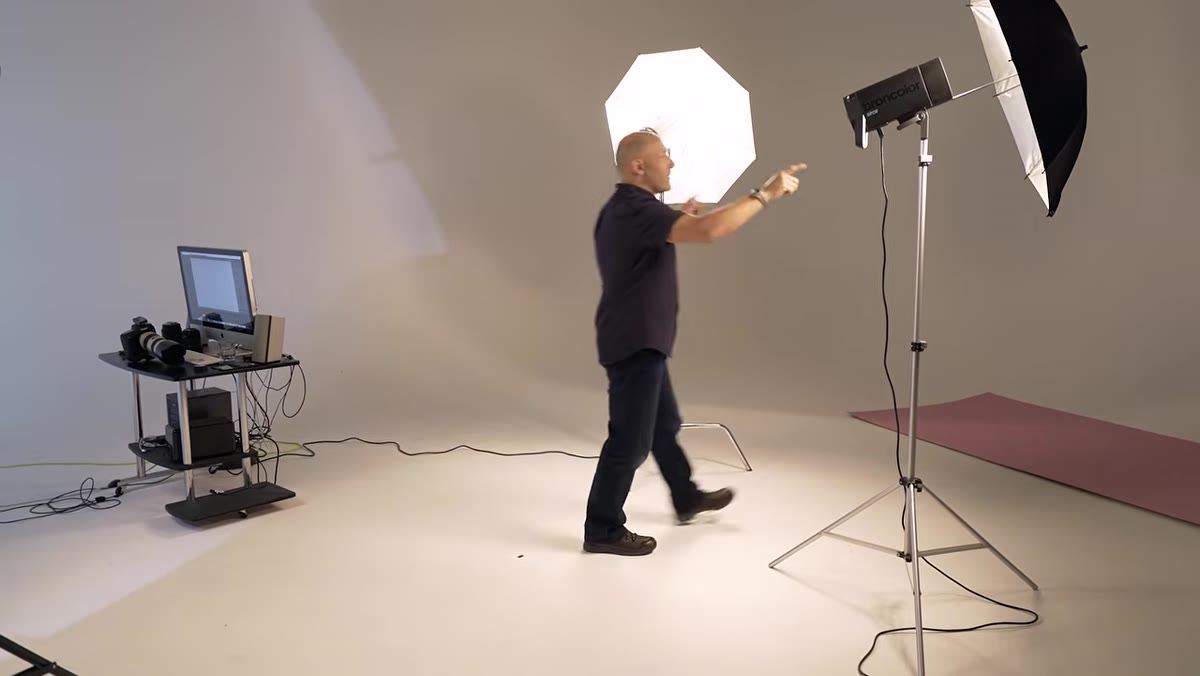 Two silver umbrellas positioned behind the model on each side
Set two silver umbrellas behind your subject, angled in at roughly 45 degrees from either side. The photographer uses approximately 75cm umbrellas here, though he’s the first to admit he doesn’t know the exact size. The specific diameter matters less than the quality of light silver umbrellas produce: a harder, more directional, almost sparkly output that wraps a bright edge around your subject rather than flooding everything with soft, flat light.
Two silver umbrellas positioned behind the model on each side
Set two silver umbrellas behind your subject, angled in at roughly 45 degrees from either side. The photographer uses approximately 75cm umbrellas here, though he’s the first to admit he doesn’t know the exact size. The specific diameter matters less than the quality of light silver umbrellas produce: a harder, more directional, almost sparkly output that wraps a bright edge around your subject rather than flooding everything with soft, flat light.
Ask your subject to pull their hair back and wear something strapless or off-shoulder if possible. This isn’t a styling preference for its own sake. You’re creating a rim of light around the neck, shoulders, and silhouette, and that edge needs clean skin or hair to travel along. Covered shoulders or hair falling forward will swallow the effect entirely.
Step 2: Set Up Your Front Umbrella
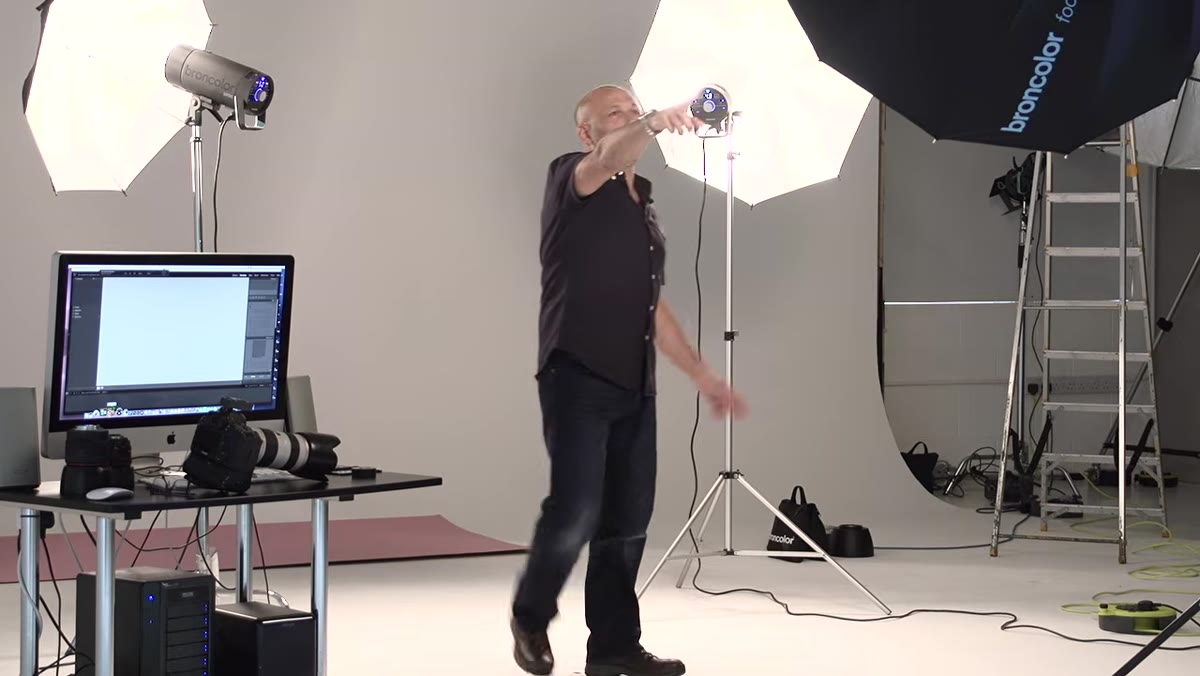 Focus 110 deep umbrella positioned in front and center of the model
The front light here is a Focus 110, which is a deep-dish umbrella with an adjustable focal point. You can push the strobe head further into the canopy to spread and soften the light, or pull it back toward the rim for something more defined and contrasty. If you don’t own one of these specifically, a deep parabolic umbrella with a similar focusing mechanism will give you the same kind of control.
Focus 110 deep umbrella positioned in front and center of the model
The front light here is a Focus 110, which is a deep-dish umbrella with an adjustable focal point. You can push the strobe head further into the canopy to spread and soften the light, or pull it back toward the rim for something more defined and contrasty. If you don’t own one of these specifically, a deep parabolic umbrella with a similar focusing mechanism will give you the same kind of control.
Position it in front of your subject, roughly centered. This light is doing double duty: it’s your key light for the face and it’s also filling the shadows created by the two rim lights behind. The exact height and angle will need tweaking once you fire a test shot, and the tutorial makes a point of showing that process rather than skipping to the final position.
Step 3: Use Light Spill to Create Your Background
 Pink hardboard panel hanging close behind the model near the rear umbrellas
Rather than lighting the background separately with a dedicated fourth light, the tutorial uses a simple piece of painted pink hardboard and lets spill from the two rear umbrellas do the work. The panel hangs close to those rear lights, picking up their output and glowing a soft pastel pink.
Pink hardboard panel hanging close behind the model near the rear umbrellas
Rather than lighting the background separately with a dedicated fourth light, the tutorial uses a simple piece of painted pink hardboard and lets spill from the two rear umbrellas do the work. The panel hangs close to those rear lights, picking up their output and glowing a soft pastel pink.
One honest note here: because the background is physically closer to one umbrella than the other, the color wash won’t be perfectly even. The photographer acknowledges this directly and suggests that uneven coverage isn’t automatically a problem. Tilting the panel slightly creates a gradient, which can actually look more dynamic than a flat, even tone. If your background looks a little uneven, try angling it before assuming something is wrong with your power settings.
Step 4: Match Your Rear Light Powers Correctly
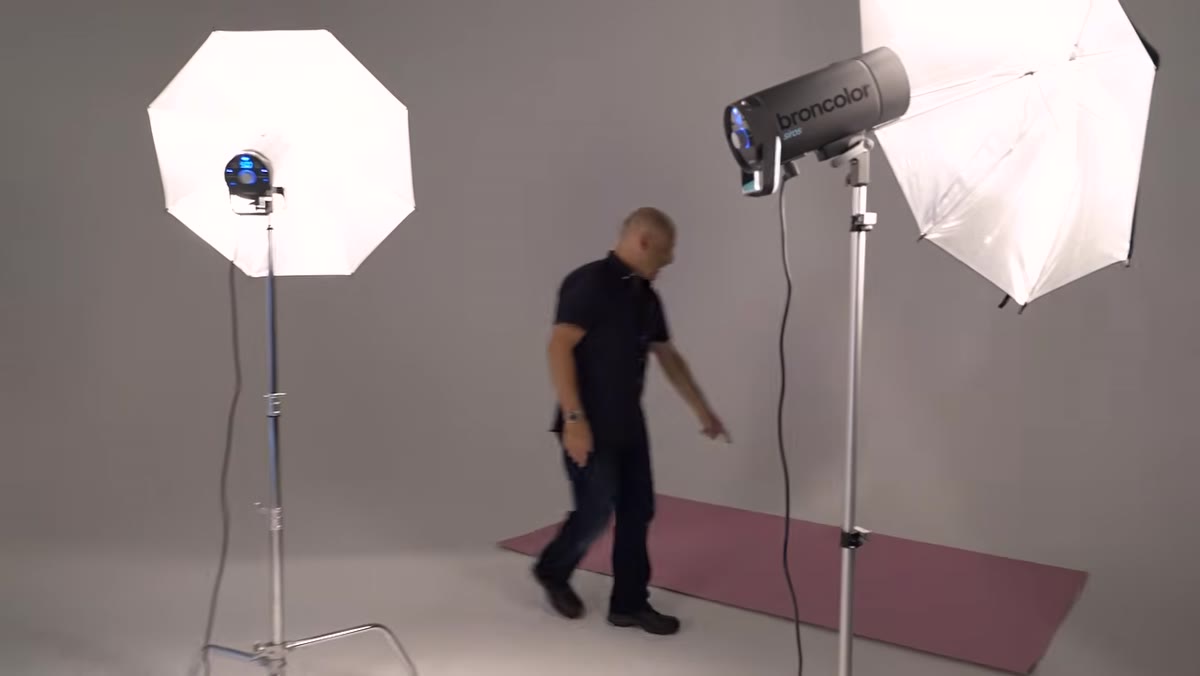
 Two flash heads shown side by side, one rated 400J and one rated 800J
This step catches a lot of photographers off guard. The tutorial uses two flash heads that are not the same wattage: one is a 400-joule unit and the other is an 800-joule unit. Setting both to the same numerical power level on the dial does not make them equal in output. The 800-joule head at power 3 is putting out significantly more light than the 400-joule head at power 3.
Two flash heads shown side by side, one rated 400J and one rated 800J
This step catches a lot of photographers off guard. The tutorial uses two flash heads that are not the same wattage: one is a 400-joule unit and the other is an 800-joule unit. Setting both to the same numerical power level on the dial does not make them equal in output. The 800-joule head at power 3 is putting out significantly more light than the 400-joule head at power 3.
To balance them, you need to compensate for the difference in maximum output. In this case, the 400-joule head needs to be set one stop higher than the 800-joule head to produce equivalent light at the subject. Always check the joule rating of each head before assuming matching dial positions means matching light. This is one of those small details that creates mysteriously lopsided rim lighting if you miss it.
Step 5: Fire a Test Shot and Read What You Actually Got
 First test image on camera showing strong rim light and underexposed fill
Set all three lights to a starting power and take a test frame before adjusting anything. The initial exposure in the tutorial is noticeably underexposed overall, but it’s immediately useful because you can see exactly what each light is contributing. The rim lights are producing a clean edge around the subject’s silhouette. The front umbrella isn’t keeping up. That diagnostic information comes directly from that first imperfect image.
First test image on camera showing strong rim light and underexposed fill
Set all three lights to a starting power and take a test frame before adjusting anything. The initial exposure in the tutorial is noticeably underexposed overall, but it’s immediately useful because you can see exactly what each light is contributing. The rim lights are producing a clean edge around the subject’s silhouette. The front umbrella isn’t keeping up. That diagnostic information comes directly from that first imperfect image.
Camera settings in this shoot are f/4, 1/60 second at the sync limit, ISO 100. These are a sensible starting baseline for studio flash work, though your specific flash system’s sync speed may differ slightly.
Step 6: Adjust the Front Light Power to Shift the Mood
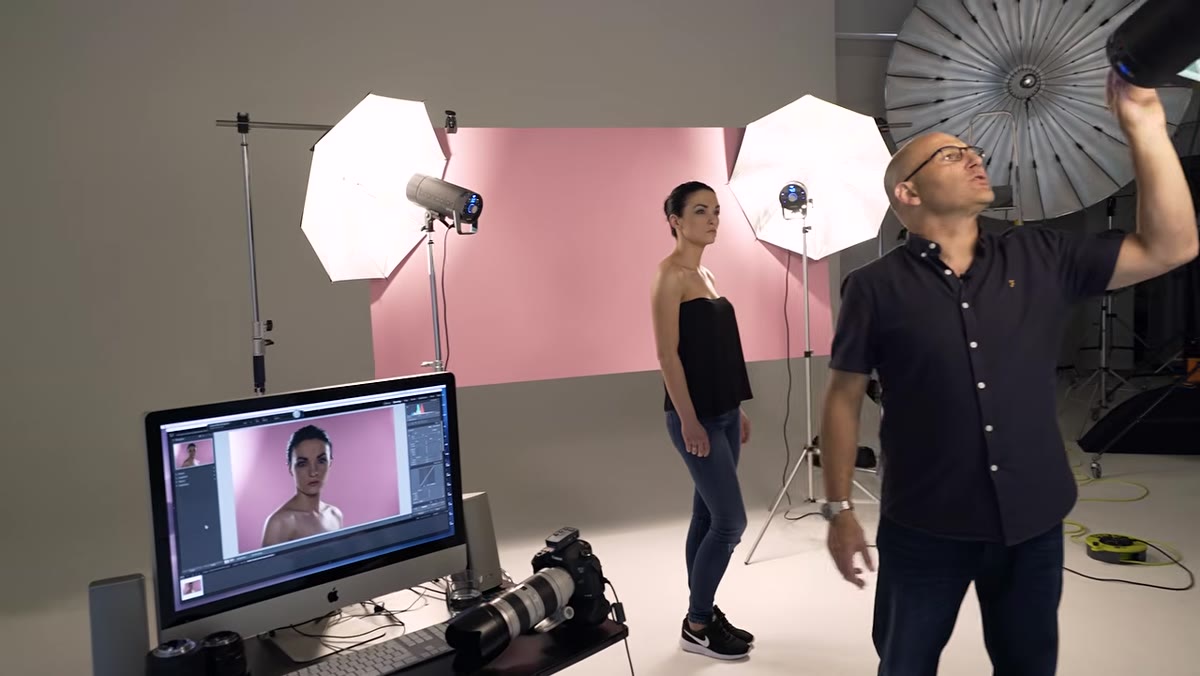 Photographer adjusting front umbrella power upward from level 3
After reading the test shot, the front umbrella power gets bumped up incrementally, from power 3 toward 4 and then 5. This is where the tutorial gets genuinely interesting. Increasing front light power doesn’t just brighten the face. It changes the ratio between your fill and your rim lights, which alters how dramatic or graphic the final image feels. Crank the front light too high and the rim lights nearly disappear into the overall brightness. Pull it back too low and you get a darker, moodier look that stops being “high-key” very quickly.
Photographer adjusting front umbrella power upward from level 3
After reading the test shot, the front umbrella power gets bumped up incrementally, from power 3 toward 4 and then 5. This is where the tutorial gets genuinely interesting. Increasing front light power doesn’t just brighten the face. It changes the ratio between your fill and your rim lights, which alters how dramatic or graphic the final image feels. Crank the front light too high and the rim lights nearly disappear into the overall brightness. Pull it back too low and you get a darker, moodier look that stops being “high-key” very quickly.
The model’s head position also factors in here more than you might expect. Turning slightly toward or away from a rear light changes how much of that rim wraps visibly around the face. You don’t always need to change power settings. Sometimes the answer is just asking your subject to shift their chin.
What I’d Do Differently in My Own Shoots
I’ve replicated setups like this using speedlights with silver shoot-through umbrellas as the rear sources, and they hold up reasonably well for budget-conscious work. The one thing I’d add to this tutorial’s logic is flagging your rear umbrellas. Silver umbrellas throw light in a lot of directions, and without some control, you’ll get flare or wash on your front umbrella or lens. A simple piece of black foam core taped to the inside edge of each rear umbrella stops most of that. It took me an embarrassingly long time to figure out why my high-key shots kept looking hazy, and that was the fix.
The single biggest takeaway from this tutorial is one the creator states outright: don’t copy power settings. Learn to read what each adjustment is doing in the image. Power settings from someone else’s studio, with different heads, different modifiers, and different distances, will not match yours anyway. What transfers is the logic behind the choices. Watch the full tutorial on YouTube and pay attention not just to the final frame, but to every imperfect test shot along the way. That’s where the actual lesson lives.
Comments
Leave a Comment