Picking a light modifier used to feel like guessing to me. I’d grab whatever was already on the stand, fire a few test shots, decide something looked “off,” and then spend twenty minutes swapping gear and second-guessing myself. It wasn’t until I started systematically comparing modifiers side by side - same subject, same position, same power - that I actually understood what each one was doing to the light, and why.
That’s exactly what this Visual Education tutorial does so well. Watch the full tutorial on YouTube - it runs through a direct comparison of several common modifiers against a large octabox, showing you the real-world difference each one produces on a portrait subject. No guessing, no theory-only explanations. Just the light, side by side.
If you’ve ever stood in front of your strobe wondering whether to reach for the reflector or the softbox, this breakdown is for you. Here’s how to follow along and actually use what’s being demonstrated.
Step 1: Set Your Baseline with a Large Softbox
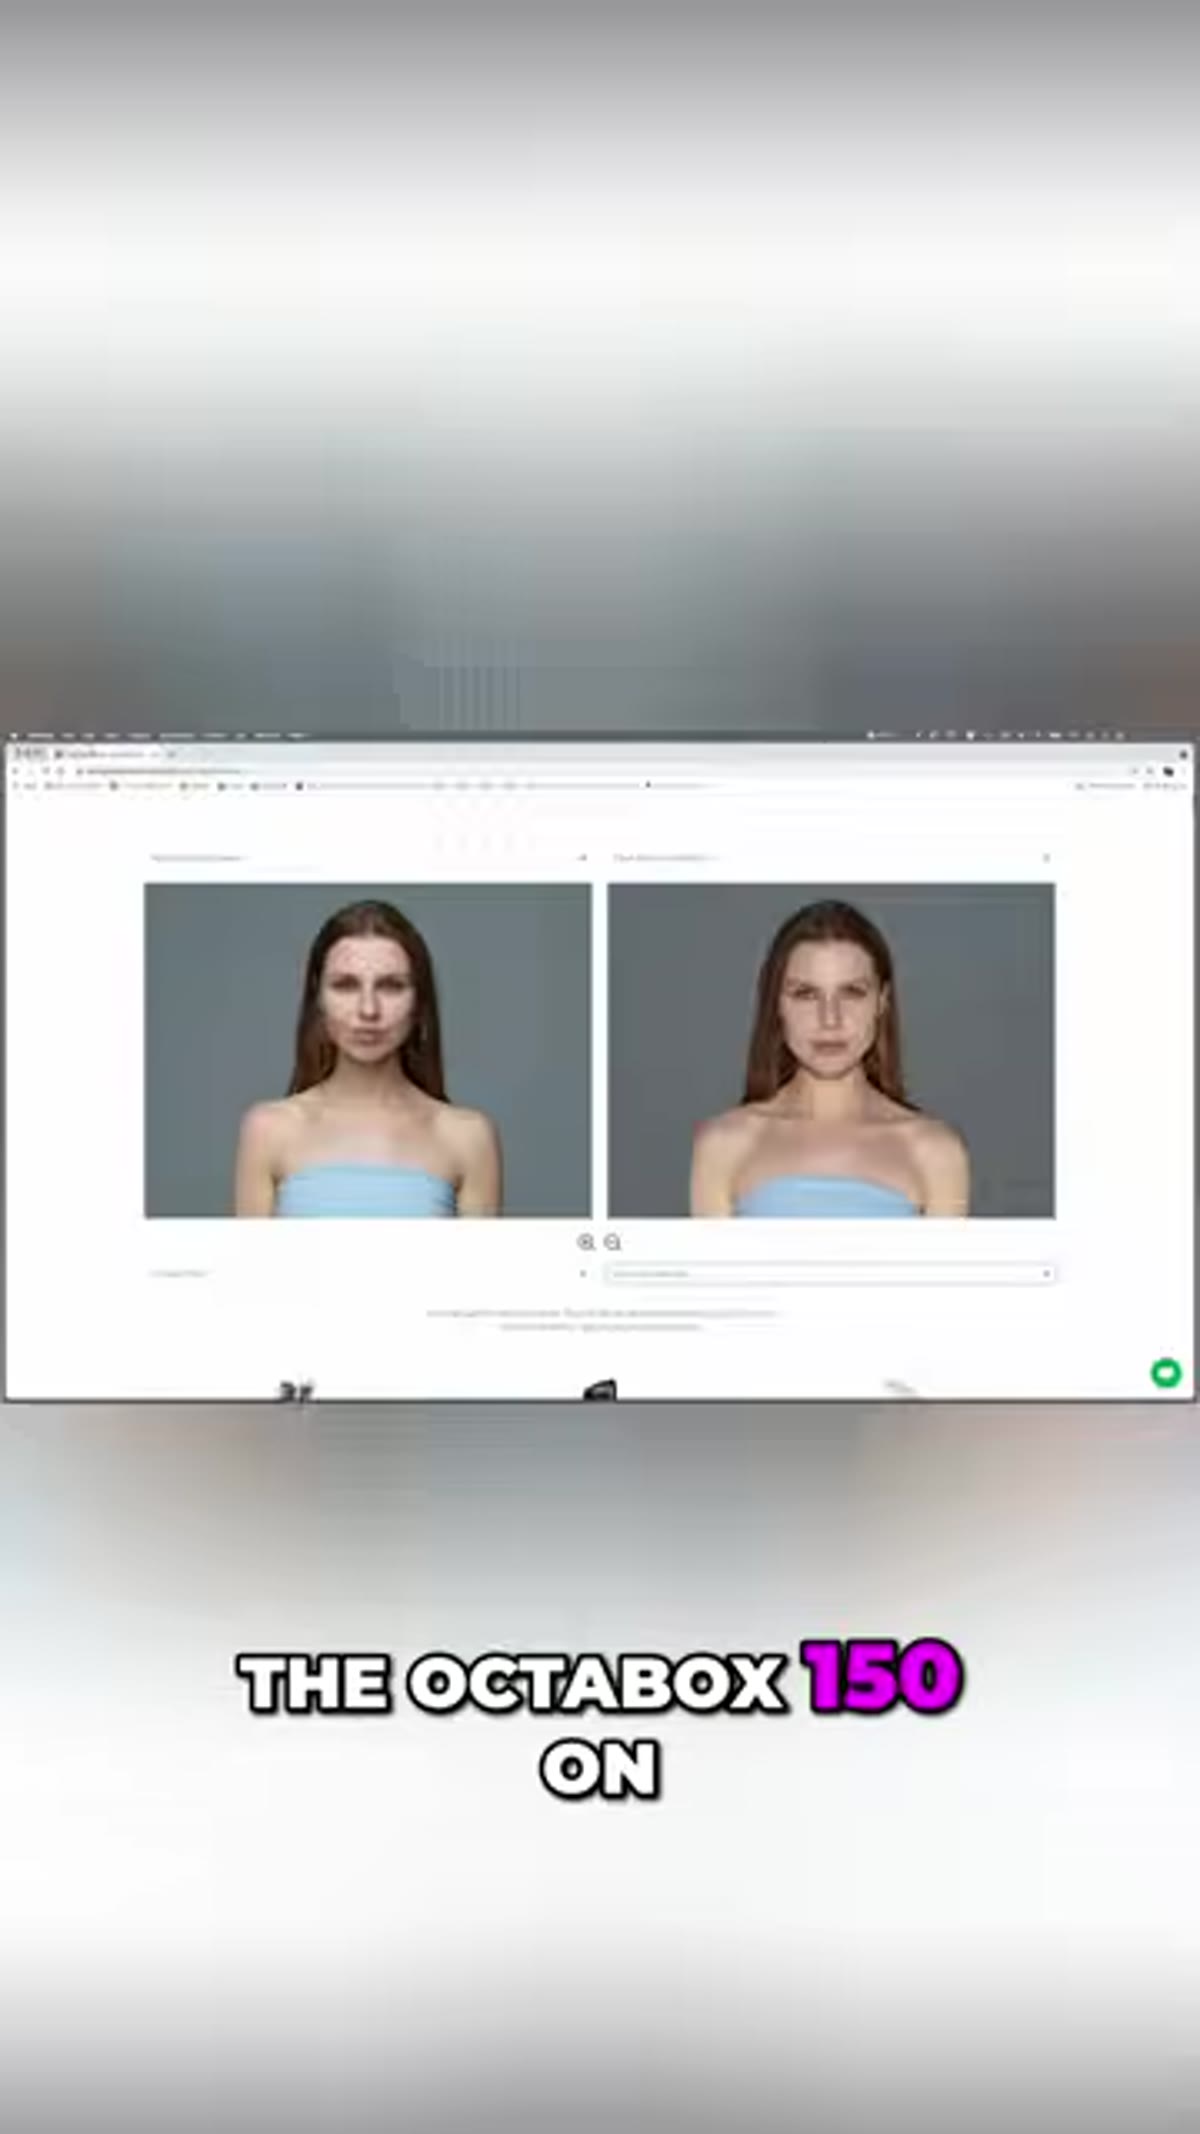 Octabox 150 lighting a portrait subject on the left side
Before you can understand what any modifier is doing, you need a reference point. In the tutorial, a large octabox - the 150cm size - serves as that baseline. It produces soft, even, flattering light with gentle shadow transitions. This is the kind of modifier that’s forgiving, versatile, and a solid starting point for any portrait session.
Octabox 150 lighting a portrait subject on the left side
Before you can understand what any modifier is doing, you need a reference point. In the tutorial, a large octabox - the 150cm size - serves as that baseline. It produces soft, even, flattering light with gentle shadow transitions. This is the kind of modifier that’s forgiving, versatile, and a solid starting point for any portrait session.
If you’re following along at home, mount your largest softbox and shoot a test portrait. Pay close attention to where the shadows fall on your subject’s face and how gradually they transition from highlight to shadow. That gradual rolloff is what “soft light” actually means in practice. Remember this look, because every modifier you test after this should be judged against it.
Step 2: Compare the Bare Bulb for High-Contrast Reference
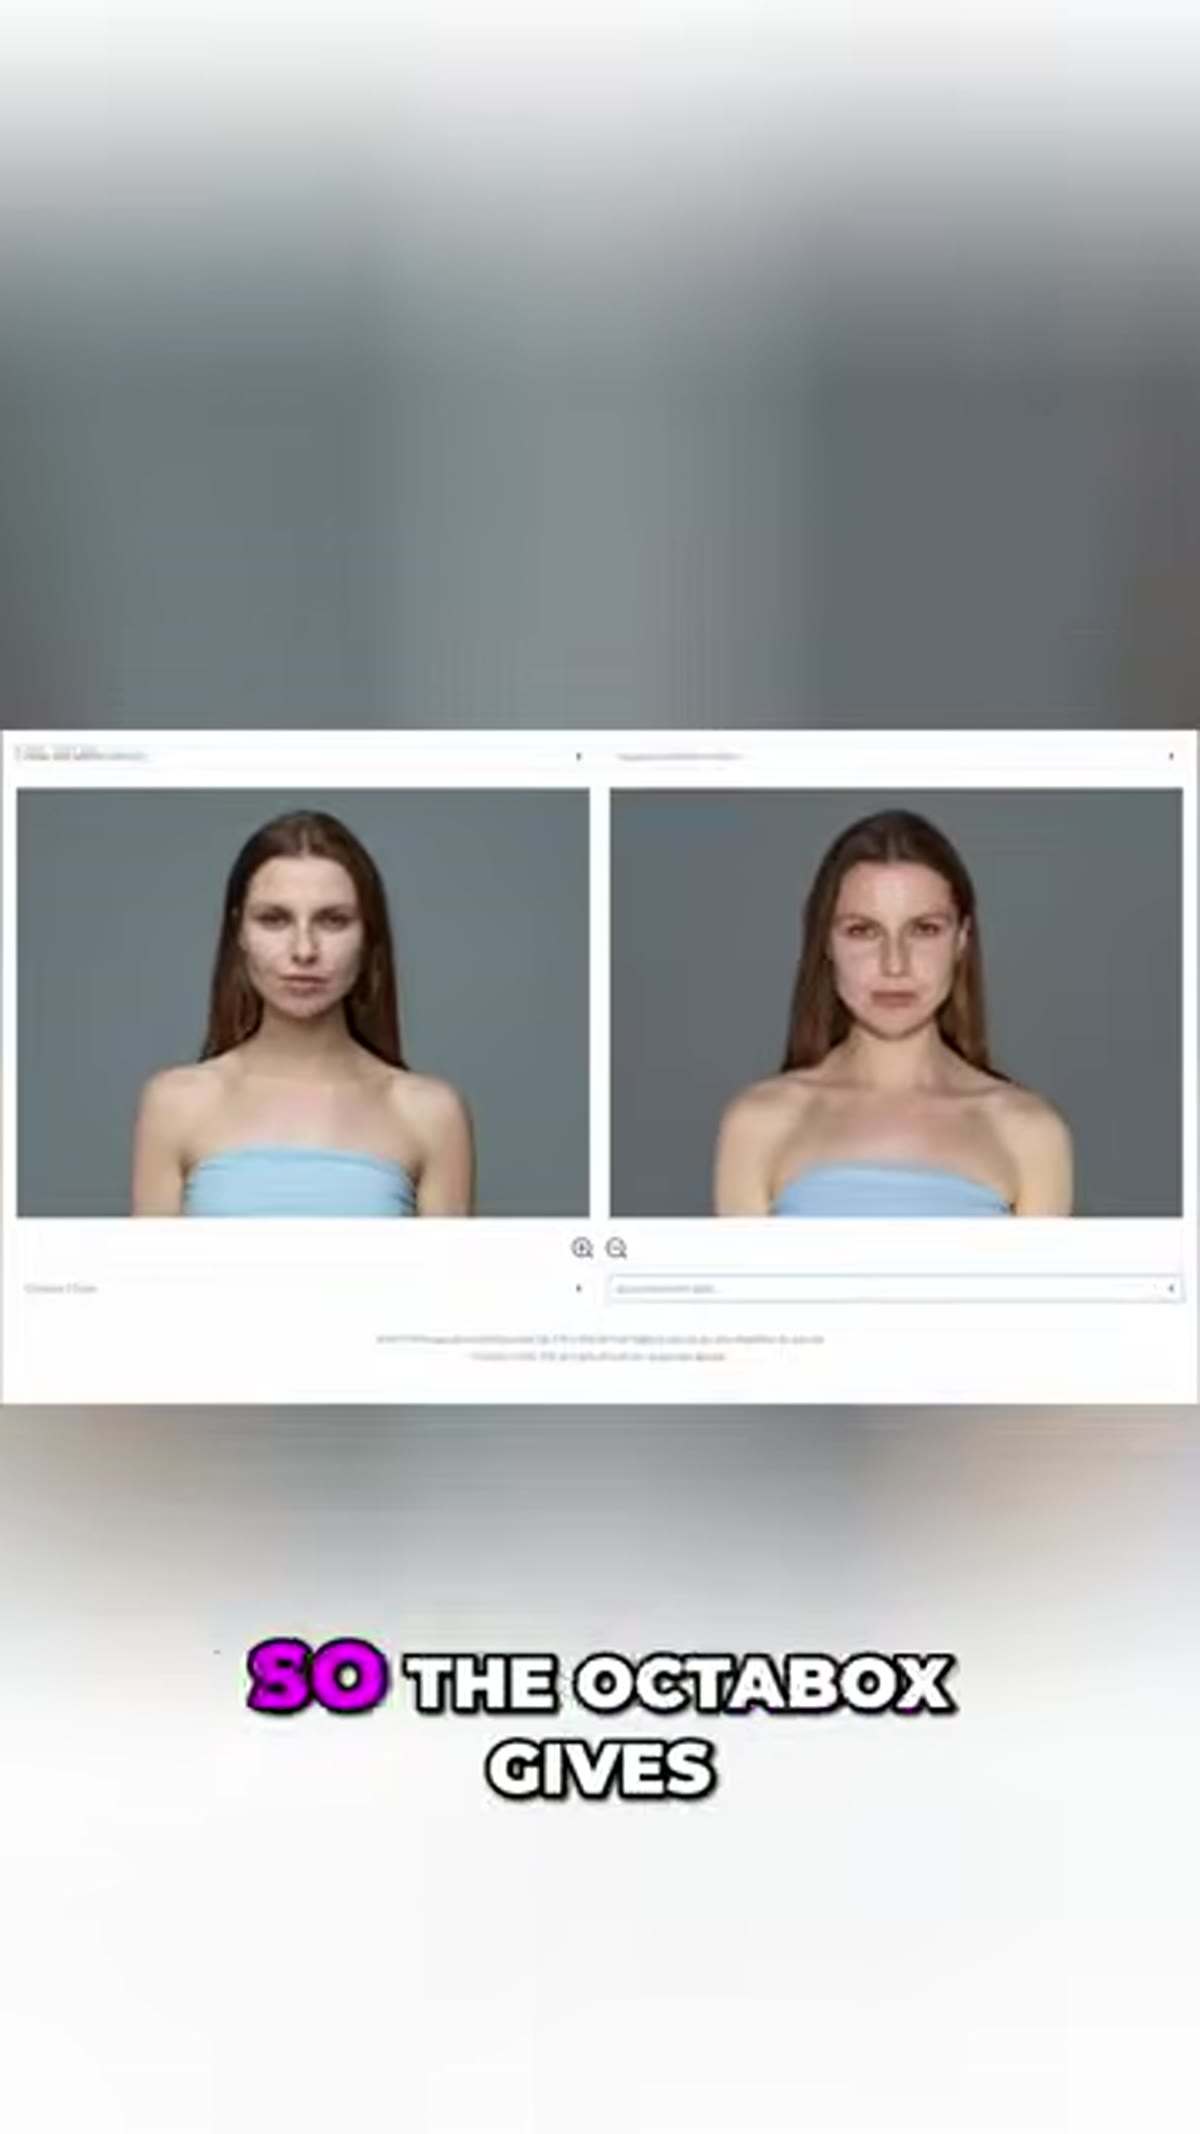 Side-by-side comparison of octabox versus bare bulb light on subject
The first real comparison in the tutorial puts the octabox up against a bare studio bulb - no modifier at all. The difference is immediate and striking. A bare bulb acts as a point light source, which means harder edges on shadows and noticeably higher contrast across the face. Highlights are brighter, shadows are darker, and the transition between them is sharp.
Side-by-side comparison of octabox versus bare bulb light on subject
The first real comparison in the tutorial puts the octabox up against a bare studio bulb - no modifier at all. The difference is immediate and striking. A bare bulb acts as a point light source, which means harder edges on shadows and noticeably higher contrast across the face. Highlights are brighter, shadows are darker, and the transition between them is sharp.
This isn’t necessarily a bad look - editorial and dramatic portraits often use hard light intentionally. But if you’re not expecting it, that contrast can feel unflattering fast. Shoot a test frame with your bare bulb at the same distance and power as your softbox shot. Notice how the shadow under the nose, jaw, and brow becomes more defined. That sharpness is the visual signature of any small or unmodified light source.
Step 3: Add a Reflector Dish to Concentrate the Light
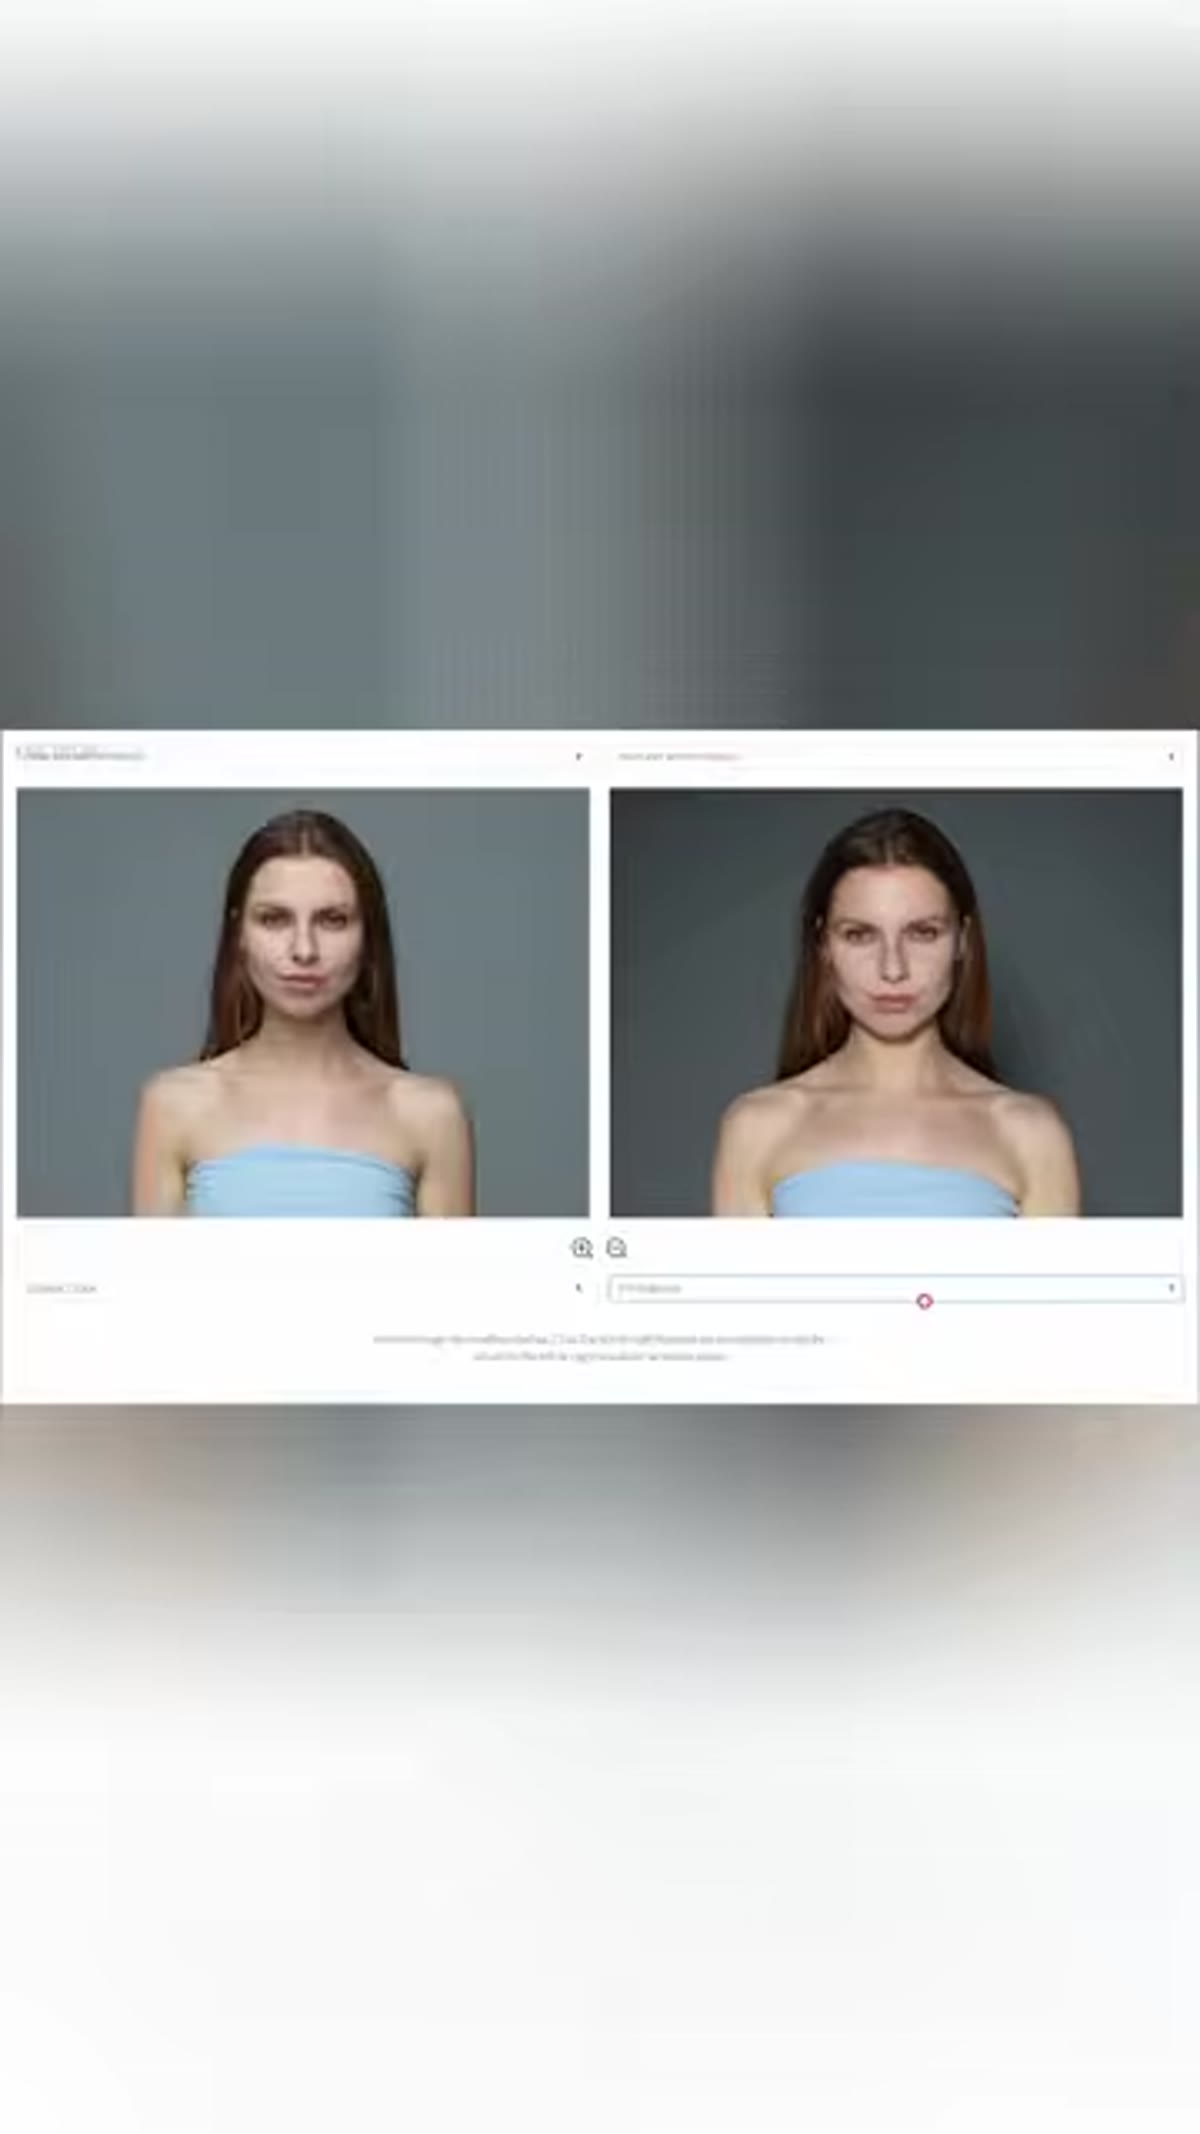 P70 reflector attached to studio light, narrowing the beam
Next up in the tutorial is a P70 reflector - a metal dish that attaches to the front of your strobe head. Where the bare bulb throws light in every direction and lets a lot of it bounce around the room, the reflector dishes that light forward and concentrates it into a tighter, more controlled beam. The result is still hard and contrasty, but more directional than the bare bulb.
P70 reflector attached to studio light, narrowing the beam
Next up in the tutorial is a P70 reflector - a metal dish that attaches to the front of your strobe head. Where the bare bulb throws light in every direction and lets a lot of it bounce around the room, the reflector dishes that light forward and concentrates it into a tighter, more controlled beam. The result is still hard and contrasty, but more directional than the bare bulb.
Think of it this way: bare bulb light scatters everywhere, and some of that scattered light wraps around your subject as ambient fill. The reflector cuts that ambient bounce down significantly, which deepens shadows and gives the image a more dramatic, focused quality. If you’re shooting in a bright white studio with lots of reflective surfaces, a P70 can help you take back control of where the light is actually going.
Step 4: Evaluate What Each Modifier Does to Shadow Edges
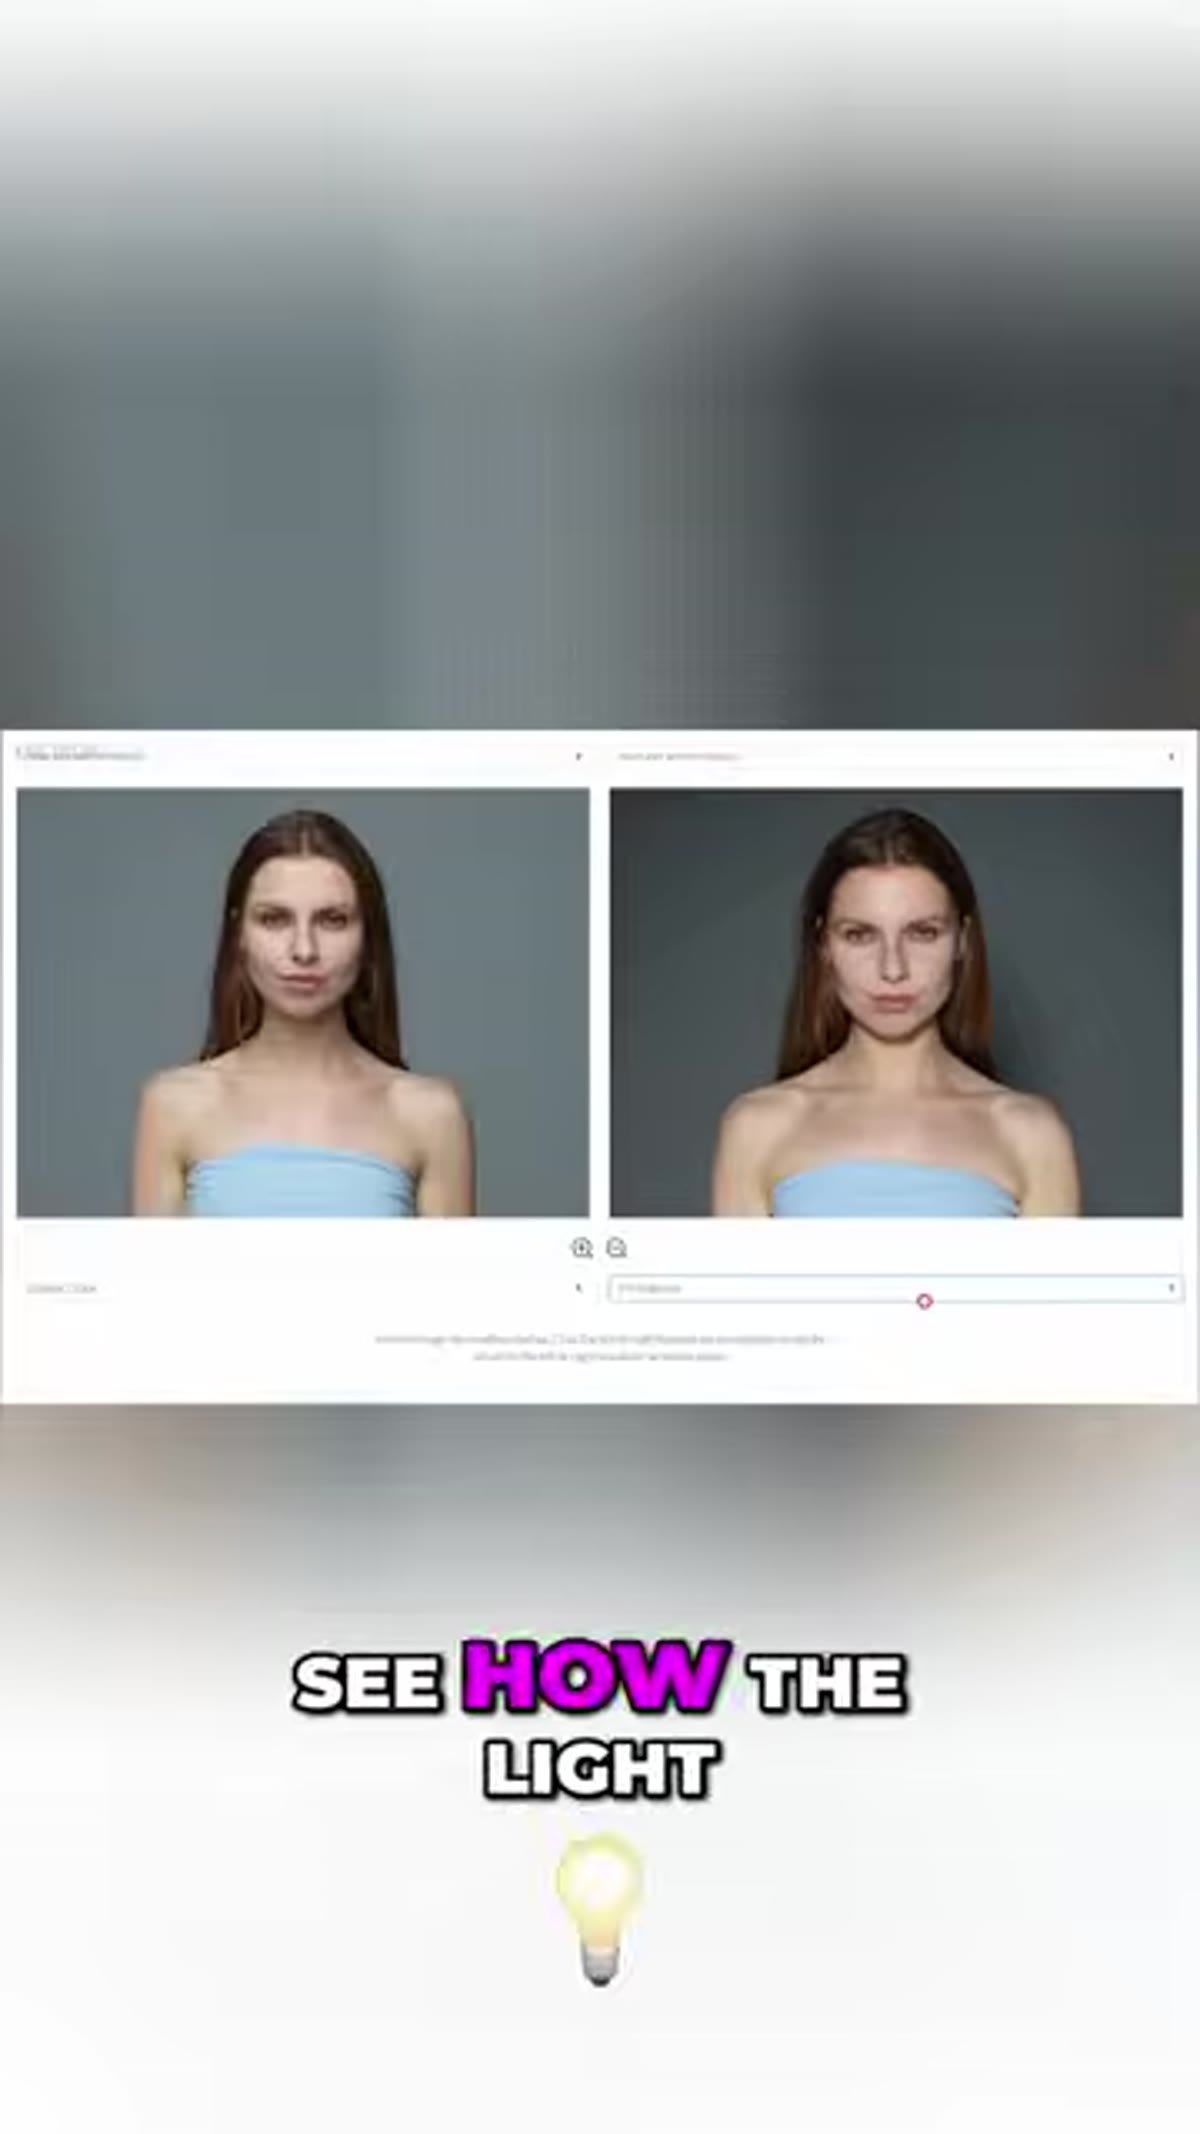 Close-up of subject’s face showing shadow edge definition changing
Here’s the step most beginners skip: actually studying the shadow edge, not just the overall brightness. After each modifier swap, zoom into your test shots and look specifically at the transition zone - the area where the lit side of the face meets the shadow side. With the large octabox, that zone is wide and gradual. With the bare bulb, it’s abrupt. With the reflector, it’s somewhere in between but leaning hard.
Close-up of subject’s face showing shadow edge definition changing
Here’s the step most beginners skip: actually studying the shadow edge, not just the overall brightness. After each modifier swap, zoom into your test shots and look specifically at the transition zone - the area where the lit side of the face meets the shadow side. With the large octabox, that zone is wide and gradual. With the bare bulb, it’s abrupt. With the reflector, it’s somewhere in between but leaning hard.
This edge quality is called the “quality of light,” and it’s determined almost entirely by the apparent size of your light source relative to your subject. Bigger source, softer edge. Smaller or more concentrated source, harder edge. Once you can see and name this in your test shots, modifier choices stop feeling random and start feeling like actual creative decisions.
Step 5: Make Your Modifier Decision Based on the Mood You’re Building
 Multiple modifiers laid out showing size differences
With your test shots in front of you, the decision becomes much more straightforward. Soft, commercial, beauty-style portraits - reach for the large octabox or a similar big source. Dramatic, editorial, or high-fashion work where you want strong shadow definition - the reflector dish or bare bulb gives you that. The tutorial makes this visible rather than leaving it as abstract advice, which is why the side-by-side format is so effective.
Multiple modifiers laid out showing size differences
With your test shots in front of you, the decision becomes much more straightforward. Soft, commercial, beauty-style portraits - reach for the large octabox or a similar big source. Dramatic, editorial, or high-fashion work where you want strong shadow definition - the reflector dish or bare bulb gives you that. The tutorial makes this visible rather than leaving it as abstract advice, which is why the side-by-side format is so effective.
One thing I’d add: write down or voice-memo your observations after each test. “P70 at 1.5 meters, subject had deep jaw shadow, nice for drama” is infinitely more useful than trying to remember it on your next shoot. Building your own reference library of modifier results is one of the fastest ways to develop a consistent lighting style.
What I Do Differently in Real Sessions
I almost always start with the large softbox - exactly as the tutorial demonstrates - even when I know I’ll end up somewhere harder. It gives me a clean, controlled look at my subject’s face and how their features respond to light before I start making things more complex. From there, I can work toward harder light deliberately rather than stumbling into it.
I also test modifiers at different distances, not just different types. A large softbox moved very close to your subject becomes even softer. Pulled far back, it starts to behave more like a smaller source. Distance is a modifier all on its own, and combining it with physical modifier swaps gives you a much wider range of looks than gear-swapping alone.
The single most important idea here is this: light quality is about source size and concentration, not brand or price. Understanding what each modifier does to those two variables - size and direction - gives you a mental model you can apply to any kit, in any studio, on any budget.
Watch the full tutorial on YouTube and follow along with your own gear. Even running through just two or three comparisons will change how you see light in your portraits.
Comments
Leave a Comment