
There is a specific frustration that comes with shooting products or full-body portraits against a regular wall. No matter how carefully you light the scene, you get a shadow line where the wall meets the floor, a hard edge that breaks the illusion of infinite space. You can fix it in post, sure, but that adds hours to a job that should feel clean from the start. I have spent more editing sessions than I care to admit painting out that corner crease, and every time I think: there has to be a better way to just build the thing right.
That better way is an infinity cove, and if you have ever wondered how professional studios get that smooth, shadowless, seamlessly curved background, this tutorial will show you exactly how it is done. In this Visual Education tutorial by Carl Taylor, the entire build is documented from raw stud work to final painted surface, and it is one of the most practical behind-the-scenes looks at studio construction I have come across. Watch the full tutorial on YouTube alongside this walkthrough if you want to see the materials up close.
The cove in the video was built by a professional carpenter, so this is not a weekend DIY project with a hot glue gun. But understanding every stage of the build helps you have smarter conversations with contractors, budget the job accurately, and know what questions to ask before a single piece of lumber goes up.
Step 1: Plan and Frame the Stud Work
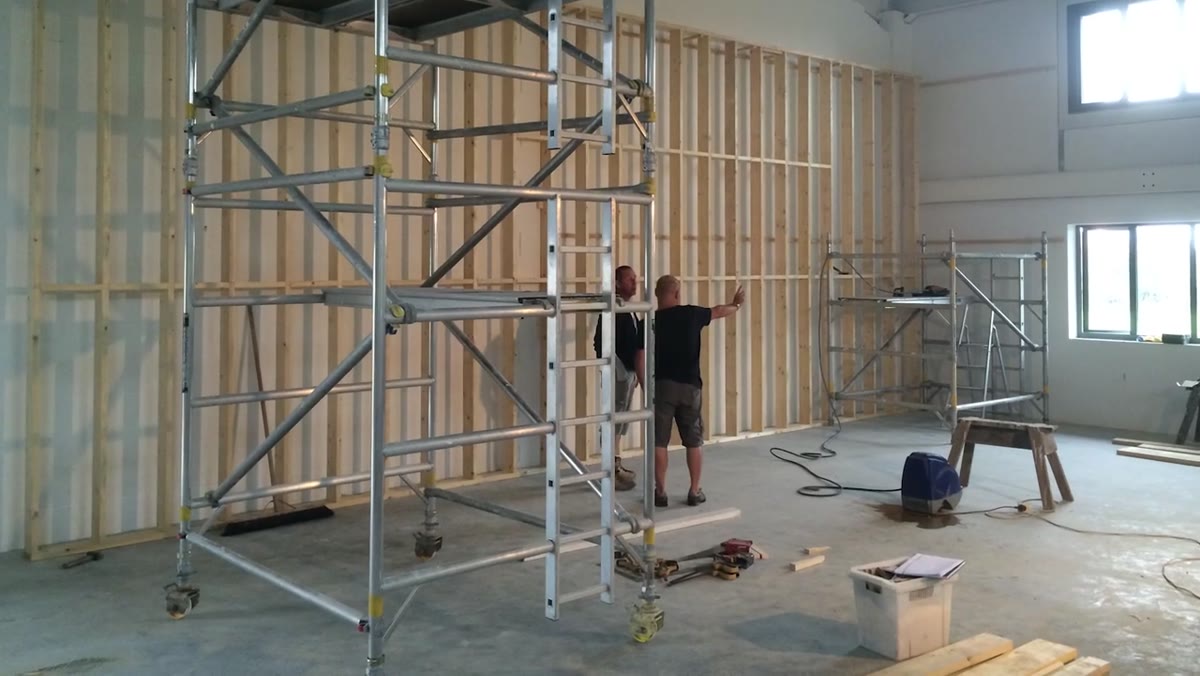 Initial timber stud framework being erected in studio space
Before anything else, the bones of the cove go up as a timber stud wall frame. This is standard wall-framing practice, but the key difference from a regular wall is that the frame has to account for a curved transition zone at the base. The studs need to be positioned to support not just a flat back wall, but also the sweeping curve that will eventually carry the eye from vertical wall down to horizontal floor. Measure your intended cove width and ceiling height before framing begins, and make sure the frame has enough depth at the base to accommodate the curve radius you want. A shallow curve looks tight and awkward on camera; a generous, gradual curve photographs as true negative space.
Initial timber stud framework being erected in studio space
Before anything else, the bones of the cove go up as a timber stud wall frame. This is standard wall-framing practice, but the key difference from a regular wall is that the frame has to account for a curved transition zone at the base. The studs need to be positioned to support not just a flat back wall, but also the sweeping curve that will eventually carry the eye from vertical wall down to horizontal floor. Measure your intended cove width and ceiling height before framing begins, and make sure the frame has enough depth at the base to accommodate the curve radius you want. A shallow curve looks tight and awkward on camera; a generous, gradual curve photographs as true negative space.
Step 2: Build the Lattice Work for the Curved Corners
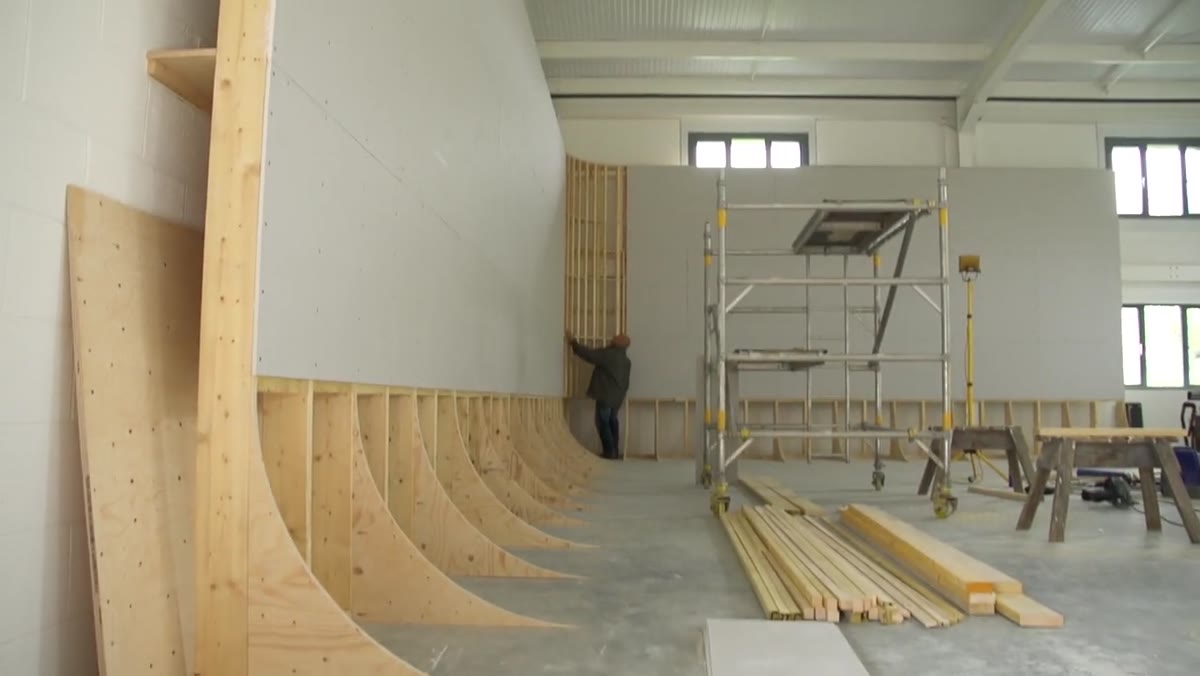 Timber lattice framework forming the curved corner transition
The hardest part of the entire build is the corner lattice, and the video does not hide that fact. The carpenter constructs an intricate lattice of smaller timber pieces within the corner zone, shaped to create the gradual arc that transitions the wall into the floor. Preformed plywood curves are used as anchoring guides, and the lattice is then filled in between them to create a continuous curved surface to skin over. If you are working with a carpenter on your own cove, this is the stage to talk through your intended shooting distance and subject scale. A cove used mostly for product close-ups can have a tighter curve than one meant to shoot full-length figures, because the camera-to-subject distance changes how much of the curve appears in frame.
Timber lattice framework forming the curved corner transition
The hardest part of the entire build is the corner lattice, and the video does not hide that fact. The carpenter constructs an intricate lattice of smaller timber pieces within the corner zone, shaped to create the gradual arc that transitions the wall into the floor. Preformed plywood curves are used as anchoring guides, and the lattice is then filled in between them to create a continuous curved surface to skin over. If you are working with a carpenter on your own cove, this is the stage to talk through your intended shooting distance and subject scale. A cove used mostly for product close-ups can have a tighter curve than one meant to shoot full-length figures, because the camera-to-subject distance changes how much of the curve appears in frame.
Step 3: Skin the Curve with Flexible Plywood
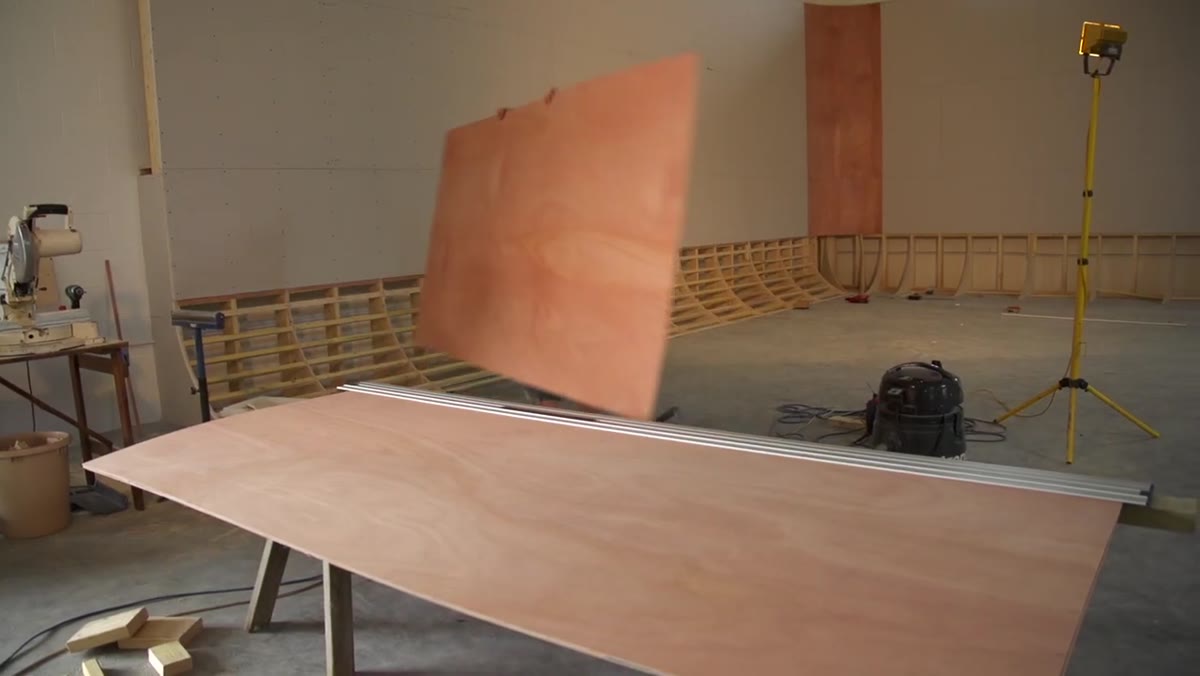 Flexible plywood sheets being applied and screwed to the lattice
Standard plywood will not bend without cracking, but thin, flexible plywood sheets, sometimes called bendy ply or flexi-ply, will conform to a curved surface when screwed gradually into the lattice beneath. The technique is to work across the sheet in stages, securing it to the lattice progressively rather than trying to force the whole panel at once. The resulting surface is smooth and rigid, holding the curve cleanly without any flat spots. This is the structural layer that everything else builds on, so take the time to get the screws flush and the seams between panels as tight as possible. Any gap here will show through the final plaster and paint.
Flexible plywood sheets being applied and screwed to the lattice
Standard plywood will not bend without cracking, but thin, flexible plywood sheets, sometimes called bendy ply or flexi-ply, will conform to a curved surface when screwed gradually into the lattice beneath. The technique is to work across the sheet in stages, securing it to the lattice progressively rather than trying to force the whole panel at once. The resulting surface is smooth and rigid, holding the curve cleanly without any flat spots. This is the structural layer that everything else builds on, so take the time to get the screws flush and the seams between panels as tight as possible. Any gap here will show through the final plaster and paint.
Step 4: Seal the Plywood Before Plastering
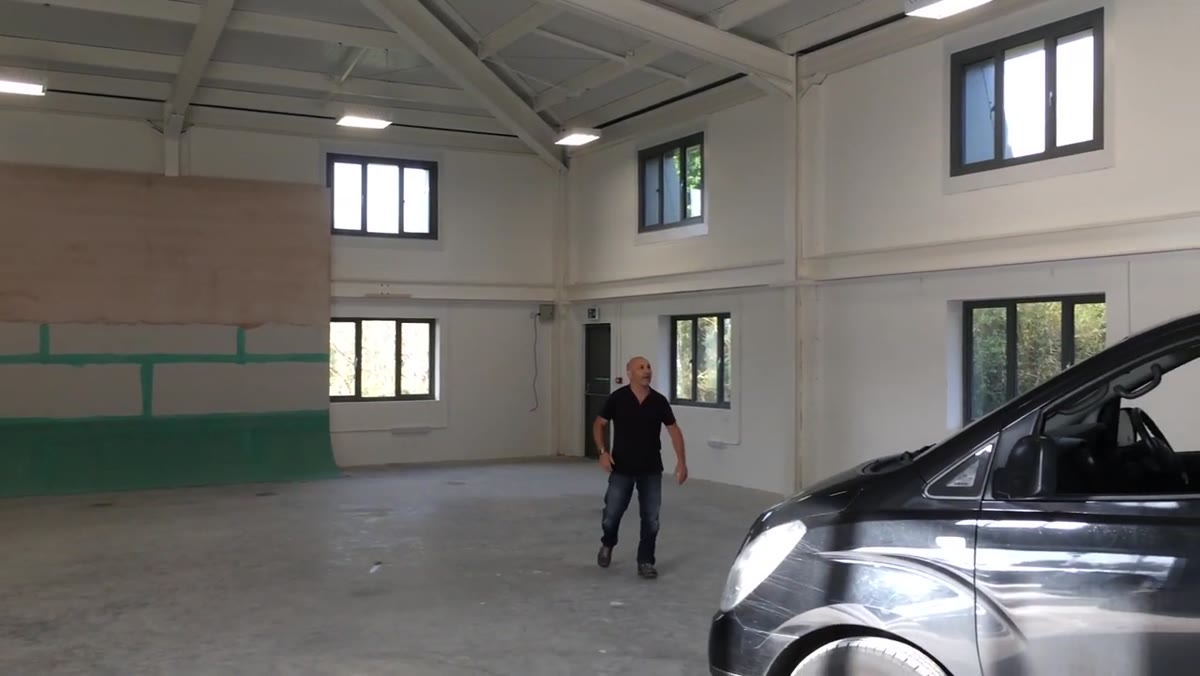 Green sealant being applied over the flexible plywood surface
Raw plywood is too porous and dimensionally unstable to plaster directly. In the tutorial, a green specialist sealant is applied across the entire plywood surface before any plaster goes on. This layer locks the wood fibers, prevents the plaster from drying at different rates across the surface, and gives the render something to key into properly. If you skip this step, you risk the plaster cracking or delaminating later, especially in a working studio environment where heat and humidity fluctuate. Ask your plasterer what sealer they prefer for plywood substrates because products vary by region, but do not let anyone talk you out of this step in the interest of saving time.
Green sealant being applied over the flexible plywood surface
Raw plywood is too porous and dimensionally unstable to plaster directly. In the tutorial, a green specialist sealant is applied across the entire plywood surface before any plaster goes on. This layer locks the wood fibers, prevents the plaster from drying at different rates across the surface, and gives the render something to key into properly. If you skip this step, you risk the plaster cracking or delaminating later, especially in a working studio environment where heat and humidity fluctuate. Ask your plasterer what sealer they prefer for plywood substrates because products vary by region, but do not let anyone talk you out of this step in the interest of saving time.
Step 5: Apply the Plaster in Sections
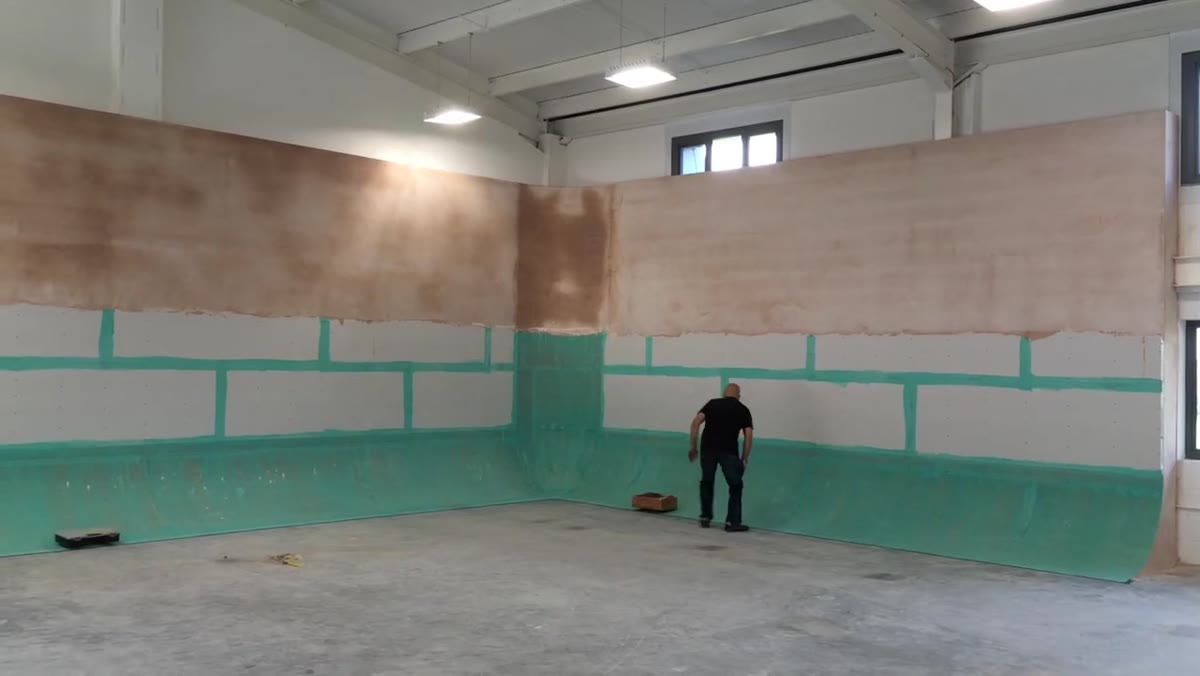 Plasterer applying top coat to upper section with scaffold in place
The plaster goes on in two stages, dictated by access. Scaffolding is used to reach and finish the upper wall and ceiling first. Once that sets, the scaffolding comes down and the plasterer works the lower curve and floor section by hand. The curve is the most technically demanding area to plaster because the trowel has to follow the arc consistently without building up thick edges at the transition points. A skilled plasterer will feather the surface continuously through the curve, keeping the thickness even so there are no ridges that would cast shadows under studio lighting. If you are getting quotes for this job, ask specifically whether the plasterer has done curved plaster work before. It is a different skill set from flat wall finishing.
Plasterer applying top coat to upper section with scaffold in place
The plaster goes on in two stages, dictated by access. Scaffolding is used to reach and finish the upper wall and ceiling first. Once that sets, the scaffolding comes down and the plasterer works the lower curve and floor section by hand. The curve is the most technically demanding area to plaster because the trowel has to follow the arc consistently without building up thick edges at the transition points. A skilled plasterer will feather the surface continuously through the curve, keeping the thickness even so there are no ridges that would cast shadows under studio lighting. If you are getting quotes for this job, ask specifically whether the plasterer has done curved plaster work before. It is a different skill set from flat wall finishing.
Step 6: Paint and Finish
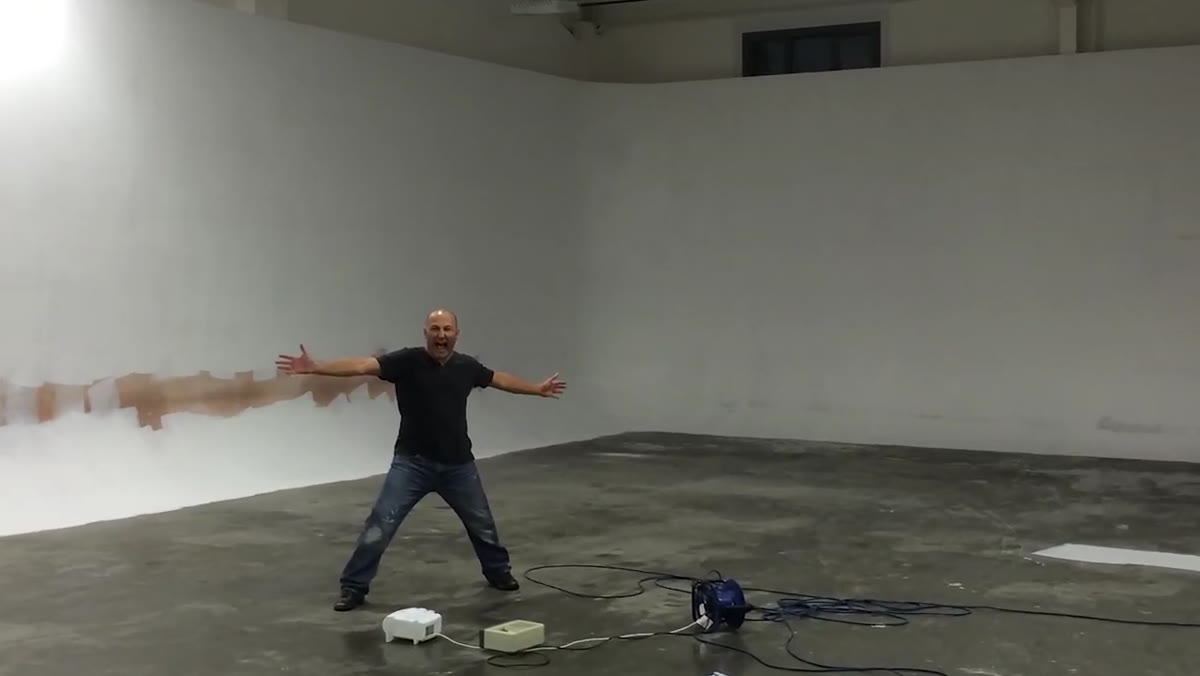 Completed cove with first coat of white paint applied
Once the plaster is fully cured, the cove gets painted. In a professional studio, this is almost always a flat white, because gloss or satin finishes reflect light in ways that create hot spots and inconsistencies across the surface. Multiple coats are standard. The paint is what you will be touching up repeatedly over the life of the studio as the surface gets scuffed by equipment, subjects, or the occasional skateboarder. Keep detailed notes on the exact paint mix and finish you used so that touch-ups blend invisibly.
Completed cove with first coat of white paint applied
Once the plaster is fully cured, the cove gets painted. In a professional studio, this is almost always a flat white, because gloss or satin finishes reflect light in ways that create hot spots and inconsistencies across the surface. Multiple coats are standard. The paint is what you will be touching up repeatedly over the life of the studio as the surface gets scuffed by equipment, subjects, or the occasional skateboarder. Keep detailed notes on the exact paint mix and finish you used so that touch-ups blend invisibly.
What I Would Add From My Own Experience
I have not built a full cove myself, but I have shot in several and have talked to studio owners about the decisions they made and regretted. The one thing that comes up consistently: build it wider than you think you need. The cove in this tutorial is substantial in scale, and every studio owner I have spoken to says the same thing - they wished they had gone bigger. A narrow cove clips out of frame the moment you shift to a wider lens or want to shoot a subject with some breathing room. If your space allows it, err on the side of generosity with the dimensions. A cove that feels too wide on an empty Tuesday is exactly right when you are shooting a family of four or a full clothing rack.
The biggest takeaway from this tutorial is that an infinity cove is not magic. It is a sequence of craft decisions, each one dependent on the one before, that adds up to a surface your camera and your lighting will love. The curve is the whole point, and getting the curve right requires patience at every stage: in the lattice, in the plywood, in the plaster, and in the paint.
If you are serious about building one, watch the full build documentation before you talk to a single contractor. Watch the full tutorial on YouTube and take notes. Carl Taylor’s team built something genuinely impressive here, and seeing the before and after is the fastest way to understand why the effort is worth it.
Comments
Leave a Comment