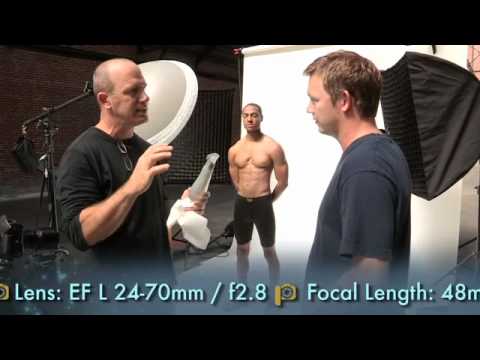
I used to think dramatic athlete portraits required a massive studio budget and a team of assistants. Then I watched enough Joel Grimes tutorials to realize the gap between “looks professional” and “looks like a million dollars” is mostly just intentional light placement and a few clever tricks in post. If you shoot portraits, fitness clients, or anyone you want to look genuinely powerful on camera, this workflow is worth understanding from the ground up.
In this Joel Grimes tutorial filmed for PhotoVision, Grimes walks through his full process: a three-light setup built around a beauty dish, a glycerin trick for simulating sweat, HDR bracketing for exposure latitude, and Photoshop compositing to drop the subject onto a backdrop. It’s a behind-the-scenes look at a working shoot, not a classroom demo, which means you get to see him actually problem-solve in real time. I’ve pulled the whole thing apart below into steps you can follow even if you never click play.
Step 1: Build the Three-Light Foundation
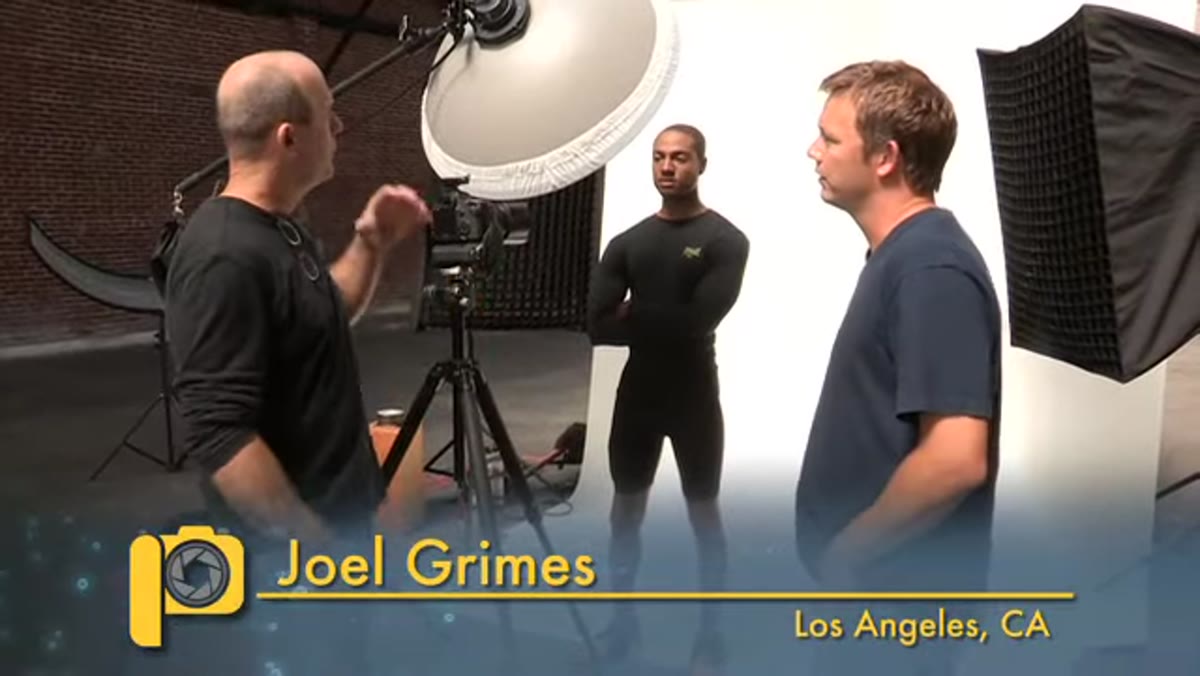 Beauty dish overhead and two rear softboxes visible on set
Grimes opens with what he calls his starting point: a beauty dish positioned almost directly overhead and close to the lens, paired with two strip banks placed behind the subject. The beauty dish is the key light, and its height matters. Overhead placement creates a dramatic, sculpted shadow under the chin and cheekbones without making the subject look flat. The two rear lights are rim lights, wrapping around the edges of the body to separate the subject from whatever background you’re shooting against.
Beauty dish overhead and two rear softboxes visible on set
Grimes opens with what he calls his starting point: a beauty dish positioned almost directly overhead and close to the lens, paired with two strip banks placed behind the subject. The beauty dish is the key light, and its height matters. Overhead placement creates a dramatic, sculpted shadow under the chin and cheekbones without making the subject look flat. The two rear lights are rim lights, wrapping around the edges of the body to separate the subject from whatever background you’re shooting against.
The critical detail here is proximity. The dish is close, almost touching the lens barrel. That softens the light enough for faces while still holding contrast. If you’re recreating this at home with a single monolight and a beauty dish, start with the dish about 12 to 18 inches from the subject’s face and experiment from there. The rim lights don’t need to match the key light’s power. Grimes is using them to create edge separation, so dial them down until you see a clean highlight on the shoulder line, not a full-on flare.
Step 2: Watch the Light on Dark Clothing
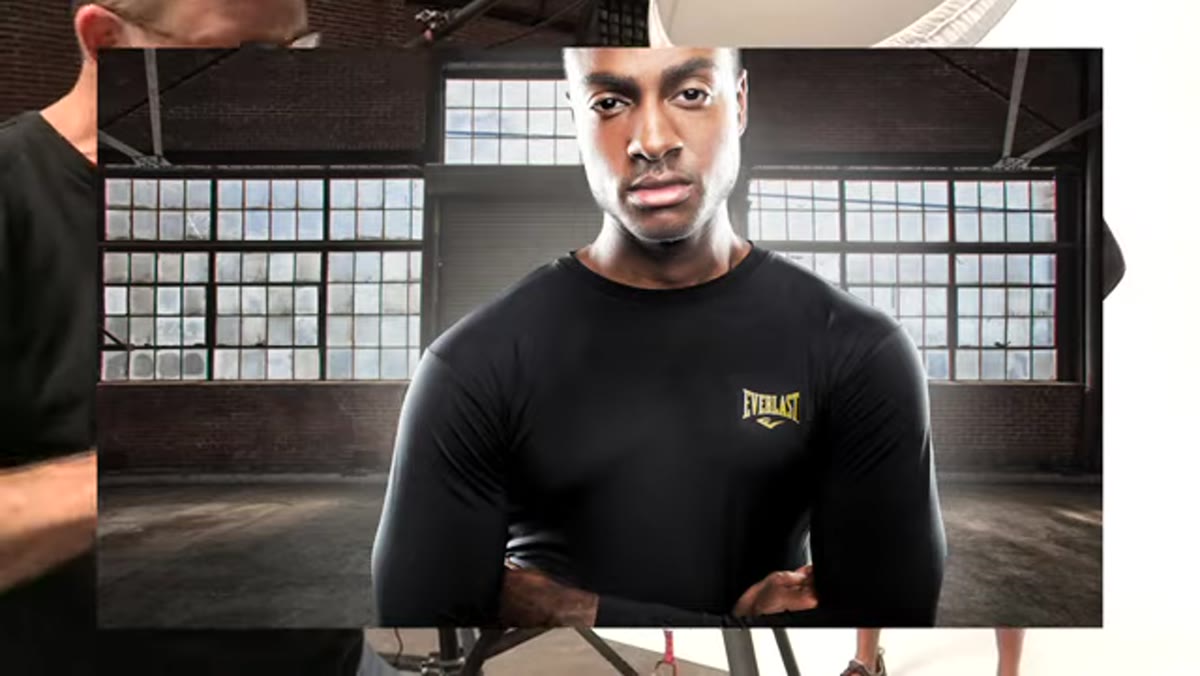 Subject in black shirt showing highlight running down sleeve
This is one of those things Grimes mentions almost in passing that actually matters a lot. When your subject is wearing black, you lose all the fabric texture unless your rim lights are doing their job. He points out how the edge light creates a continuous highlight running down the shirt, which is the only thing giving that dark fabric any dimension.
Subject in black shirt showing highlight running down sleeve
This is one of those things Grimes mentions almost in passing that actually matters a lot. When your subject is wearing black, you lose all the fabric texture unless your rim lights are doing their job. He points out how the edge light creates a continuous highlight running down the shirt, which is the only thing giving that dark fabric any dimension.
The same logic applies to hands, arms, anything at the edges of the frame. Highlights on skin against dark clothing create instant depth. Before you fire a single frame, look at the edges of your subject and ask whether the light is defining them or losing them. If you’re seeing a dark blob where a shoulder should be, your rim lights need to come up or shift position slightly toward the camera.
Step 3: Apply Glycerin for a Natural Sweat Effect
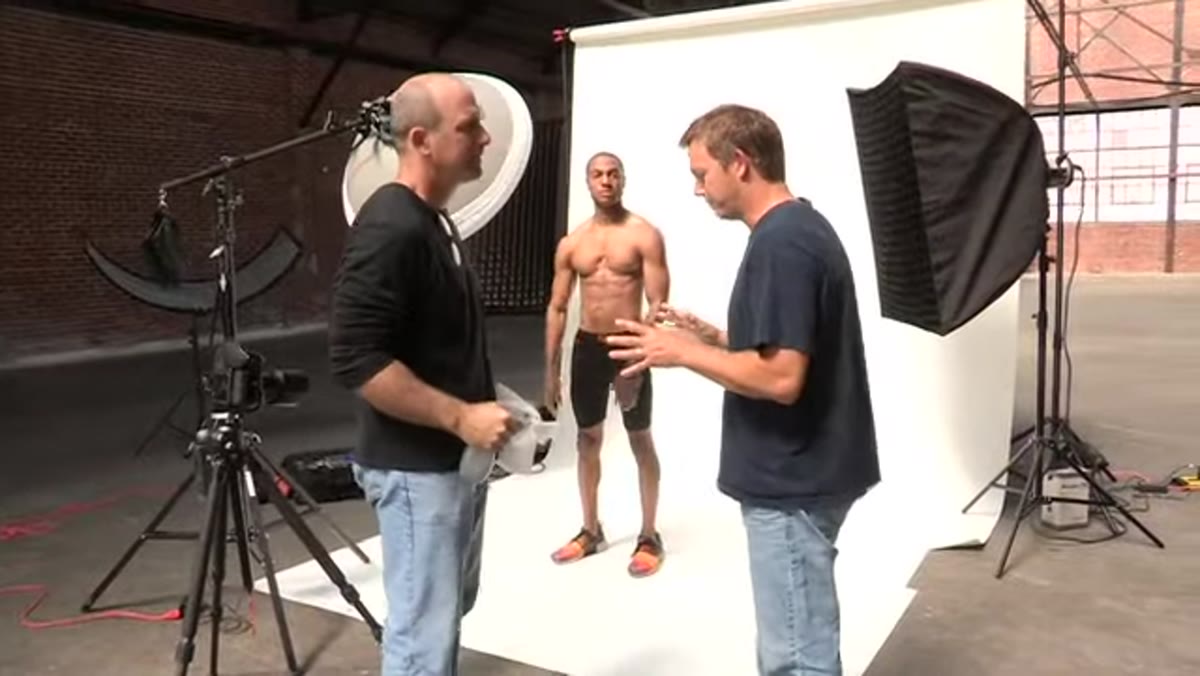 Glycerin being applied to subject’s torso before shooting
When the shirt comes off and Grimes wants the subject to look like they’ve been working hard, he reaches for glycerin, not water. Plain water evaporates fast and looks different under studio lights than it does on skin. Glycerin, which you can pick up at any drugstore or grocery store, beads up and stays. He mixes it roughly 50/50 with water before applying it.
Glycerin being applied to subject’s torso before shooting
When the shirt comes off and Grimes wants the subject to look like they’ve been working hard, he reaches for glycerin, not water. Plain water evaporates fast and looks different under studio lights than it does on skin. Glycerin, which you can pick up at any drugstore or grocery store, beads up and stays. He mixes it roughly 50/50 with water before applying it.
The result is that convincing “just finished training” look without the logistics of actually getting someone wet on set. Apply it with your hands or a small spray bottle, then work it into the skin with your fingers so it looks natural rather than poured on. Under directional light, those beads catch highlights and add incredible texture to muscle definition. It’s one of those tricks that sounds too simple to matter until you see it on a monitor.
Step 4: Bracket for HDR Latitude
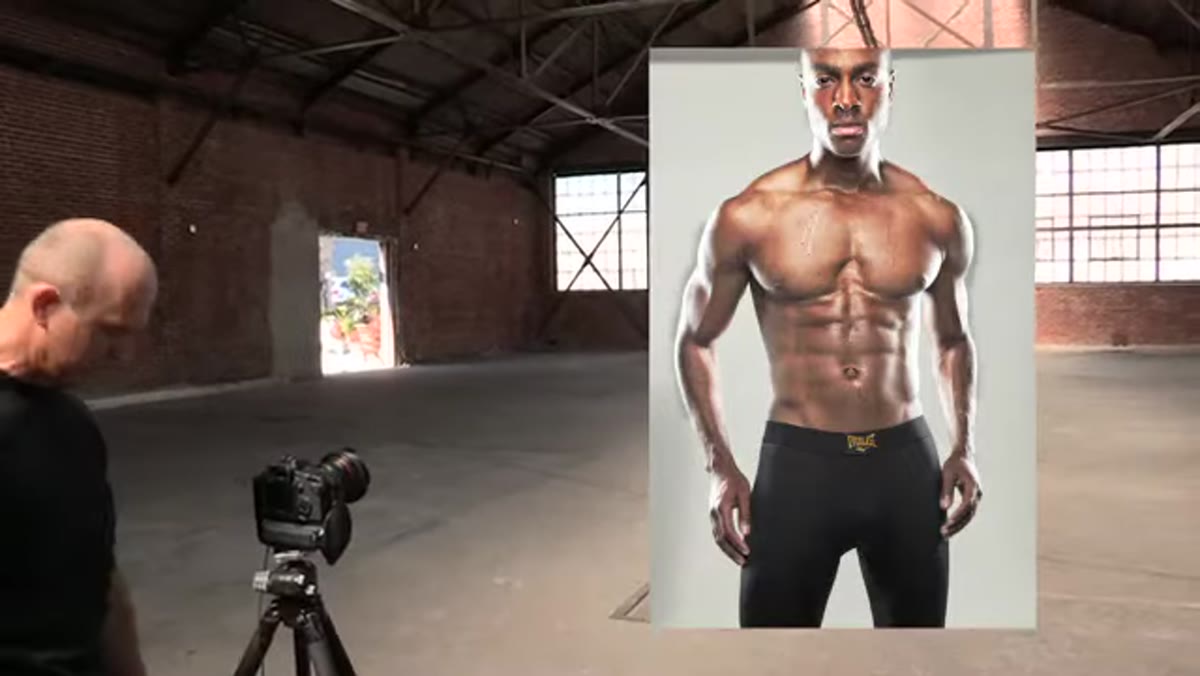 Camera firing in bracketed sequence, two stops under shown
Grimes shoots a bracketed sequence rather than a single exposure. He fires multiple frames at different exposures, with the range designed to capture full detail in both the highlights and the shadows. For high-contrast setups like this one, where you have bright rim lights and deep shadows in the same frame, a single exposure is always going to sacrifice one end of the range.
Camera firing in bracketed sequence, two stops under shown
Grimes shoots a bracketed sequence rather than a single exposure. He fires multiple frames at different exposures, with the range designed to capture full detail in both the highlights and the shadows. For high-contrast setups like this one, where you have bright rim lights and deep shadows in the same frame, a single exposure is always going to sacrifice one end of the range.
If you’re doing this with a strobe setup, you’ll need to bracket manually rather than relying on your camera’s auto-bracket mode, since strobes don’t respond to shutter speed changes the way continuous light does. Change your aperture or dial down the strobe output between frames. Grimes is working with about a five-stop total range across his bracket. You don’t need five frames. Three well-spaced exposures, one for highlights, one for midtones, one to open up the shadows, will cover most situations.
Step 5: Refine the Edge Mask in Photoshop
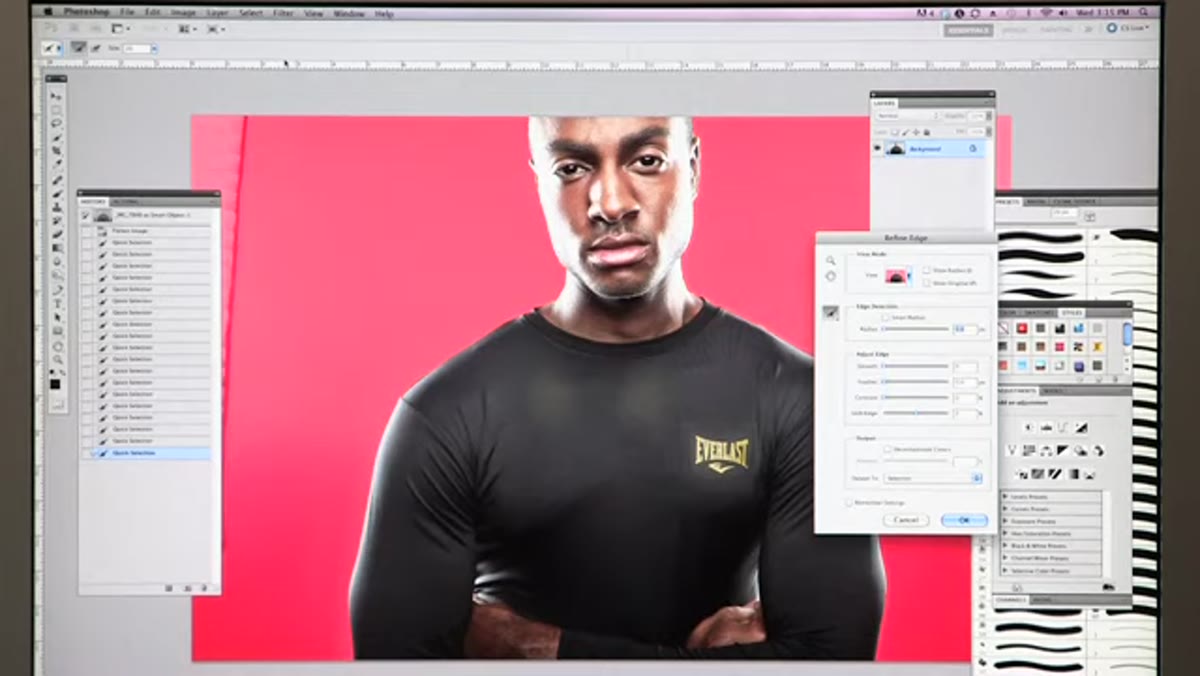 Refine Edge tool open with red mask overlay visible
Once the HDR merge is done, Grimes moves into compositing. He uses Photoshop’s Refine Edge tool to clean up the selection around the subject before dropping them onto a background. He works with the red mask overlay turned on, which lets him see exactly where the edge is and where it needs work.
Refine Edge tool open with red mask overlay visible
Once the HDR merge is done, Grimes moves into compositing. He uses Photoshop’s Refine Edge tool to clean up the selection around the subject before dropping them onto a background. He works with the red mask overlay turned on, which lets him see exactly where the edge is and where it needs work.
The practical tip here is to paint the Refine Edge brush along hair, flyaways, or any soft edge where the auto-selection got sloppy. Hard edges like shoulders and arms usually hold well on their own. It’s the organic edges, a shaved head with a little fuzz, the gap between an arm and the torso, where you need to spend the extra thirty seconds. Getting this right is the difference between a composite that looks like a magazine cover and one that looks like a school project.
Step 6: Position the Subject on the Backdrop
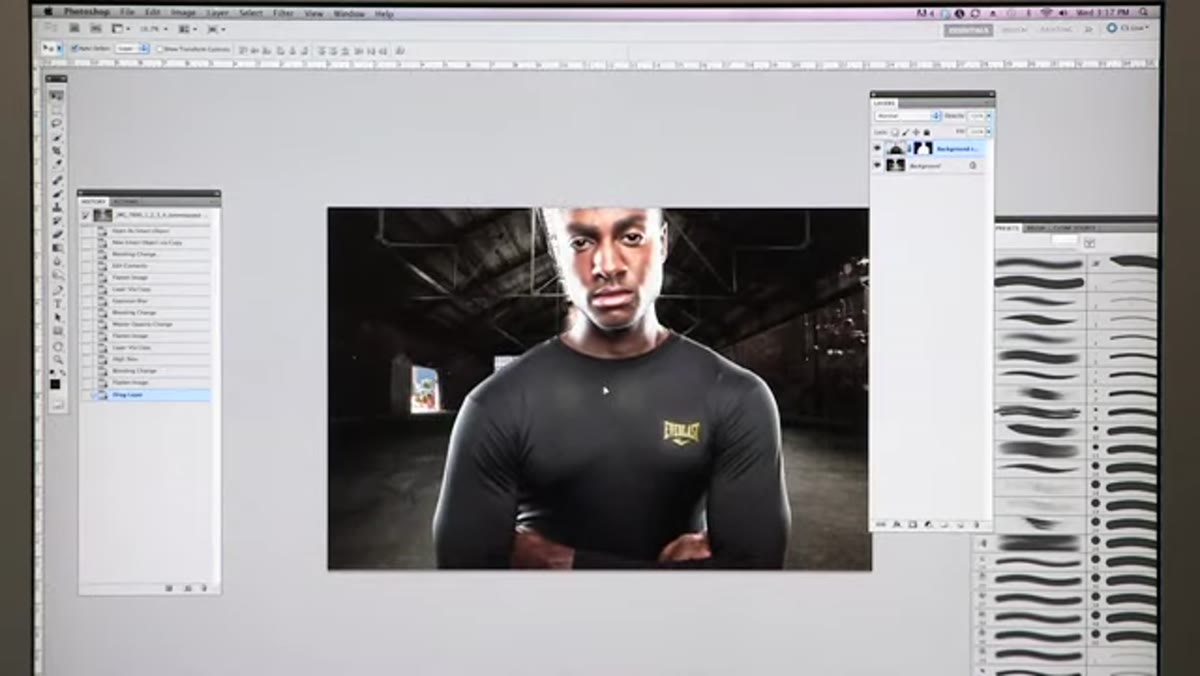 Subject layer being placed and repositioned on background
After the mask is clean, Grimes drops the subject onto the composite backdrop and looks for where the light interaction makes sense. The key question is whether the edge light in the original photo reads as if it’s coming from somewhere believable in the background image. If the rim light in the studio photo is coming from camera right and your backdrop has no light source on that side, the composite will feel off even if viewers can’t explain why.
Subject layer being placed and repositioned on background
After the mask is clean, Grimes drops the subject onto the composite backdrop and looks for where the light interaction makes sense. The key question is whether the edge light in the original photo reads as if it’s coming from somewhere believable in the background image. If the rim light in the studio photo is coming from camera right and your backdrop has no light source on that side, the composite will feel off even if viewers can’t explain why.
He also checks whether the overhead beauty dish still reads correctly in context. The position of the subject on the background changes the visual story. Put them too far back and the overhead light looks disconnected. Too far forward and it fights the background’s natural depth.
What I’d Add From My Own Experience
I’ve tested this three-light setup with a single strobe and two reflectors standing in for the rim banks, which is genuinely something you can try if you don’t have three lights yet. The results aren’t identical, but they’re closer than you’d think. Foam core bounce cards at 45 degrees behind the subject will catch spill from your key light and redirect a little rim separation back at the edges of your subject.
The glycerin tip is the one I hand out most often now. I mentioned it to someone at a local fitness shoot last spring and she looked at me like I’d told her a secret. You can find it next to the hand lotion at most drugstores, and a small bottle will last you a full season of shoots.
The single most important principle in this entire tutorial is that every light has a job. The beauty dish sculpts the face, the rim lights separate the subject, and the HDR range gives you material to work with in post. Once you understand what each light is doing, you can start making deliberate choices instead of just hoping the setup looks good. Watch the full process from Grimes himself right here: Watch the full tutorial on YouTube.
Comments (2)
This is exactly what I needed today. Been struggling with this for weeks.
Tried this technique this morning. Game changer for real.
Leave a Comment