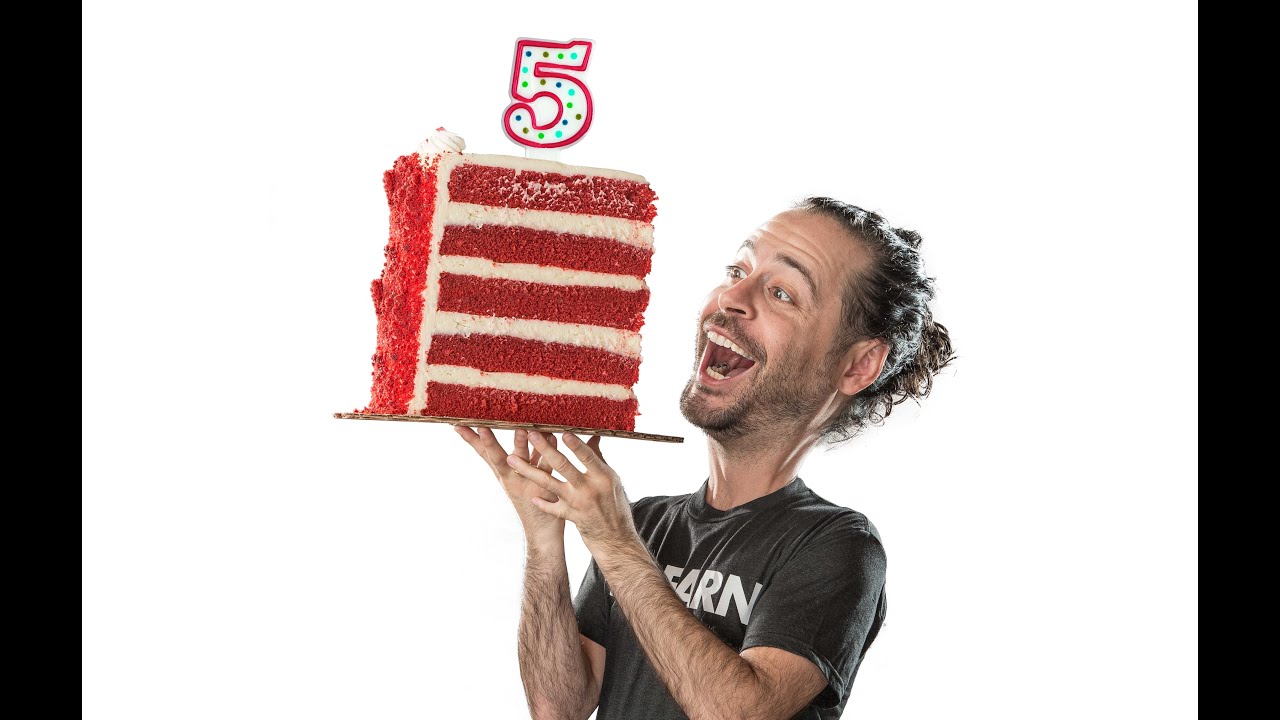
Every so often a photo stops people mid-scroll. You know the kind. Someone posts it, the comments flood in, and half of them are just “wait, how?” That’s exactly what happened when the team at PHLEARN put out their fifth anniversary promo image - a surreal, oversized-head-meets-giant-birthday-cake composite that looked equal parts chaotic and polished. The requests for a breakdown came pouring in, so Aaron Nace did what he does best and made a tutorial out of it.
In this Aaron Nace (PHLEARN) tutorial, Watch the full tutorial on YouTube, he walks through the entire process of building that anniversary image from scratch - starting with a single raw photo of himself holding a piece of cake and ending with a stylized composite that looks nothing like the original frame. What I love about it as a working photographer is that every technique he uses has a life outside of birthday promos. Clean subject extractions, layered composites, and masking complex edges like hair are skills I reach for constantly, whether I’m building a travel mood board or cleaning up a portrait for a client.
The whole workflow is approachable enough for beginners but moves fast enough that intermediate shooters will pick up something useful. Here’s my step-by-step breakdown so you can follow along even without pausing the video every thirty seconds.
Step 1: Start With a Sketch (Before You Ever Open Photoshop)
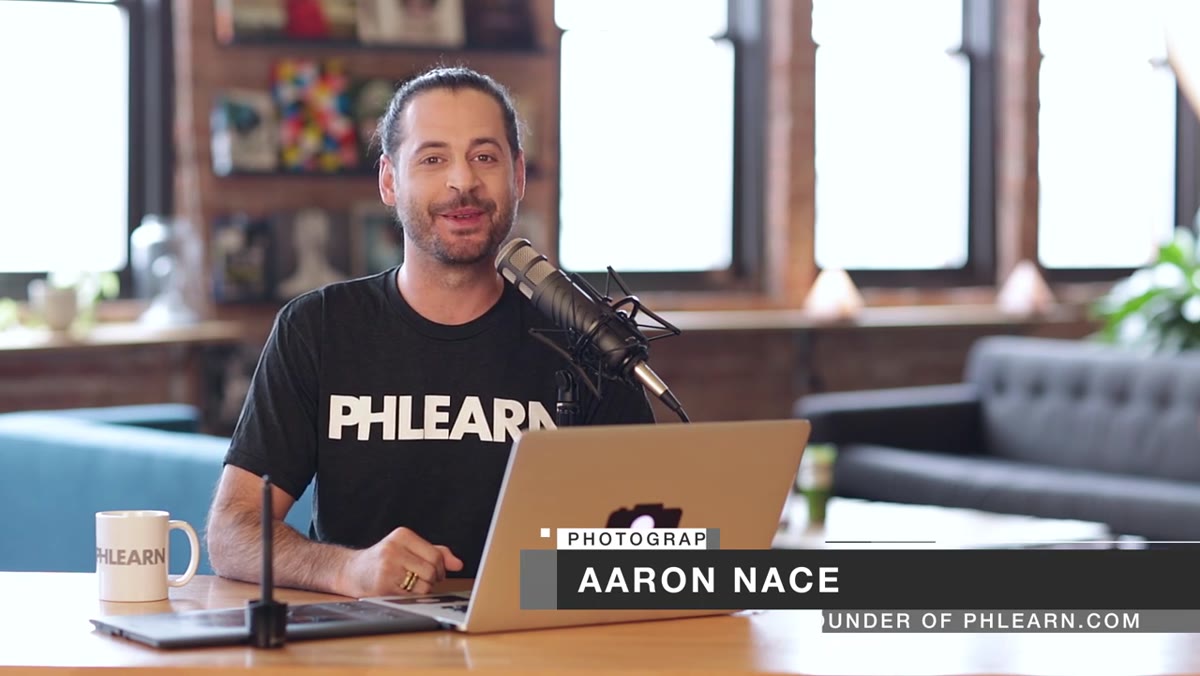 Aaron explaining the pre-shoot planning and sketch concept
This one surprised me the first time I watched the tutorial because it comes before any software is opened. Aaron mentions that before the photo shoot even happened, the team sketched out what they wanted the final image to look like. They knew they wanted a five-layer cake to mark the fifth anniversary. The actual cake they found had three layers. Rather than scrambling on set, they photographed what they had and planned to add layers in post.
Aaron explaining the pre-shoot planning and sketch concept
This one surprised me the first time I watched the tutorial because it comes before any software is opened. Aaron mentions that before the photo shoot even happened, the team sketched out what they wanted the final image to look like. They knew they wanted a five-layer cake to mark the fifth anniversary. The actual cake they found had three layers. Rather than scrambling on set, they photographed what they had and planned to add layers in post.
That planning mindset is worth borrowing for any composite project. If you know going in that you’ll be cutting a subject out, shoot them against a high-contrast background. If you know you’ll be adding elements, leave room in the frame. Decisions made before you shoot save you hours inside Photoshop.
Step 2: Use the Magic Wand Tool to Rough-Select the Background
 Magic Wand tool selected in Photoshop toolbar with tolerance field visible
With the base photo open in Photoshop, Aaron reaches for the Magic Wand tool (keyboard shortcut: W). He sets the tolerance to around 12, which keeps the selection sensitive enough to catch subtle tonal variations without grabbing too much at once. Because the shoot happened on a white seamless backdrop that wasn’t perfectly evenly lit, the background isn’t a uniform value - which is a totally normal real-world situation.
Magic Wand tool selected in Photoshop toolbar with tolerance field visible
With the base photo open in Photoshop, Aaron reaches for the Magic Wand tool (keyboard shortcut: W). He sets the tolerance to around 12, which keeps the selection sensitive enough to catch subtle tonal variations without grabbing too much at once. Because the shoot happened on a white seamless backdrop that wasn’t perfectly evenly lit, the background isn’t a uniform value - which is a totally normal real-world situation.
He clicks on the background to start the selection, then holds Shift and keeps clicking to add areas to the selection piece by piece. This is especially important in spots like the space under an arm or between fingers, where the background peeks through. The goal at this stage is to select everything you want to remove, not everything you want to keep. Once the background is selected, he clicks the layer mask button to hide it, then inverts the mask with Command+I so the subject stays visible and the background disappears.
Step 3: Add a Solid Color Layer to Check Your Cutout
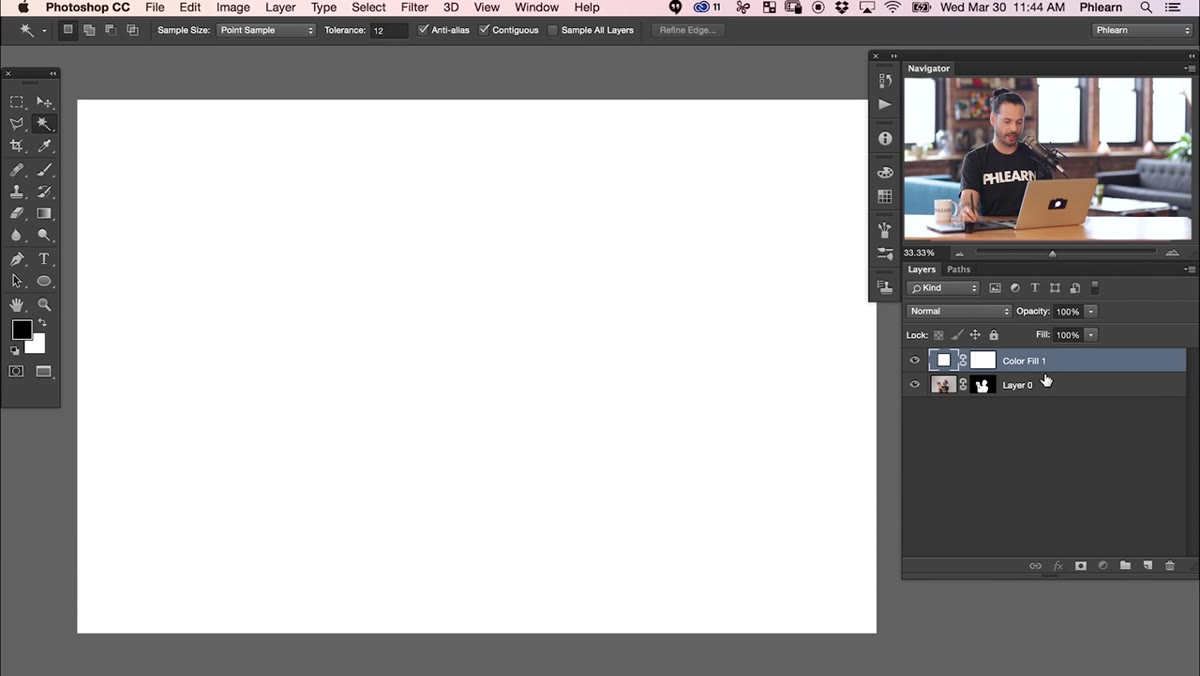 White solid color adjustment layer applied below the subject
Once the rough cutout is done, Aaron adds a Solid Color adjustment layer set to white and places it beneath the subject layer. This gives you a clean, neutral surface to evaluate your edges against. It sounds simple, but this step catches problems you’d otherwise miss - fringing, leftover background pixels, or areas where the mask is eating into the subject.
White solid color adjustment layer applied below the subject
Once the rough cutout is done, Aaron adds a Solid Color adjustment layer set to white and places it beneath the subject layer. This gives you a clean, neutral surface to evaluate your edges against. It sounds simple, but this step catches problems you’d otherwise miss - fringing, leftover background pixels, or areas where the mask is eating into the subject.
This is a habit I’ve picked up for any cutout work. Checking your selection against a flat color (white for dark-edged subjects, gray or black for lighter ones) will save you from sending a client a composite where the subject has a ghost halo around them.
Step 4: Refine Hair and Soft Edges With the Refine Mask Tool
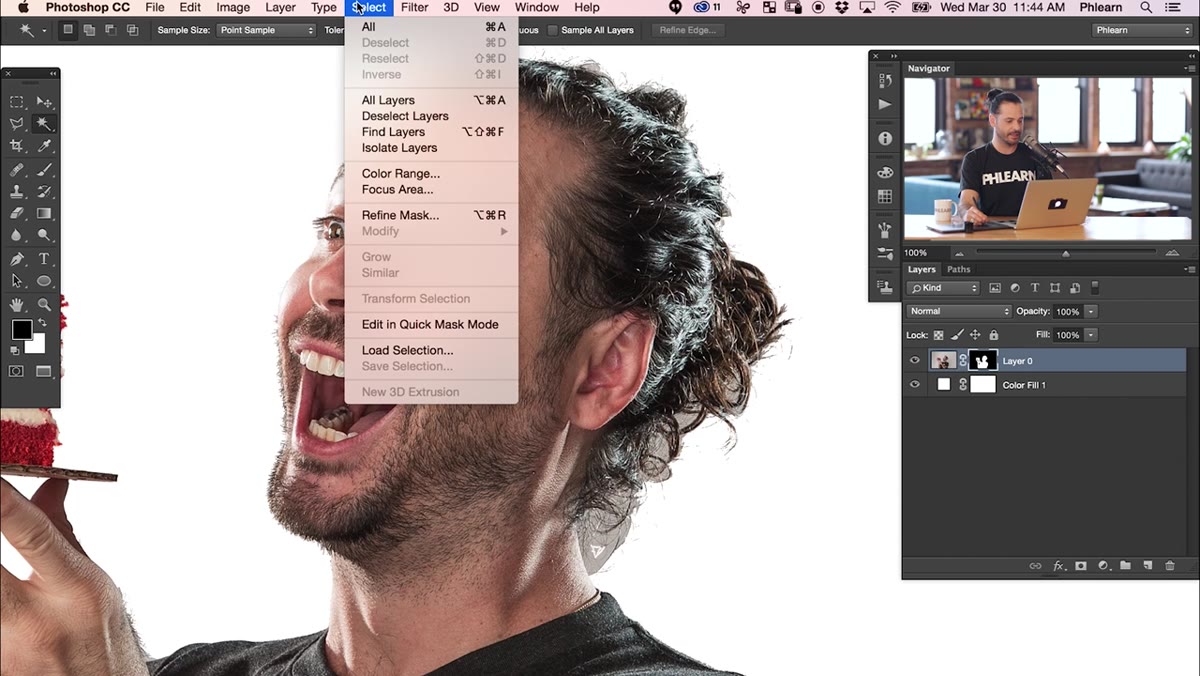 Refine Mask dialog open with Refine Radius tool active
Here’s where the real magic happens. With the layer mask selected, Aaron goes to Select, then down to Refine Mask. Inside that dialog, he picks up the Refine Radius tool - a brush-based tool that lets Photoshop analyze soft or complex edges on its own. Hair is the classic use case, and arm hair counts too.
Refine Mask dialog open with Refine Radius tool active
Here’s where the real magic happens. With the layer mask selected, Aaron goes to Select, then down to Refine Mask. Inside that dialog, he picks up the Refine Radius tool - a brush-based tool that lets Photoshop analyze soft or complex edges on its own. Hair is the classic use case, and arm hair counts too.
He simply paints over the areas where the cutout looks rough or the edge is unclear, and Photoshop recalculates the mask automatically based on what it detects underneath the brush. You don’t have to be precise. Paint loosely around the problem area, let go, and let the algorithm do its work. The key setting to experiment with here is the radius, which controls how far out from your original selection edge Photoshop looks for detail to recover. Start small and increase it only if the result looks muddy.
Step 5: Invert the Selection and Apply the Mask
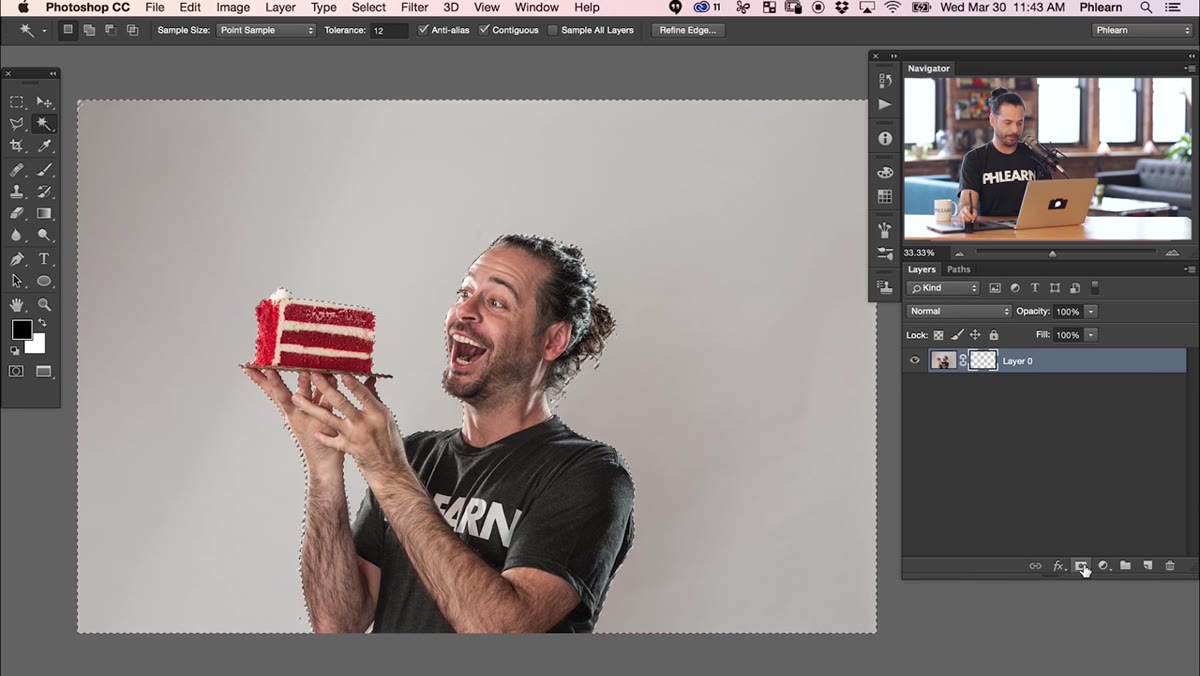 Layer mask thumbnail visible with subject isolated on transparent background
After refining, you’ll want to confirm the mask is applied the right way - subject visible, background transparent. Aaron inverts his initial mask with Command+I because the Magic Wand selected the background first, not the subject. If you select the subject directly instead of the background, you may not need to invert. Either way, check the mask thumbnail in the Layers panel: white areas show, black areas hide. Paint with black to remove parts of the selection, white to bring them back.
Layer mask thumbnail visible with subject isolated on transparent background
After refining, you’ll want to confirm the mask is applied the right way - subject visible, background transparent. Aaron inverts his initial mask with Command+I because the Magic Wand selected the background first, not the subject. If you select the subject directly instead of the background, you may not need to invert. Either way, check the mask thumbnail in the Layers panel: white areas show, black areas hide. Paint with black to remove parts of the selection, white to bring them back.
At this point you should have a clean subject cutout ready to composite into whatever scene or layout you’re building.
A Note on Shooting for Composites
I’ve learned the hard way that the photo you shoot has to cooperate with the edit you’re planning. When I first started doing composite work, I’d grab a great portrait and then spend twice as long fighting the Photoshop tools because the lighting was inconsistent or the background was a cluttered mess. Aaron’s approach of sketching the concept before the shoot is something I now treat as non-negotiable for any planned composite, even simple ones.
If you’re working on a birthday shoot or any styled photo with multiple planned elements, block out your layers ahead of time the way you’d block out a scene. Decide which elements will be photographed separately. Plan your lighting so everything matches when you layer it together. The camera work should serve the post-production, not fight it.
The biggest takeaway from this tutorial is that a believable composite starts long before Photoshop opens. Strong selections, good Refine Mask technique, and a clean checking process will handle the technical side - but none of that matters if the original photo wasn’t shot with the composite in mind. Get those two things working together and you’ll spend less time fixing and more time creating.
Watch the full tutorial on YouTube to see Aaron complete the full composite, including the five-layer cake construction and the final layout work.
Comments
Leave a Comment