If you’ve been using Lightroom Classic and Camera Raw interchangeably, assuming they’re always in sync, October 2024 is the month that assumption finally breaks down. Adobe pushed a significant update to Camera Raw that did not land in Lightroom Classic or Lightroom Desktop at the same time, which means if you’re doing your raw editing in Photoshop’s Camera Raw plugin, you have access to tools your Lightroom-only friends don’t have yet. That gap matters in a real workflow.
I spotted this in a tutorial by Matt Kloskowski, and it immediately caught my attention because the headliner feature, a reworked denoise system, is something I deal with every single week. Travel shooting means high ISO files are just part of life. I’ve shot interiors with almost no available light, golden-hour wildlife that required pushing sensitivity way up, and night markets in Southeast Asia where the tradeoff between noise and a usable shutter speed is a constant negotiation. Anything that makes managing noise more flexible and less final is worth stopping for. Watch the full tutorial on YouTube if you want to follow along visually while you read.
Here is a step-by-step walkthrough of everything covered, written so you can follow it without having the video open.
Step 1: Confirm You’re Running Camera Raw 17 or Higher
 Gear icon menu open in Camera Raw top right
Before anything else, check your version. The features in this update require Camera Raw 17 or above. Open Photoshop, drop a raw file into Camera Raw, and check the version number in your preferences or update via the Creative Cloud desktop app if you need to. Running an older version means none of the new panels or options will appear, and you’ll spend time wondering why the interface doesn’t match what you’re seeing described here.
Gear icon menu open in Camera Raw top right
Before anything else, check your version. The features in this update require Camera Raw 17 or above. Open Photoshop, drop a raw file into Camera Raw, and check the version number in your preferences or update via the Creative Cloud desktop app if you need to. Running an older version means none of the new panels or options will appear, and you’ll spend time wondering why the interface doesn’t match what you’re seeing described here.
Step 2: Enable New AI Features in Technology Previews
 Technology Previews checkbox highlighted in Camera Raw settings
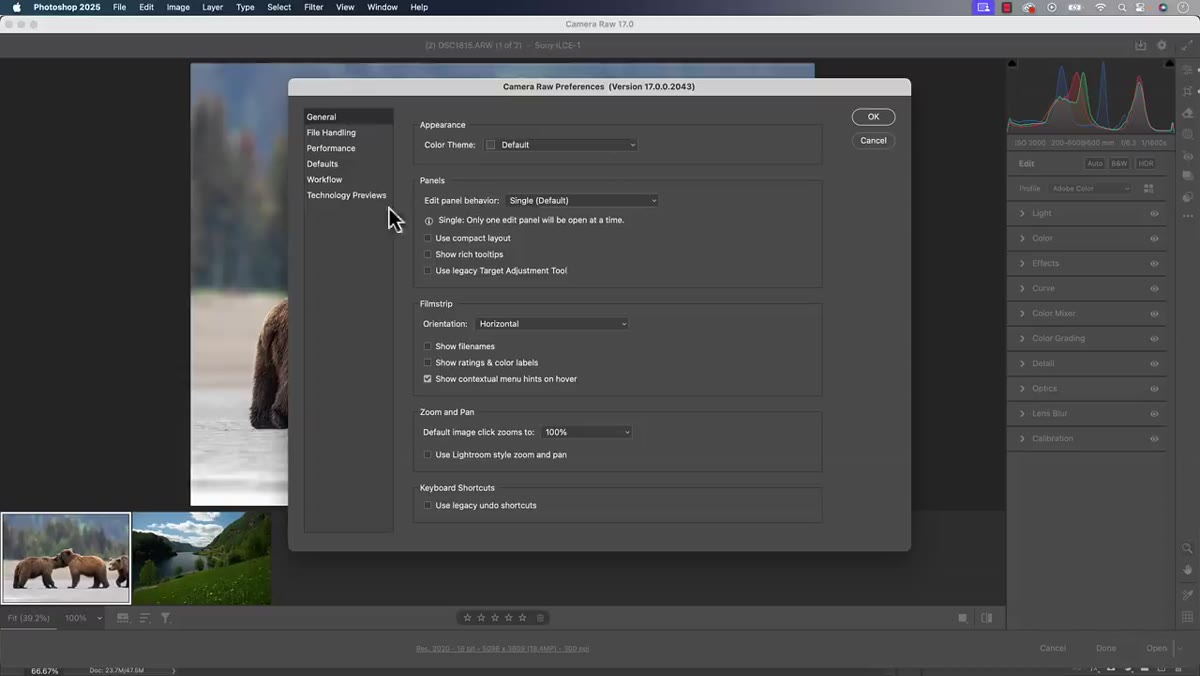
Once you’re on the right version, the new tools are still not active by default. Click the gear icon in the top right corner of Camera Raw, navigate to Technology Previews, and check the box labeled “New AI Features and Settings Panel.” Without this step, the updated denoise behavior and other new controls simply won’t show up. It’s a one-time toggle, but it’s easy to miss if you updated and then went looking for the new stuff without finding it.
Technology Previews checkbox highlighted in Camera Raw settings
Once you’re on the right version, the new tools are still not active by default. Click the gear icon in the top right corner of Camera Raw, navigate to Technology Previews, and check the box labeled “New AI Features and Settings Panel.” Without this step, the updated denoise behavior and other new controls simply won’t show up. It’s a one-time toggle, but it’s easy to miss if you updated and then went looking for the new stuff without finding it.
While you’re in that settings panel, Matt also points out a quality-of-life tip worth taking: if the tooltips that pop up all over Camera Raw drive you a little crazy, you can disable them under the General section. Not a new feature, but worth knowing.
Step 3: Open the Detail Panel to Access the Redesigned Denoise Tool
 Detail panel open showing denoise checkbox and slider
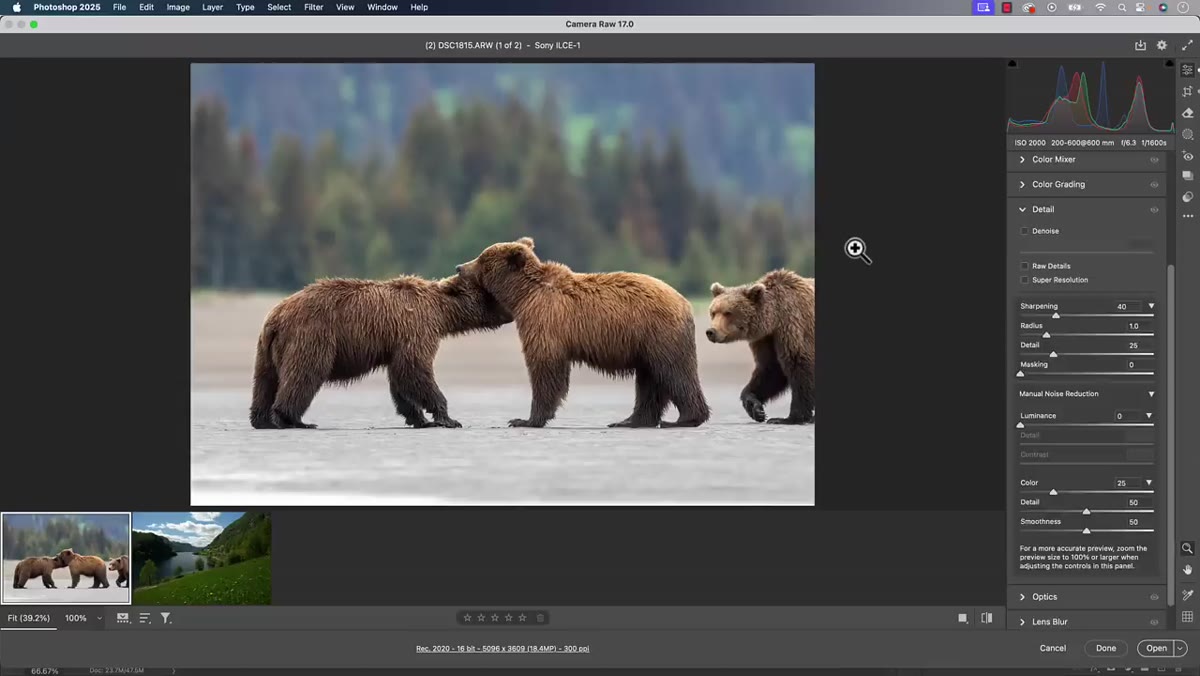
With technology previews enabled, open your raw file and go to the Detail panel. You’ll see the denoise workflow has changed. Previously, running AI denoise forced you to commit to a specific strength value, and it would automatically create a separate DNG copy of your file to apply the processing to. That copy was your working file going forward. There was no easy way to revisit the decision without starting over.
Detail panel open showing denoise checkbox and slider
With technology previews enabled, open your raw file and go to the Detail panel. You’ll see the denoise workflow has changed. Previously, running AI denoise forced you to commit to a specific strength value, and it would automatically create a separate DNG copy of your file to apply the processing to. That copy was your working file going forward. There was no easy way to revisit the decision without starting over.
Now there is a checkbox that activates denoise directly on your original raw file. Check it, let Camera Raw process the file (it still takes a minute, same as before), and when it’s done, you’ll see a slider that lets you adjust the strength of the noise reduction at any time.
Step 4: Use the Slider to Dial In Your Noise Reduction Amount
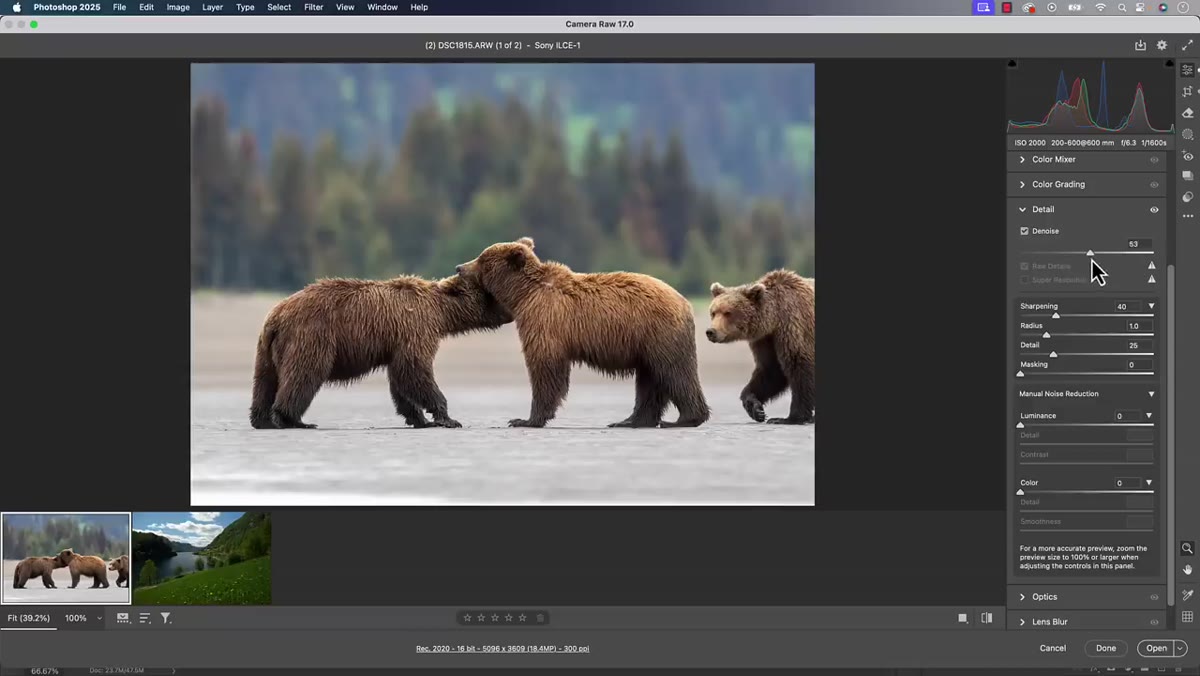 Denoise adjustment slider visible after processing completes
The slider is the real change here. In the old workflow, you were asked to set a number before you could see the result in full context, which always felt like guessing. Now the denoise processes first, and then you use the slider to find the right level for that specific image. For a wildlife shot at ISO 2000, you might want something moderate. For a dark interior at ISO 6400, you’ll likely push it further.
Denoise adjustment slider visible after processing completes
The slider is the real change here. In the old workflow, you were asked to set a number before you could see the result in full context, which always felt like guessing. Now the denoise processes first, and then you use the slider to find the right level for that specific image. For a wildlife shot at ISO 2000, you might want something moderate. For a dark interior at ISO 6400, you’ll likely push it further.
Matt mentions he historically settled between 60 and 70 for most of his work and rarely felt the need to revisit it. That tracks with my experience too. But the point is that now if you open a file three weeks later and decide the denoise was too aggressive, you can soften it. That flexibility is the actual upgrade.
Step 5: Understand What “Non-Destructive Denoise” Actually Means
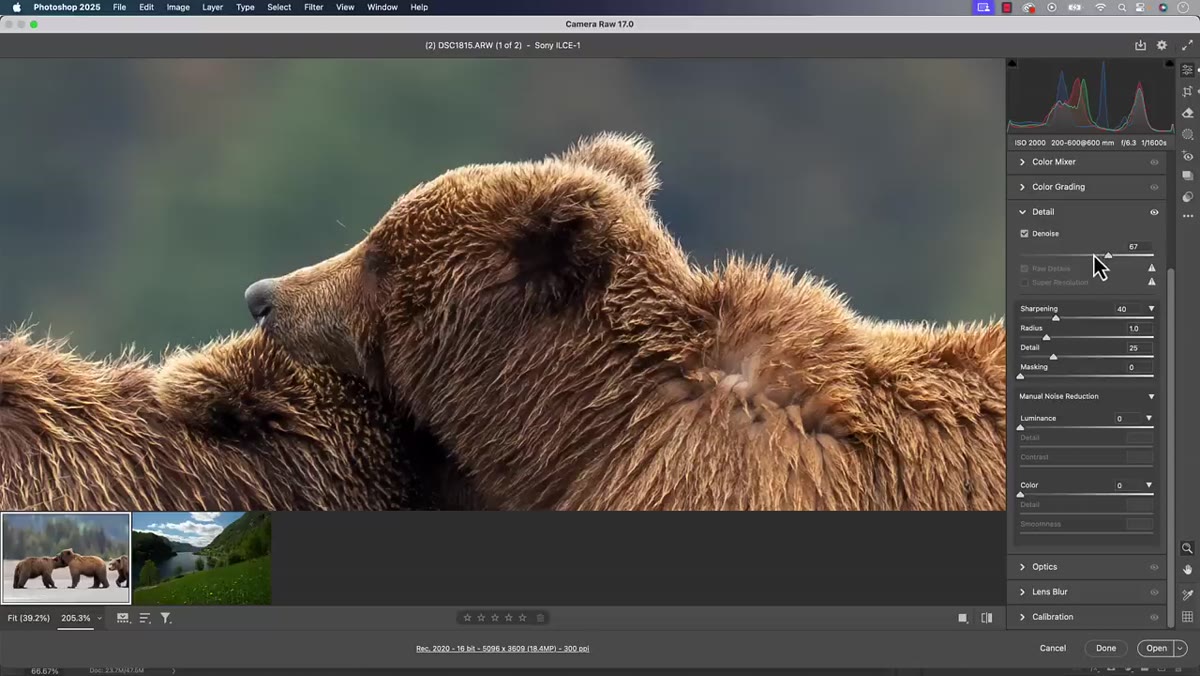 File panel showing no separate DNG copy created
The biggest structural change is that Camera Raw no longer creates a separate DNG file when you apply denoise. Previously that copied DNG was the mechanism that allowed any kind of revisit at all, but it also cluttered your file system, added storage overhead, and created a slightly confusing relationship between the copy and the original raw file. Now the denoise is stored as a setting on the original raw, just like your exposure or white balance adjustments. Close the file, reopen it later, and your denoise settings are right there, fully editable.
File panel showing no separate DNG copy created
The biggest structural change is that Camera Raw no longer creates a separate DNG file when you apply denoise. Previously that copied DNG was the mechanism that allowed any kind of revisit at all, but it also cluttered your file system, added storage overhead, and created a slightly confusing relationship between the copy and the original raw file. Now the denoise is stored as a setting on the original raw, just like your exposure or white balance adjustments. Close the file, reopen it later, and your denoise settings are right there, fully editable.
Matt is careful to note that the old method was technically non-destructive too, because the original raw always existed. But this is cleaner, simpler, and more consistent with how every other adjustment in Camera Raw already behaves.
Step 6: Note Which Features Are and Aren’t in Lightroom Yet
 Side-by-side reference to Camera Raw vs Lightroom feature availability
Only one feature from this October update is also available in Lightroom Classic and Lightroom Desktop: the updated generative remove or generative erase tool. Everything else, including the redesigned denoise workflow, is Camera Raw-only for now. Adobe has historically kept these applications in close feature parity, so Lightroom will likely catch up, but if you need these tools today, Camera Raw inside Photoshop is where you need to be working.
Side-by-side reference to Camera Raw vs Lightroom feature availability
Only one feature from this October update is also available in Lightroom Classic and Lightroom Desktop: the updated generative remove or generative erase tool. Everything else, including the redesigned denoise workflow, is Camera Raw-only for now. Adobe has historically kept these applications in close feature parity, so Lightroom will likely catch up, but if you need these tools today, Camera Raw inside Photoshop is where you need to be working.
My Take: When the Friction Removal Actually Matters
The thing about improvements to existing tools is that they’re easy to undervalue. A new AI feature with a flashy name grabs attention. A denoise workflow that no longer creates an extra file and lets you adjust after the fact sounds like housekeeping. But in practice, reducing friction at steps you repeat hundreds of times across a year of shooting adds up fast.
I have folders of older travel files I’ve been reluctant to denoise aggressively because I was worried about locking in the wrong level. The idea that I could now revisit those decisions is genuinely useful to me, not just theoretically. If you’re a Lightroom-first shooter, keep an eye on Adobe’s update notes. But if you work in Camera Raw regularly, enable those technology previews right now and spend ten minutes with a noisy file. You’ll feel the difference immediately.
The single most important thing to take from this update is simple: check that Technology Previews checkbox. Everything else follows from that one step. The new denoise experience is meaningfully better, and it’s sitting right there waiting for you once you flip the switch.
Watch the full tutorial on YouTube to see Matt walk through each feature with live demonstrations on actual wildlife and landscape photos.
Comments (5)
The before and after really sells it. Incredible difference.
Tried this technique this morning. Game changer for real.
Finally someone explains this in a way that actually makes sense.
The before and after really sells it. Incredible difference.
Excellent tutorial. I'd add that from a business standpoint, this technique is incredibly versatile.
Leave a Comment