Every Sunday morning I take a photo walk around my neighborhood in Seattle. Rain, shine, the occasional hailstorm — I’m out there. And for years, the footage I shot on those walks had this weird, jittery quality I couldn’t shake. My photos looked fine. My videos looked like I filmed them through a nervous system. I adjusted exposure, I fiddled with ISO, I blamed the camera. Turns out I was fighting the wrong problem entirely.
Watch the full tutorial on YouTube
In this Peter McKinnon tutorial — part of his quick-hit “Two Minute Tuesday” series — he breaks down exactly why outdoor video looks rough even when your camera settings seem correct, and what a simple piece of glass in front of your lens can do to fix it. I’ve watched a lot of gear-focused tutorials that end up being thinly disguised shopping lists, but this one actually explains the physics of the problem before offering the solution. That’s the part worth paying attention to.
Step 1: Understand What “Professional-Looking” Video Actually Means
 Smooth blurred background behind McKinnon while speaking to camera
When people say a video looks “cinematic” or “professional,” they’re usually reacting to one specific quality: a shallow depth of field, where the subject is sharp and the background melts into a soft blur. That look tells your viewer’s brain that someone with a real camera made this. It’s not magic. It comes from shooting at a wide aperture, meaning a low f-stop number like f/1.4 or f/1.8, which lets in a lot of light and keeps only a narrow plane of the scene in focus.
Smooth blurred background behind McKinnon while speaking to camera
When people say a video looks “cinematic” or “professional,” they’re usually reacting to one specific quality: a shallow depth of field, where the subject is sharp and the background melts into a soft blur. That look tells your viewer’s brain that someone with a real camera made this. It’s not magic. It comes from shooting at a wide aperture, meaning a low f-stop number like f/1.4 or f/1.8, which lets in a lot of light and keeps only a narrow plane of the scene in focus.
The problem is that wide apertures and bright outdoor light are fundamentally in conflict. Open your lens all the way up on a sunny day and your footage blows out completely. Your instinct might be to raise the shutter speed to compensate. That’s where things go sideways, and it’s the core problem this tutorial solves.
Step 2: Learn the 180-Degree Shutter Rule Before You Touch Anything Else
 McKinnon explaining shutter speed to frame rate relationship
This is the rule I wish someone had explained to me when I started shooting video. When you record video, your shutter speed needs to be roughly double your frame rate. Shooting at 24 frames per second? Your shutter speed should sit at 1/50th of a second. Shooting at 30fps? Set it to 1/60th. This ratio is called the 180-degree shutter angle, borrowed from film camera mechanics, and it’s what gives footage that natural, pleasing motion blur when something moves across the frame.
McKinnon explaining shutter speed to frame rate relationship
This is the rule I wish someone had explained to me when I started shooting video. When you record video, your shutter speed needs to be roughly double your frame rate. Shooting at 24 frames per second? Your shutter speed should sit at 1/50th of a second. Shooting at 30fps? Set it to 1/60th. This ratio is called the 180-degree shutter angle, borrowed from film camera mechanics, and it’s what gives footage that natural, pleasing motion blur when something moves across the frame.
When you break that ratio by cranking your shutter speed up to, say, 1/250th to deal with bright light, movement looks sharp and staccato instead of fluid. It’s technically exposed correctly but it feels wrong. Your eye knows something is off even if your brain can’t name it. Keeping your shutter speed locked at double your frame rate is non-negotiable for clean-looking video.
Step 3: Recognize Why Bright Outdoor Light Creates an Impossible Situation
 Over-exposed outdoor shot before ND filter is applied
So here’s the trap you’re in without any additional tools. You want a wide aperture for that shallow background. You need a fixed shutter speed to maintain natural motion. But outside in daylight, those two settings together let in far too much light and your footage is blown out and unusable. You can’t close the aperture without losing the background blur. You can’t raise the shutter without ruining the motion quality. You’re stuck.
Over-exposed outdoor shot before ND filter is applied
So here’s the trap you’re in without any additional tools. You want a wide aperture for that shallow background. You need a fixed shutter speed to maintain natural motion. But outside in daylight, those two settings together let in far too much light and your footage is blown out and unusable. You can’t close the aperture without losing the background blur. You can’t raise the shutter without ruining the motion quality. You’re stuck.
Lowering your ISO helps a little, but most cameras bottom out at ISO 100 and that still isn’t enough to compensate on a bright day. This is the exact problem ND filters were designed to solve, and once you understand why the problem exists, the solution makes complete sense.
Step 4: Add an ND Filter to Your Lens
 McKinnon sliding ND filter in front of lens while filming outdoors
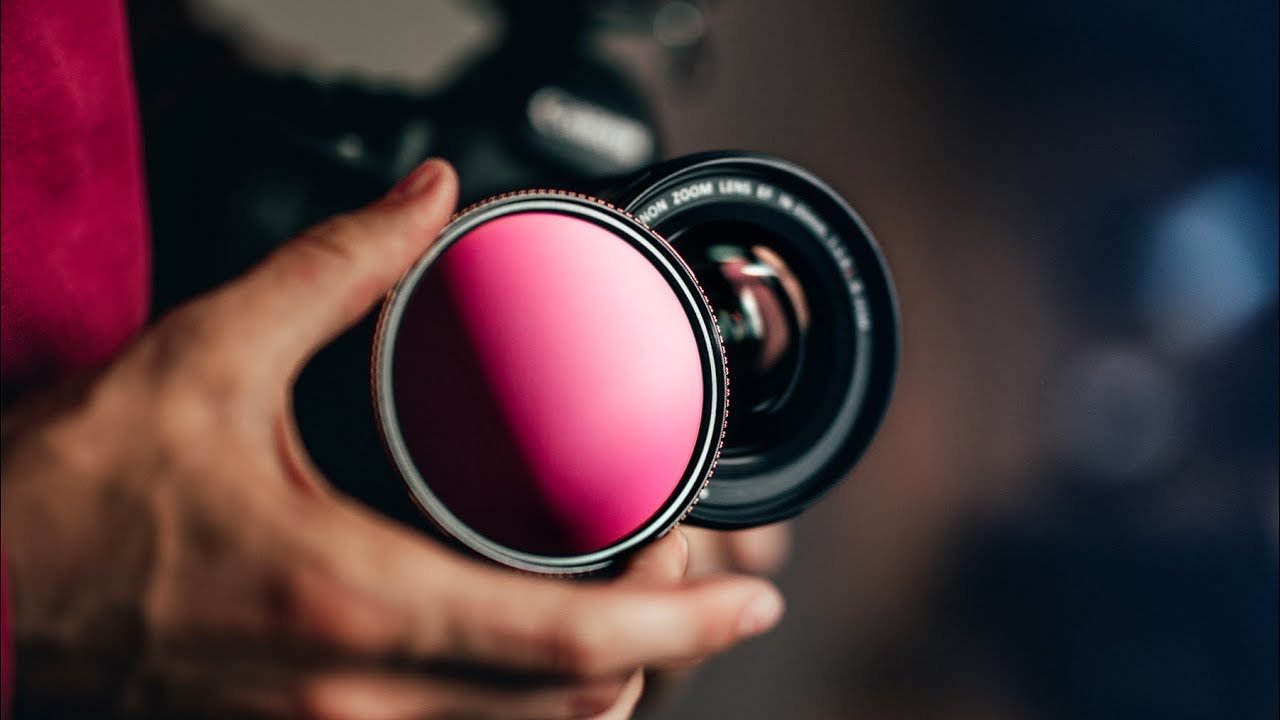
An ND filter is a piece of darkened optical glass that screws onto the front of your lens (or attaches via a magnetic mount system, depending on your setup). It reduces the amount of light entering the camera without changing anything about your aperture, shutter speed, or ISO. McKinnon describes it as sunglasses for your camera, which is genuinely the clearest explanation I’ve heard. You’re not changing the exposure settings. You’re just dimming the incoming light so those settings can do their job.
McKinnon sliding ND filter in front of lens while filming outdoors
An ND filter is a piece of darkened optical glass that screws onto the front of your lens (or attaches via a magnetic mount system, depending on your setup). It reduces the amount of light entering the camera without changing anything about your aperture, shutter speed, or ISO. McKinnon describes it as sunglasses for your camera, which is genuinely the clearest explanation I’ve heard. You’re not changing the exposure settings. You’re just dimming the incoming light so those settings can do their job.
ND filters come in different strengths, measured by how many stops of light they block. A 3-stop ND is great for overcast days or golden hour. An ND1000 (blocking about 10 stops of light) is what you reach for at high noon in direct sun. McKinnon shows an ND1000 in the tutorial, and he is not exaggerating when he says it looks like a piece of pure black glass. Make sure you’re buying filters sized to match your lens’s filter thread diameter, which is printed on the lens barrel next to a circle symbol.
Step 5: Compare the Shot Before and After the Filter
 Side-by-side visible difference as filter slides across lens
This is the moment in the tutorial that makes everything click. McKinnon holds the ND filter in front of his lens mid-shot and you can see the image transform in real time. The blown-out, flat look of the unfiltered outdoor shot immediately drops into a properly exposed frame with a creamy, soft background. The aperture hasn’t changed. The shutter speed hasn’t changed. Just less light hitting the sensor.
Side-by-side visible difference as filter slides across lens
This is the moment in the tutorial that makes everything click. McKinnon holds the ND filter in front of his lens mid-shot and you can see the image transform in real time. The blown-out, flat look of the unfiltered outdoor shot immediately drops into a properly exposed frame with a creamy, soft background. The aperture hasn’t changed. The shutter speed hasn’t changed. Just less light hitting the sensor.
When you try this yourself, meter your shot first without the filter so you know what exposure you’re aiming for. Then slide your ND filter on and adjust the filter strength (if you’re using a variable ND) or swap filter densities until your histogram looks balanced. This is a tactile skill that gets faster with practice. I now do it reflexively before I start rolling.
What I’d Add From My Own Shooting
Variable ND filters are worth the extra cost for beginners. A fixed ND1000 is great but you’ll find yourself swapping filters constantly as the light changes throughout a shoot. A variable ND lets you twist a ring to dial in exactly the right amount of darkening, which is far more practical when you’re moving between shade and open sky. The tradeoff is that cheap variable NDs can introduce an X-pattern cross-polarization artifact at their maximum setting, so buy from a reputable brand rather than grabbing the cheapest option on a resale site. I learned that the expensive way on a trip to Iceland where half my footage had a dark X streaked across the sky.
One more note: if you mostly shoot stills rather than video, ND filters still earn their keep. I’ve used an ND6 to shoot long-exposure waterfall shots in the middle of the afternoon without needing to wait for dusk. That’s how I finally got the waterfall shot I’d been chasing for three days on a trip to Oregon (and yes, I did miss dinner). The filter opens up creative possibilities that have nothing to do with video at all.
The single most important idea in this tutorial is the 180-degree shutter rule. Everything else follows from it. Once you understand why your shutter speed has to stay locked at double your frame rate, the need for an ND filter becomes obvious rather than optional. It’s not a luxury accessory — it’s the only way to shoot video outdoors with a wide aperture and maintain proper exposure at the same time.
Watch the full tutorial on YouTube to see the before-and-after comparison McKinnon demonstrates live on camera. Seeing the filter slide across the lens in real time is genuinely more convincing than any written explanation, mine included.
Comments (1)
Wow, I had no idea you could do this. Mind blown.
Leave a Comment