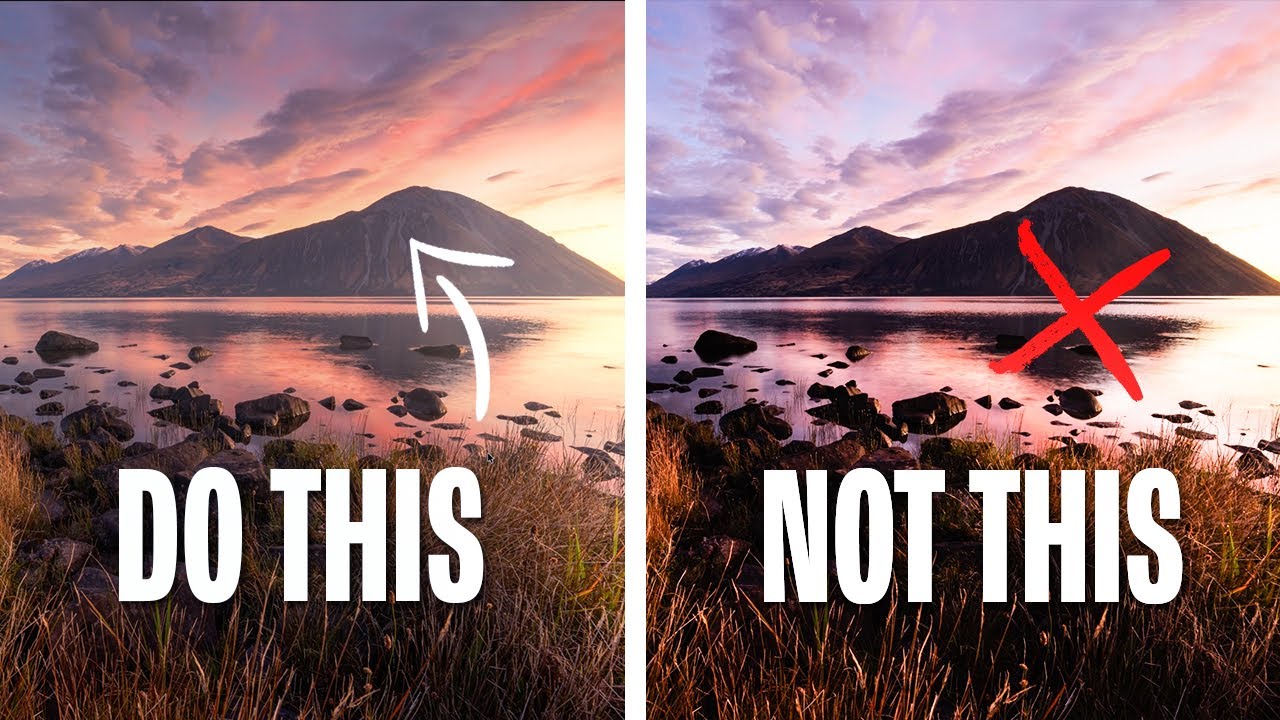
Every Sunday morning I take a photo walk around Seattle. No agenda, no client brief, just me and whatever light shows up. And for the first year of doing that, I’d come home with these gorgeous raw files that somehow looked flat and overworked by the time I was done editing them. I couldn’t figure out what I was doing wrong. I knew my way around Lightroom well enough, but something in my process was quietly killing the images.
That’s exactly why this tutorial from William Patino landed so hard for me. Watch the full tutorial on YouTube - he walks through a sunrise shot taken at Lake O’Hara and uses it as a live case study for the editing habits that most of us pick up early and never question. The mistakes he covers aren’t exotic or obscure. They’re the default moves. Which is what makes them so easy to miss.
What follows is my breakdown of the key steps from his tutorial, written so you can follow along in either Lightroom or Adobe Camera Raw - the panels are nearly identical, so whichever you use, you’re covered.
Step 1: Balance the Dynamic Range First, Before You Do Anything Else
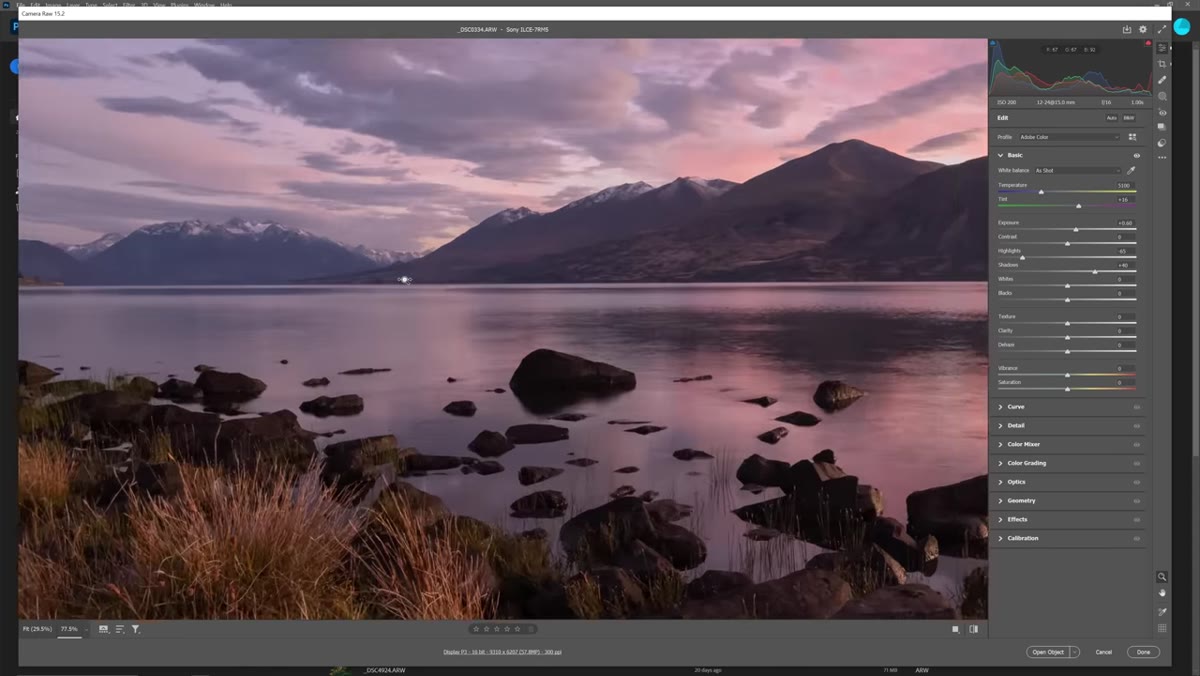
 Exposure slider being raised on an unedited sunrise RAW file
Before touching any specific tool, get the image into a workable state by addressing the tonal spread. Patino does this by lifting the overall Exposure slider just enough so that the shadows and highlights feel roughly balanced - not perfect, just visible. From there, pull the Highlights slider down to recover sky detail, and nudge the Shadows slider up, somewhere around +40, to open up the darker areas without overcommitting. Keep your eye on the histogram the whole time. You want to see data across the full range without either end smashing into the wall.
Exposure slider being raised on an unedited sunrise RAW file
Before touching any specific tool, get the image into a workable state by addressing the tonal spread. Patino does this by lifting the overall Exposure slider just enough so that the shadows and highlights feel roughly balanced - not perfect, just visible. From there, pull the Highlights slider down to recover sky detail, and nudge the Shadows slider up, somewhere around +40, to open up the darker areas without overcommitting. Keep your eye on the histogram the whole time. You want to see data across the full range without either end smashing into the wall.
This isn’t the final edit - it’s a starting point. Think of it as getting the room lit before you start arranging furniture.
Step 2: Understand Why the Contrast Slider Is Probably Hurting You
 Contrast slider being cranked right, histogram spreading and clipping
Here’s the one that changed how I think about editing. The global Contrast slider in Lightroom and ACR does exactly what it says - it pushes darks darker and brights brighter across the entire image. Watch the histogram when you drag it to the right and you’ll see both ends begin to clip almost immediately on a scene that already has strong light and shadow.
Contrast slider being cranked right, histogram spreading and clipping
Here’s the one that changed how I think about editing. The global Contrast slider in Lightroom and ACR does exactly what it says - it pushes darks darker and brights brighter across the entire image. Watch the histogram when you drag it to the right and you’ll see both ends begin to clip almost immediately on a scene that already has strong light and shadow.
But the bigger problem isn’t the clipping. It’s what happens to depth. A high-contrast scene like a mountain landscape already has limited tonal range in the distance - that atmospheric haze is what gives the image its sense of space. When you crank global contrast, you darken those far-off shadows and crush that depth. The image starts to look like a flat graphic instead of a three-dimensional place. Patino’s rule is simple: if the histogram is already pushed wide, adding more global contrast is taking away data you can’t get back.
Step 3: Use Atmospheric Logic to Guide Your Editing Decisions
 Zoomed-in view of distant mountain shadows vs. foreground rocks
This is the concept that I wish someone had handed me on a card when I started. In nature, shadows in the foreground are deeper and richer than shadows in the distance. That’s not a stylistic choice - that’s just how light behaves through atmosphere. Landscape painters have understood this for centuries. They build their scenes from the back forward, starting with muted, low-contrast tones in the distance and introducing true blacks only as they reach the foreground.
Zoomed-in view of distant mountain shadows vs. foreground rocks
This is the concept that I wish someone had handed me on a card when I started. In nature, shadows in the foreground are deeper and richer than shadows in the distance. That’s not a stylistic choice - that’s just how light behaves through atmosphere. Landscape painters have understood this for centuries. They build their scenes from the back forward, starting with muted, low-contrast tones in the distance and introducing true blacks only as they reach the foreground.
When you edit with this in mind, you stop thinking about the image as a single flat object to adjust and start thinking about it as a layered environment. The foreground can handle strong contrast. The background should stay soft.
Step 4: Switch from Global to Local Adjustments for Contrast
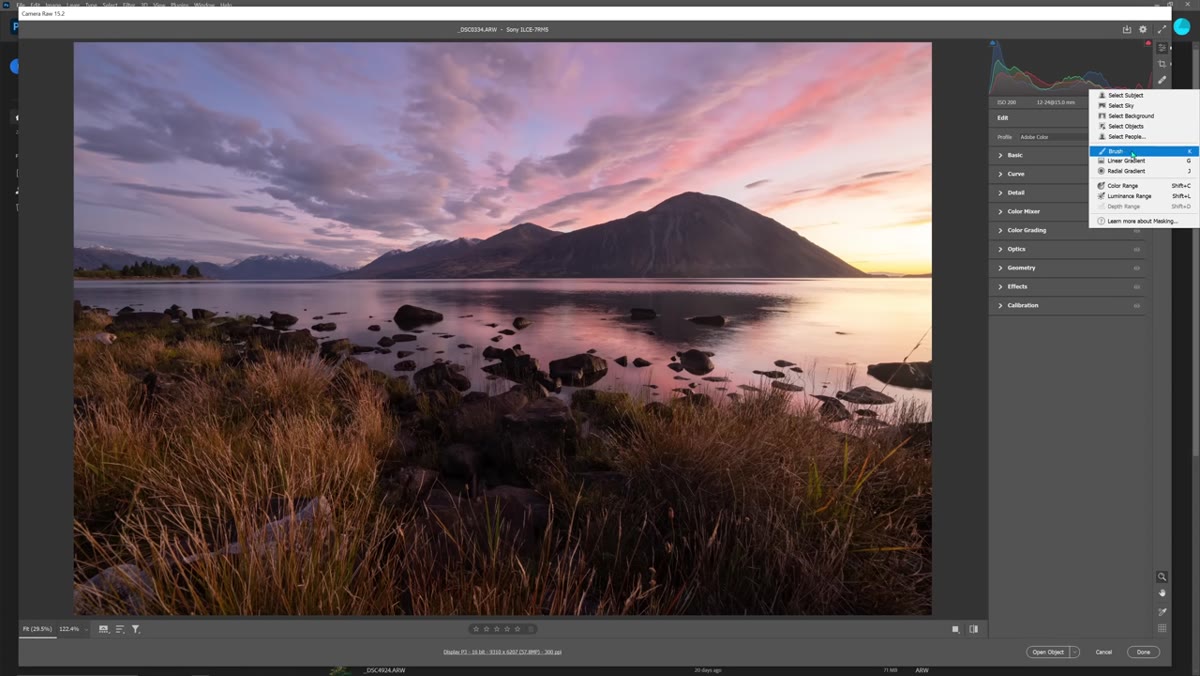 Masking panel open with Adjustment Brush selected in ACR
The fix Patino recommends is straightforward once you understand the problem: stop using the global Contrast slider for this kind of work and use the Masking or Adjustment Brush tools instead. In Lightroom, click on Masking. In Adobe Camera Raw, look for the same panel - it gives you access to tools that let you paint adjustments onto specific areas of the image rather than the whole frame.
Masking panel open with Adjustment Brush selected in ACR
The fix Patino recommends is straightforward once you understand the problem: stop using the global Contrast slider for this kind of work and use the Masking or Adjustment Brush tools instead. In Lightroom, click on Masking. In Adobe Camera Raw, look for the same panel - it gives you access to tools that let you paint adjustments onto specific areas of the image rather than the whole frame.
This means you can add contrast to the foreground rocks without touching the mountain in the background. You can deepen the shadows in the immediate scene while keeping those distant tones airy and separated. The controls you use are the same - Contrast, Shadows, Highlights - but now they’re targeted. That’s the difference between a photo that looks processed and one that looks real.
Step 5: Check Your Histogram at Every Stage, Not Just at the End
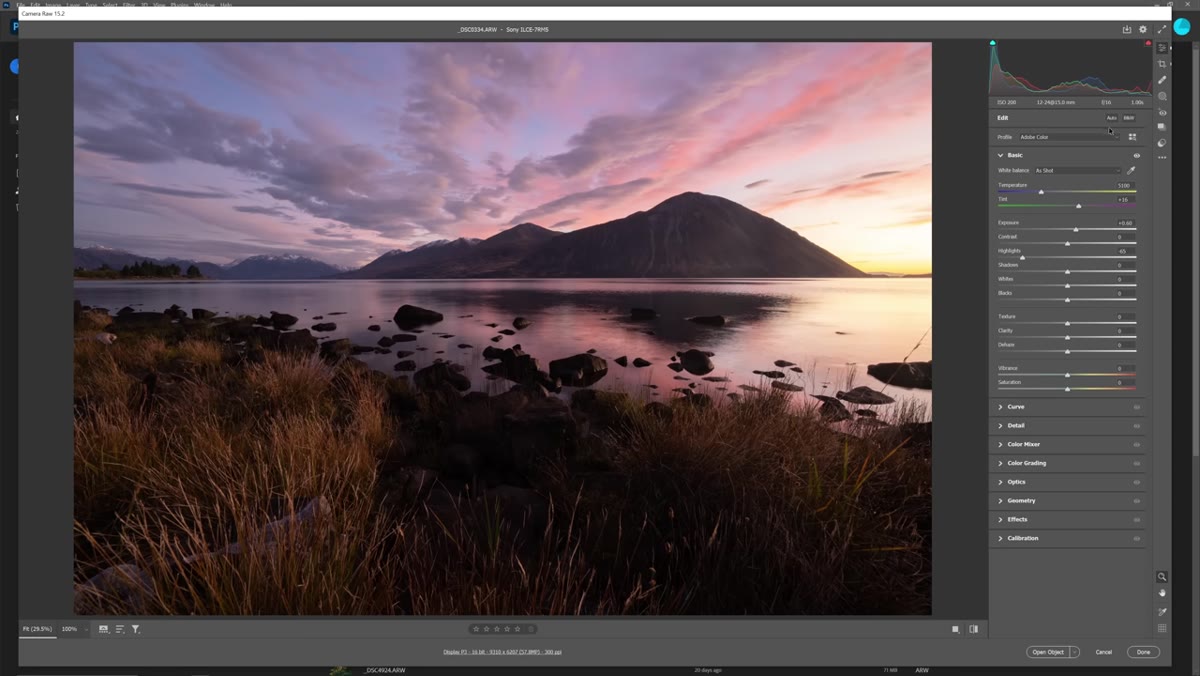 Histogram showing highlights recovered after pulling down the slider
One habit Patino comes back to repeatedly is reading the histogram in real time, not as a final check but as a constant reference. Most of us glance at it when we think something looks off. The better practice is to watch it move as you adjust. When you drag a slider, the histogram tells you what’s actually happening to the tonal data - and sometimes the image on screen looks fine while the histogram is quietly telling you that you’ve already lost information in the shadows or blown the highlights.
Histogram showing highlights recovered after pulling down the slider
One habit Patino comes back to repeatedly is reading the histogram in real time, not as a final check but as a constant reference. Most of us glance at it when we think something looks off. The better practice is to watch it move as you adjust. When you drag a slider, the histogram tells you what’s actually happening to the tonal data - and sometimes the image on screen looks fine while the histogram is quietly telling you that you’ve already lost information in the shadows or blown the highlights.
A small amount of clipping on the highlight end can be natural and acceptable, especially in sunrise and sunset scenes where the light source is in frame. What you’re watching for is large portions of data piling up against either edge with nowhere to go.
What I’d Add from My Own Experience
Patino’s tutorial focuses on a landscape, but I’ve found this local-vs-global principle applies just as much to portrait and travel photography. I once edited a series of street photos from a trip to Japan and wondered why every image looked muddy and over-dramatic. I had been reaching for that contrast slider the same way he describes - out of habit, not intention. Switching to local adjustments for just the subject versus the background made an immediate difference.
One additional thing I’ve started doing: before I touch any slider, I ask myself which part of the image is doing the most work and what that area actually needs. That question alone has cut my editing time down significantly because I stop making adjustments that cancel each other out. Edit with a purpose for each zone of the image, not a blanket treatment for the whole thing.
The single most important idea from this tutorial is that global adjustments are blunt tools, and landscape photos especially need a more precise hand. The contrast slider isn’t bad - it’s just being asked to do a job it wasn’t built for when your scene already has strong tonal variation.
Watch the full tutorial on YouTube to see William Patino demonstrate these adjustments live on the Lake O’Hara file - watching the histogram respond in real time is worth the watch on its own.
Comments
Leave a Comment