
If you’ve been in this hobby long enough, you know exactly what I’m talking about. There’s a drawer somewhere in your house, maybe two, full of things you definitely need but can never locate when a shoot is actually happening. A CR123 battery rolling around next to a random Allen key, a watch battery you bought for something you no longer own, and three cables you’re pretty sure are duplicates but aren’t confident enough to throw away. I’ve been there. I am there, honestly, even after years of shooting. Organization is the unglamorous side of photography that nobody posts about, but it affects every single shoot.
That’s why I was genuinely excited when I came across this Peter McKinnon tutorial on solving exactly this problem. Watch the full tutorial on YouTube before or after reading this breakdown. Peter walks through a toolbox-on-sliding-rails system from Uline that he’s set up in his gear closet, and the concept is straightforward enough that you can adapt it regardless of your budget or the size of your setup. Whether you’re shooting professionally out of a studio or hoarding lenses in the corner of a Seattle apartment, this system has a version that works for you.
What makes this more than just “buy a toolbox” advice is the thinking behind how you organize it. The real takeaway is categorical discipline, grouping gear not by size or how often you use it, but by the workflow it belongs to. Here’s how to do it step by step.
Step 1: Choose a Multi-Drawer Sliding Rail Toolbox
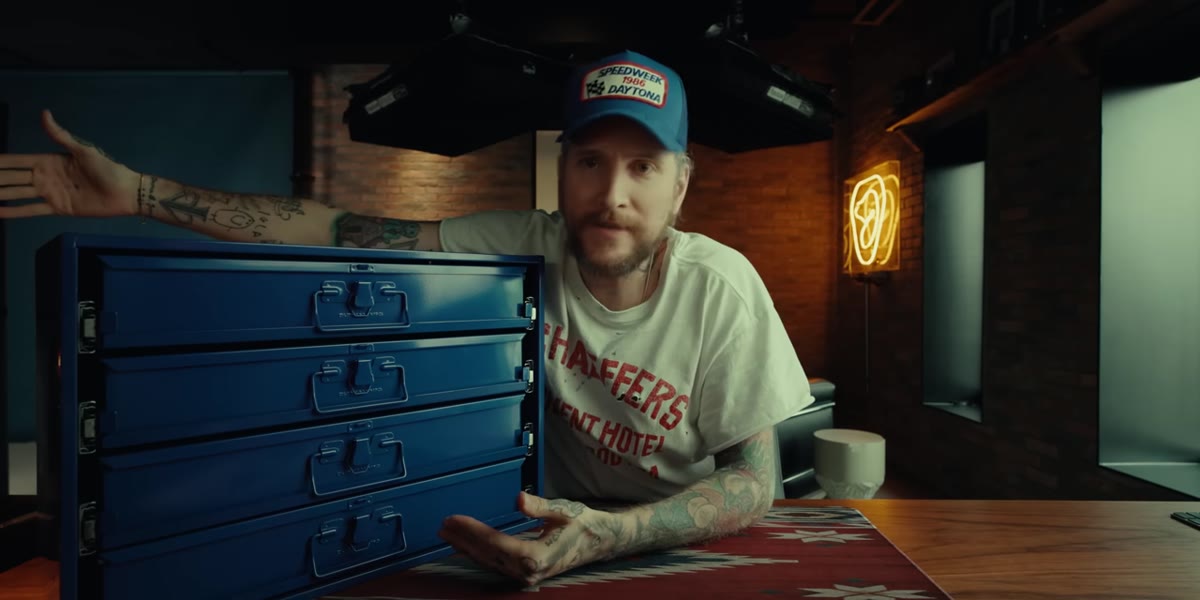 Toolbox with sliding rails and lockable drawers shown on bench
The foundation of this system is a multi-drawer toolbox that sits on sliding rails, with individual drawers that lock and, crucially, can be removed entirely from the unit. Peter sources his from Uline, which is worth knowing because Uline caters to industrial and commercial buyers, so the quality is solid and the sizing options are generous. Look for a unit where each drawer pulls out completely, not just slides open. That removability is the feature that makes this system actually functional rather than just pretty.
Toolbox with sliding rails and lockable drawers shown on bench
The foundation of this system is a multi-drawer toolbox that sits on sliding rails, with individual drawers that lock and, crucially, can be removed entirely from the unit. Peter sources his from Uline, which is worth knowing because Uline caters to industrial and commercial buyers, so the quality is solid and the sizing options are generous. Look for a unit where each drawer pulls out completely, not just slides open. That removability is the feature that makes this system actually functional rather than just pretty.
When sizing your unit, think about where it will live. A gear closet, a YouTube studio corner, a garage workbench. You want something that fits the space without dominating it, but with enough drawers to separate at least four to six distinct categories of gear.
Step 2: Assign Each Drawer to a Single Gear Category
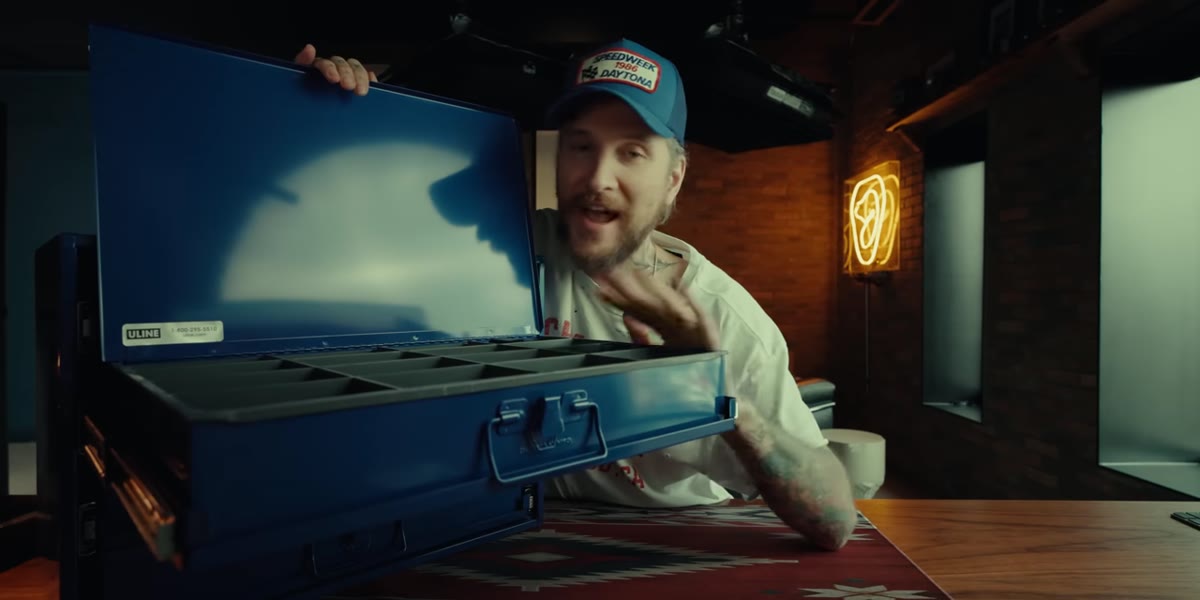 Open drawer revealing action cam gear and mounts organized inside
This is where most people go wrong with storage. They organize by size or frequency of use, and end up with a “miscellaneous” drawer that becomes a second junk drawer within three weeks. Peter’s approach assigns each drawer to one specific workflow category. His top drawers are dedicated to action cameras and every mount, plug, battery, and cable that goes with them. That’s it. Nothing else lives there.
Open drawer revealing action cam gear and mounts organized inside
This is where most people go wrong with storage. They organize by size or frequency of use, and end up with a “miscellaneous” drawer that becomes a second junk drawer within three weeks. Peter’s approach assigns each drawer to one specific workflow category. His top drawers are dedicated to action cameras and every mount, plug, battery, and cable that goes with them. That’s it. Nothing else lives there.
The discipline here is that you’re not organizing objects, you’re organizing kits. Ask yourself: when I’m about to use this piece of gear, what else am I always reaching for at the same time? Group those things together. If you have a microphone setup, put the mic, its cable, the windscreen, and the mount adapter in the same drawer. You’ll stop doing the frantic pre-shoot scavenger hunt almost immediately.
Step 3: Dedicate a Drawer to Batteries, Cables, and Chargers
 Drawer open showing cables, batteries, and chargers grouped together
Nobody wants to do this one. It’s the least satisfying drawer to fill and the most satisfying to be able to find quickly. Peter keeps a full drawer just for batteries, cables, and chargers, including power inverters and laptop chargers. The key is not mixing this with anything else. It becomes your power drawer, the first place you check when something isn’t charged or connected.
Drawer open showing cables, batteries, and chargers grouped together
Nobody wants to do this one. It’s the least satisfying drawer to fill and the most satisfying to be able to find quickly. Peter keeps a full drawer just for batteries, cables, and chargers, including power inverters and laptop chargers. The key is not mixing this with anything else. It becomes your power drawer, the first place you check when something isn’t charged or connected.
Inside this drawer, small zip pouches or cable ties go a long way. Group cables by type, keep batteries sorted by size or camera body, and make sure every charger has its cable attached to it or stored right next to it. Separating these from your other gear means you won’t accidentally pack your camera and leave the charger behind.
Step 4: Use Small Coin Pouches or Zip Cases for Tiny Accessories
 Coin purse pouch being opened, demonstrating squeeze-open mechanism
The smallest, most annoying accessories are usually the ones that matter most on location. Tiny Allen keys, watch batteries, ND filter adapters, memory card readers. Peter stores these in small squeeze-open coin pouches, the kind you’d find in a vintage shop or on Amazon for next to nothing. They hold their shape, open easily with one hand, and you can label the outside with a small piece of tape.
Coin purse pouch being opened, demonstrating squeeze-open mechanism
The smallest, most annoying accessories are usually the ones that matter most on location. Tiny Allen keys, watch batteries, ND filter adapters, memory card readers. Peter stores these in small squeeze-open coin pouches, the kind you’d find in a vintage shop or on Amazon for next to nothing. They hold their shape, open easily with one hand, and you can label the outside with a small piece of tape.
This is a genuinely underrated move. A labeled coin pouch inside a drawer tells you exactly what’s inside without opening it, and when you’re packing fast before a shoot, that kind of friction reduction adds up. I’ve started using them for the small stuff in my camera bag too, not just in storage.
Step 5: Use the Removable Drawers as Portable Kits
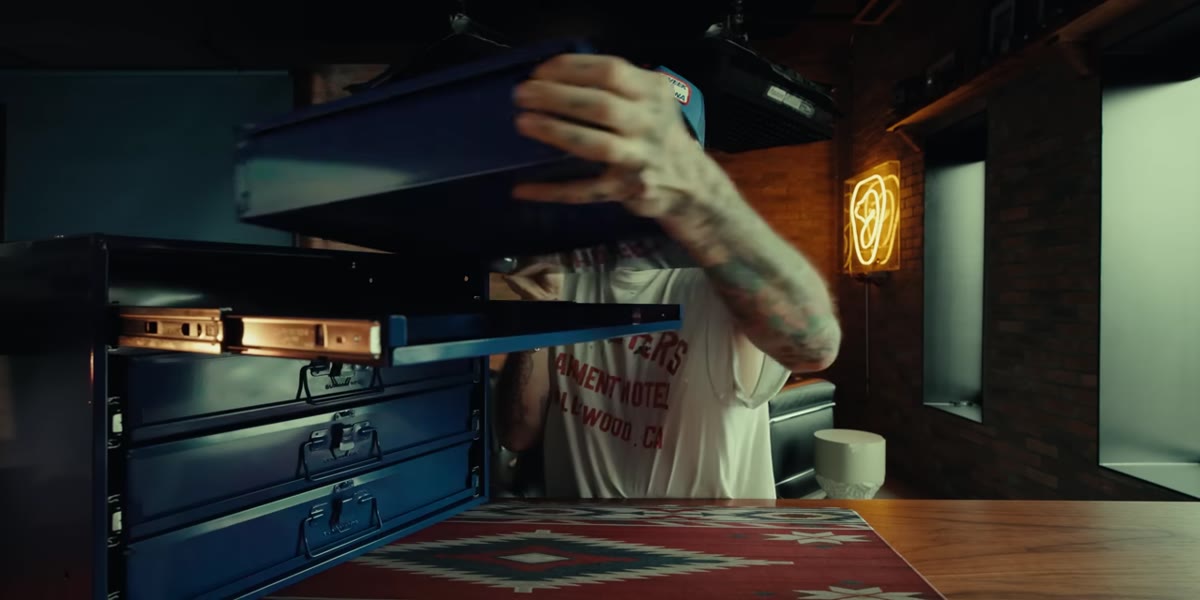 Individual drawer being removed from the main unit
Here’s the feature that elevates this from a static storage solution to an active part of your workflow. Because each drawer slides out completely from the unit, you can pull out just the drawer you need and carry it to wherever you’re working. Setting up a camera in another room? Grab the cables and chargers drawer. Mounting an action cam in the garage? Take the action cam drawer with you.
Individual drawer being removed from the main unit
Here’s the feature that elevates this from a static storage solution to an active part of your workflow. Because each drawer slides out completely from the unit, you can pull out just the drawer you need and carry it to wherever you’re working. Setting up a camera in another room? Grab the cables and chargers drawer. Mounting an action cam in the garage? Take the action cam drawer with you.
This turns each drawer into a self-contained kit you can transport without repacking or remembering what to bring. It also creates a natural “return to base” habit. When you’re done, the drawer goes back to its slot, and everything stays where it belongs.
What I’d Add From My Own Experience
The one thing I’d layer on top of Peter’s system is a quarterly audit. Every three months or so, I do a Sunday morning walk through my gear storage the same way I do a photo walk through my neighborhood. The goal isn’t to reorganize everything, just to notice what’s migrated to the wrong drawer, what I haven’t touched in months, and what I’ve bought duplicates of because I forgot I already owned one.
I also keep a small index card taped to the front of each drawer with a quick label of what’s inside. It sounds old-school, and it is, but when you’re running late for a shoot and your hands are full, reading a card is faster than opening six drawers. Small friction reduction compounds over time into a much smoother workflow.
The single biggest shift this system creates isn’t tidiness. It’s confidence. Knowing exactly where everything is before a shoot means your mental energy stays on the creative work, not the logistics. If you’re tired of the junk drawer tax every time you pick up your camera, this is worth a serious look.
Watch the full tutorial on YouTube to see Peter walk through his full setup and every drawer in detail.
Comments (1)
I've been looking for exactly this kind of tutorial. Perfect timing.
Leave a Comment