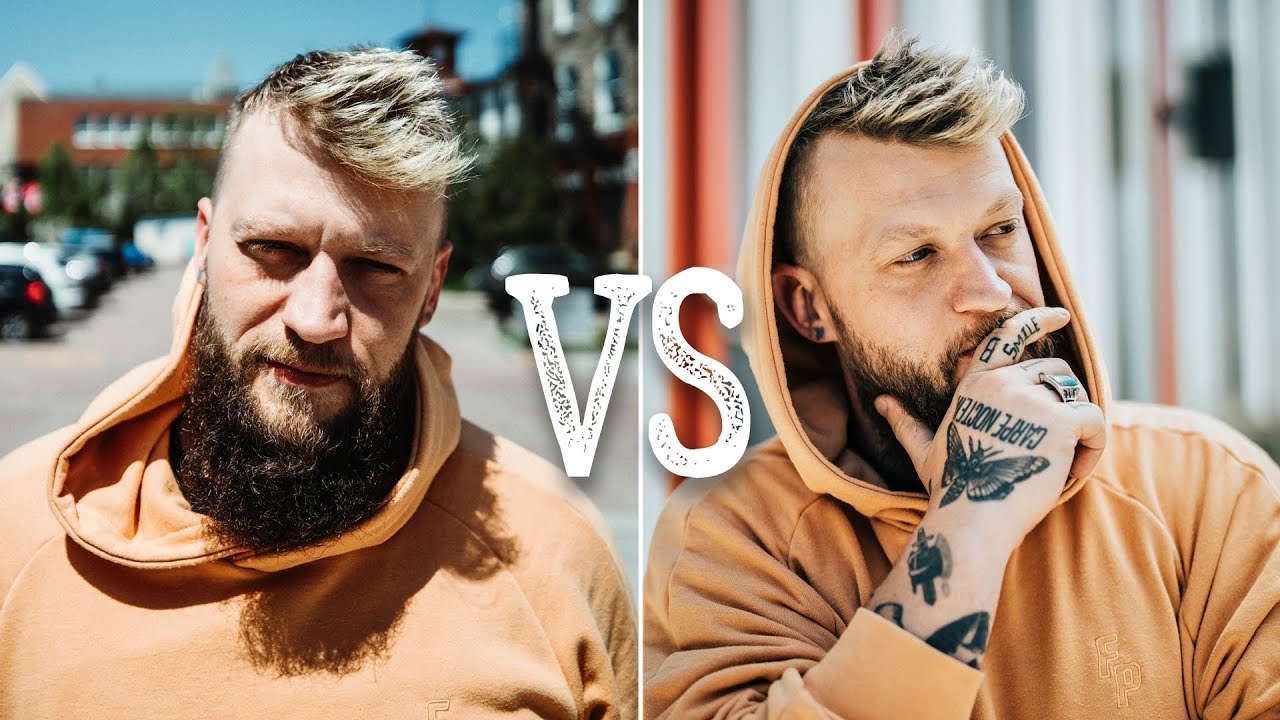
If you shoot portraits outdoors with any regularity, you already know the specific frustration I’m talking about. It’s noon, the light is brutal, and your subject is squinting into a sky that’s basically one giant flashbang. You twist every dial on your camera trying to salvage the shot, and every single result looks flat, blown out, or just plain unflattering. I’ve been there more times than I can count, including on a trip to Portugal where I spent three days chasing “golden hour” and completely ignored the six hours of perfectly usable harsh light in between.
In this Peter McKinnon tutorial, he works with fellow creator Chris Ramsey as his subject to demonstrate exactly how to handle direct, overhead sunlight without running for the shade or waiting until 6pm. Watch the full tutorial on YouTube - it’s fast, practical, and worth your time. But if you want the breakdown you can reference while you’re actually out shooting, that’s what this is for.
The core lesson is this: harsh sunlight is a problem you can solve with positioning, tools, and a small shift in perspective. You don’t need a studio. You need a plan.
Step 1: Understand What Makes Direct Sunlight Difficult
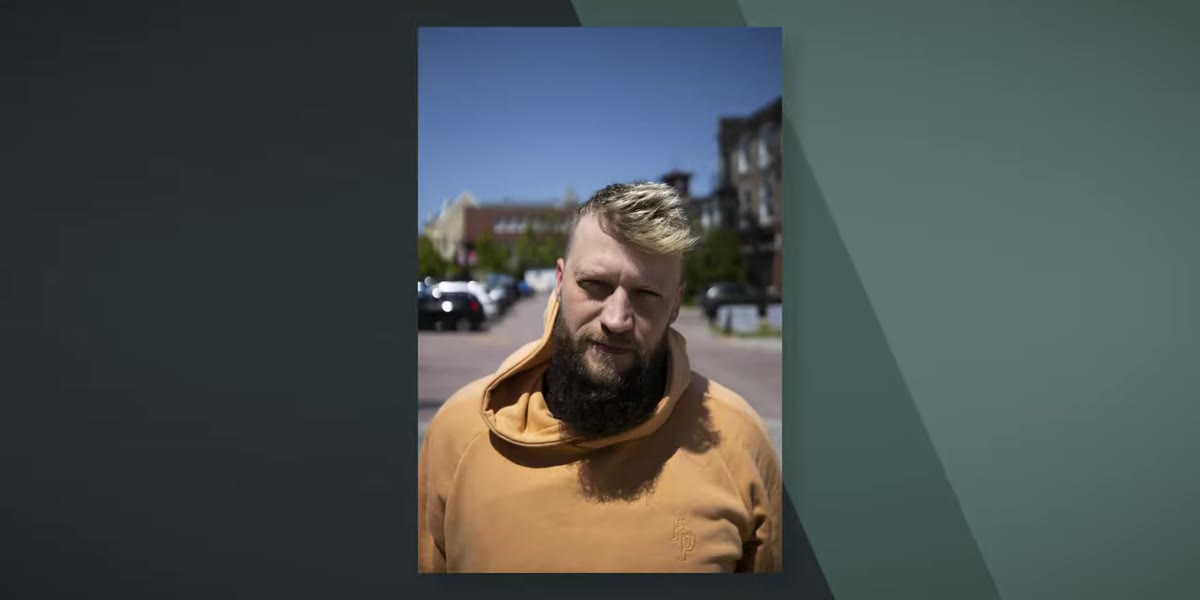 Overexposed, shadow-heavy portrait showing the direct sun problem
Before you can fix the problem, you need to see it clearly. Overhead sun creates two specific issues: it casts harsh downward shadows under the eyes, nose, and chin, and it creates extreme contrast between highlights and shadows that most camera sensors struggle to handle. The result is a photo where your subject looks either blown out in the bright areas or lost in deep, unflattering shadows. Neither is what you were going for.
Overexposed, shadow-heavy portrait showing the direct sun problem
Before you can fix the problem, you need to see it clearly. Overhead sun creates two specific issues: it casts harsh downward shadows under the eyes, nose, and chin, and it creates extreme contrast between highlights and shadows that most camera sensors struggle to handle. The result is a photo where your subject looks either blown out in the bright areas or lost in deep, unflattering shadows. Neither is what you were going for.
The good news is that none of this means you need to stop shooting. It means you need to start thinking about where the light is going after it hits your subject, not just where it’s coming from.
Step 2: Use the Ground as a Natural Bounce Card
 Subject standing on white concrete with visible fill light on face
Here’s something most beginners never think about: the surface your subject is standing on acts as a reflector. When your subject stands on a light-colored surface, like white or pale concrete, the sunlight that hits the ground bounces back upward and fills in those harsh downward shadows on their face. It’s a free, natural fill light that requires zero equipment.
Subject standing on white concrete with visible fill light on face
Here’s something most beginners never think about: the surface your subject is standing on acts as a reflector. When your subject stands on a light-colored surface, like white or pale concrete, the sunlight that hits the ground bounces back upward and fills in those harsh downward shadows on their face. It’s a free, natural fill light that requires zero equipment.
When Peter positions Chris on white concrete, you can see the difference immediately. The light on his face looks more even because the ground is doing the work of a reflector. If you put that same person on dark asphalt or grass, that bounce disappears and the shadows get heavier. On your next outdoor shoot, scout for light-colored pavement, sand, or even a white wall nearby that can throw some fill back onto your subject’s face.
Step 3: Know When to Lean Into the Harshness
 Portrait with intentional harsh direct sunlight showing edgy, contrasty look
This one is easy to miss because it sounds like a contradiction: sometimes the harsh look is the right look. High-contrast, direct sunlight with deep shadows can add intensity and edge to a portrait. For certain styles, like street photography, editorial work, or anything with a gritty urban feel, that unforgiving quality of noon light is exactly what you want.
Portrait with intentional harsh direct sunlight showing edgy, contrasty look
This one is easy to miss because it sounds like a contradiction: sometimes the harsh look is the right look. High-contrast, direct sunlight with deep shadows can add intensity and edge to a portrait. For certain styles, like street photography, editorial work, or anything with a gritty urban feel, that unforgiving quality of noon light is exactly what you want.
Before you pull out any gear to soften the light, ask yourself whether the aesthetic you’re going for might actually benefit from the harshness. If you’re shooting something moody, bold, or graphic, work with the direct sun rather than against it. Save your diffusion tools for when soft and flattering is genuinely the goal.
Step 4: Diffuse the Light with a Portable Diffuser
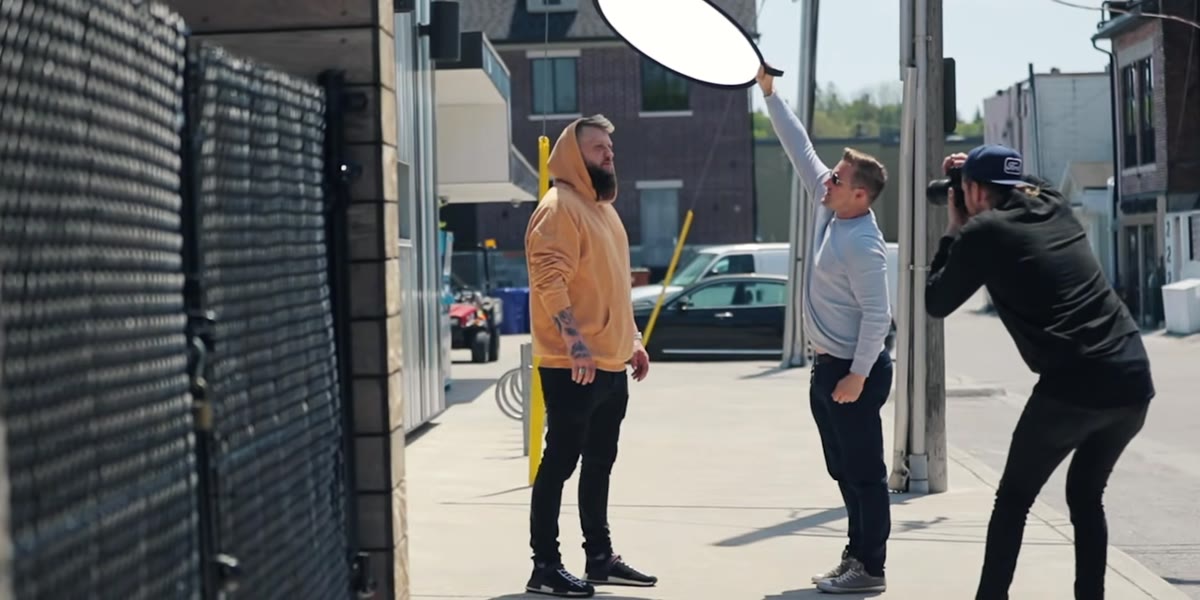 Assistant holding a diffuser panel above subject’s head outdoors at midday
If soft, even light is what you’re after, a collapsible diffuser is the single most useful tool you can own for outdoor portrait work. Peter has a second person hold the diffuser panel above and slightly in front of the subject, positioning it between the sun and the subject’s face. The diffuser scatters the light before it hits the subject, turning that harsh point source into something that looks almost like a softbox or an overcast sky.
Assistant holding a diffuser panel above subject’s head outdoors at midday
If soft, even light is what you’re after, a collapsible diffuser is the single most useful tool you can own for outdoor portrait work. Peter has a second person hold the diffuser panel above and slightly in front of the subject, positioning it between the sun and the subject’s face. The diffuser scatters the light before it hits the subject, turning that harsh point source into something that looks almost like a softbox or an overcast sky.
The results are dramatic. The same location, the same time of day, and the same sun, but the portraits look completely different: smooth skin tones, no harsh shadows under the eyes, and a much more flattering quality of light overall. Diffusers collapse down to a fraction of their working size and can fit in a camera bag or a large backpack. If you shoot portraits outdoors regularly and you don’t own one yet, it’s the next thing you should buy.
Step 5: Find Natural Shade and Shadow Pockets in Urban Environments
 Subject standing at edge of building shadow in an urban setting
You don’t always need gear. In any city or town, buildings, awnings, trees, and alleyways create natural pockets of shade throughout the day. The trick is learning to read the light as you walk and recognizing when a shadow edge can work in your favor.
Subject standing at edge of building shadow in an urban setting
You don’t always need gear. In any city or town, buildings, awnings, trees, and alleyways create natural pockets of shade throughout the day. The trick is learning to read the light as you walk and recognizing when a shadow edge can work in your favor.
Peter points this out while moving through an urban environment: instead of staying in the open where the sun is at full strength, he finds spots where shade softens the light naturally. Positioning your subject just inside or at the edge of a shadow gives you that same diffused, even quality without needing a second person holding anything over anyone’s head. This is especially useful when you’re shooting solo or want to keep things low-key and fast.
A Note from My Own Sunday Morning Walks
Every Sunday I take a solo photo walk through my neighborhood here in Seattle, camera in hand, usually starting around 9am when the light is still gentle. But this summer I started deliberately pushing that walk to noon, partly to challenge myself and partly because of tutorials like this one. What I’ve found is that the urban environment practically does the diffusion work for you if you’re paying attention. Gaps between buildings, the shadow side of a parked van, even a white food truck reflecting light back onto a stranger’s face. The light is there. It’s just not obvious until you start looking for it.
One thing Peter doesn’t mention, but I’ve found really helpful: bring a small white foam board as a budget bounce card if you don’t have a reflector yet. It folds flat, costs almost nothing, and works surprisingly well. I used one for almost a full year before I invested in a proper collapsible reflector kit.
The single biggest mindset shift this tutorial offers is this: direct sunlight is not your enemy, it’s just a variable you haven’t learned to control yet. Whether you bounce it off the ground, block it with a diffuser, hide from it in a shadow pocket, or lean into its contrast for effect, you always have options. You just need to see them before you start shooting.
Watch the full tutorial on YouTube to see each technique demonstrated side by side with the before-and-after results. Seeing the actual image quality difference in real time makes every step click in a way that reading alone can’t fully replicate.
Comments
Leave a Comment