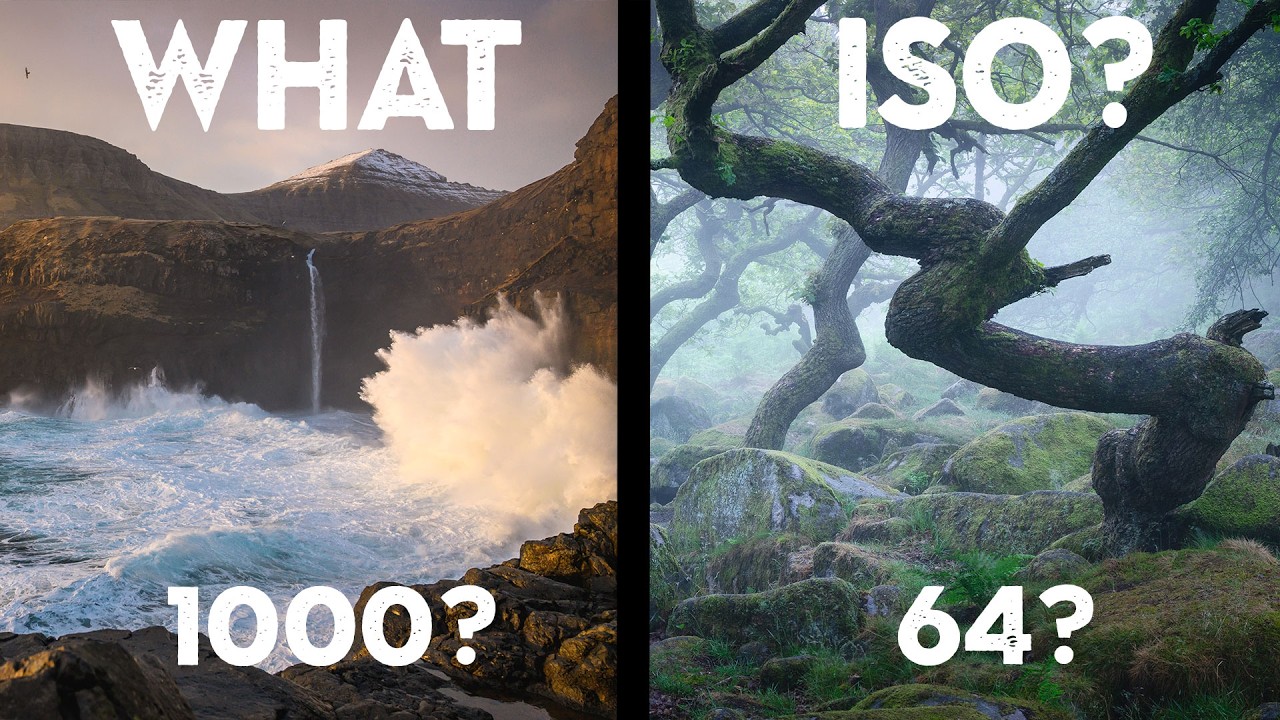
Every Sunday morning I take a photo walk around Seattle. No agenda, just me and whatever camera I grab off the shelf. And for the first couple of years I was doing that, I was quietly sabotaging myself with one specific habit: I kept my ISO glued to the lowest possible number, no matter what. I thought that was the disciplined, correct thing to do. Turns out it was actually one of the most common mistakes beginner photographers make, and it was costing me shots I can never get back.
I came across this topic while watching a tutorial from UK landscape photographer Nigel Danson, and something he said early on stopped me cold. He pointed out that some of his favorite images, the ones he’s proudest of, were shot at ISOs between 800 and 3,200. Not because he was sloppy, but because he was prioritizing the right things. Watch the full tutorial on YouTube - it’s worth your full attention. What follows is my breakdown of the technique, written so you can apply it on your next shoot without needing to pause and rewind.
The core argument Nigel makes is one I wish someone had told me earlier: the best photo is not the one with the least noise. It’s the one with the best light, the strongest composition, and the right creative decisions. ISO is just one lever in a three-lever system, and obsessing over it while ignoring the other two is where most beginners go wrong.
Step 1: Understand What ISO Actually Does (and Doesn’t Do)
 Camera sensor diagram showing ISO amplification signal
ISO amplifies the signal your sensor receives. That’s it. When there isn’t enough light, a higher ISO makes the sensor more sensitive, which introduces noise as a side effect. The important thing Nigel clarifies here is that noise is a symptom of low light, not of a high ISO number by itself. Modern cameras, and modern editing tools like Lightroom’s AI noise reduction, have made high-ISO noise far less of a problem than it was even five years ago.
Camera sensor diagram showing ISO amplification signal
ISO amplifies the signal your sensor receives. That’s it. When there isn’t enough light, a higher ISO makes the sensor more sensitive, which introduces noise as a side effect. The important thing Nigel clarifies here is that noise is a symptom of low light, not of a high ISO number by itself. Modern cameras, and modern editing tools like Lightroom’s AI noise reduction, have made high-ISO noise far less of a problem than it was even five years ago.
The other thing ISO affects is dynamic range. At your camera’s base ISO (for Nigel’s Nikon Z8, that’s ISO 64), you get the widest dynamic range, meaning the most detail in both highlights and shadows. As you raise ISO, that range narrows. But again, this is solvable. Bracketing multiple exposures and blending them in post is a standard technique that handles this cleanly. Knowing these two trade-offs lets you make informed decisions instead of fearful ones.
Step 2: Set Your Shutter Speed First, Based on the Scene
 Faroe Islands handheld shot with shutter speed priority explanation
Before you even look at ISO, ask yourself what your shutter speed needs to be for this specific situation. Nigel’s example here is vivid: he was shooting in the Faroe Islands in 70 mph winds, handheld, barely able to stay upright. A tripod wasn’t a realistic option. In that moment, locking in a shutter speed of 1/250th of a second was the priority because it was the only way to guarantee a sharp image. That decision pushed his ISO up to 1,000, and he made it without hesitation because a noisy sharp image beats a clean blurry one every single time.
Faroe Islands handheld shot with shutter speed priority explanation
Before you even look at ISO, ask yourself what your shutter speed needs to be for this specific situation. Nigel’s example here is vivid: he was shooting in the Faroe Islands in 70 mph winds, handheld, barely able to stay upright. A tripod wasn’t a realistic option. In that moment, locking in a shutter speed of 1/250th of a second was the priority because it was the only way to guarantee a sharp image. That decision pushed his ISO up to 1,000, and he made it without hesitation because a noisy sharp image beats a clean blurry one every single time.
Think through your scene before touching the dial. Is there motion you want to freeze, like birds, crashing waves, or a person mid-stride? Go fast. Do you want motion blur, like silky water over rocks or light trails from cars? Go slow and put the camera on a tripod. Do you need to handhold for any reason, weather, terrain, a moment that won’t wait? Set a shutter speed your hands can actually support, typically at least 1/focal length of your lens. Let that number anchor everything else.
Step 3: Choose Your Aperture for Depth of Field, Not Exposure
 Depth of field discussion with landscape scene reference
Once shutter speed is set, aperture is next, and it should be driven by how much of the scene you want in focus. Wide aperture (a low f-number like f/1.8 or f/2.8) gives you shallow depth of field, which is great for isolating a subject. Narrow aperture (higher f-number like f/11 or f/16) keeps more of the scene sharp from foreground to background, which is often what landscape photography calls for.
Depth of field discussion with landscape scene reference
Once shutter speed is set, aperture is next, and it should be driven by how much of the scene you want in focus. Wide aperture (a low f-number like f/1.8 or f/2.8) gives you shallow depth of field, which is great for isolating a subject. Narrow aperture (higher f-number like f/11 or f/16) keeps more of the scene sharp from foreground to background, which is often what landscape photography calls for.
The mistake Nigel identifies is that beginners will adjust aperture to control brightness when they should be adjusting it to control focus. If you need f/11 for depth of field but the scene is getting too dark, the answer is not to open up to f/4 and sacrifice the shot’s sharpness throughout the frame. The answer is to raise ISO. That’s what it’s there for.
Step 4: Let ISO Fill the Gap
 ISO selection as the final variable in the exposure triangle
After shutter speed and aperture are locked in for creative reasons, ISO becomes the finishing adjustment that gets your exposure to the right level. This is the mindset shift. ISO is not the first thing you set, and it is not something to minimize at all costs. It is the variable you use to balance the exposure once the important creative decisions are already made.
ISO selection as the final variable in the exposure triangle
After shutter speed and aperture are locked in for creative reasons, ISO becomes the finishing adjustment that gets your exposure to the right level. This is the mindset shift. ISO is not the first thing you set, and it is not something to minimize at all costs. It is the variable you use to balance the exposure once the important creative decisions are already made.
In practice, this means looking at your histogram or your meter reading after dialing in the other two settings, and then adjusting ISO until the exposure is where you want it. If that means ISO 1,600, that is the correct ISO for that shot. A photo taken with correct intention at ISO 1,600 will always be more useful than a technically “clean” image at ISO 64 that’s blurry, poorly focused, or missed the light entirely.
Step 5: Check Your Results with Two Quick Camera Tests
 Reviewing image noise at high ISO on camera LCD
Nigel recommends doing two practical tests so you know your specific camera’s behavior before you’re out in the field under pressure. First, shoot the same scene at a range of ISOs in similar light and compare the results at 100% zoom in your editing software. Find the point where noise starts to genuinely bother you. For most modern cameras, that threshold is much higher than people expect.
Reviewing image noise at high ISO on camera LCD
Nigel recommends doing two practical tests so you know your specific camera’s behavior before you’re out in the field under pressure. First, shoot the same scene at a range of ISOs in similar light and compare the results at 100% zoom in your editing software. Find the point where noise starts to genuinely bother you. For most modern cameras, that threshold is much higher than people expect.
Second, look at what noise reduction tools actually do to your images at those higher ISOs. Run a few through Lightroom’s AI denoise or whatever tool you use and judge the results honestly. You may find that ISO 3,200 with one click of noise reduction is completely usable. Knowing this in advance means you will make bolder, more confident decisions when you’re standing in the rain trying to protect your camera and still get the shot.
A Note From My Own Shooting
I’ll add one thing Nigel doesn’t specifically address, but that my own experience has confirmed. The fear of high ISO is often worse on smaller screens. If you’re chimping on the back of your camera at 100%, noise looks terrifying. But at print size, or even at Instagram resolution, it almost disappears. I once spent a whole vacation convinced an image was ruined by grain, only to get home and realize it looked completely fine output at any normal display size. Now I do my ISO tolerance tests at the sizes I actually share and print, not just at maximum zoom on a monitor.
The single biggest takeaway from this tutorial is simple: shutter speed and aperture serve your creative vision, and ISO serves your exposure. Get those priorities in the right order and the “right” ISO will almost always reveal itself. Stop starting with ISO and work backward from it instead.
Watch the full tutorial on YouTube to see Nigel walk through real examples from his own shoots, including specific images and the exact reasoning behind his settings choices. It is 100% worth 15 minutes of your time.
Comments (2)
Been doing this wrong for years apparently. Thanks for the wake-up call.
I've been looking for exactly this kind of tutorial. Perfect timing.
Leave a Comment