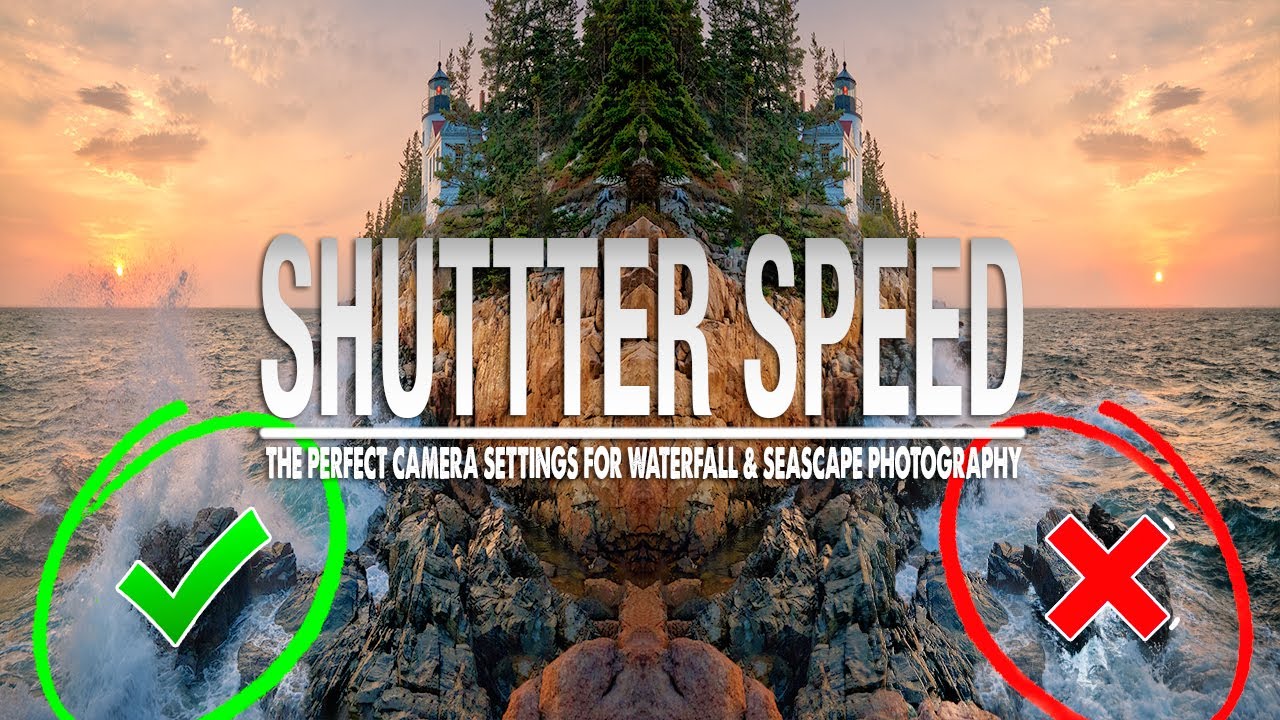
I once spent four consecutive evenings at the same waterfall on a trip to Oregon, missing dinner every night, trying to nail one shot. The water looked either too frozen or too smooth, and I kept second-guessing myself at the dial. The problem wasn’t my gear or even my composition. It was that I hadn’t actually decided what I wanted the water to look like before I pressed the shutter. I was guessing, and it showed.
That’s exactly the gap that this tutorial from landscape photographer Mark Denney fills. In his video on shutter speed for waterfall and seascape photography, Watch the full tutorial on YouTube, Denney walks through a framework that stops you from treating shutter speed as an afterthought. His core argument is simple but easy to overlook: when moving water is in your frame, shutter speed is the most powerful creative decision you’ll make, not aperture, not ISO. It shapes the mood, the story, and the feeling of the entire image.
What I appreciate most about his approach is that he asks you to define your creative vision before you touch the camera settings. That one shift in thinking made a real difference for me, and I think it will for you too.
Step 1: Understand What “Slow” and “Fast” Actually Mean for Water
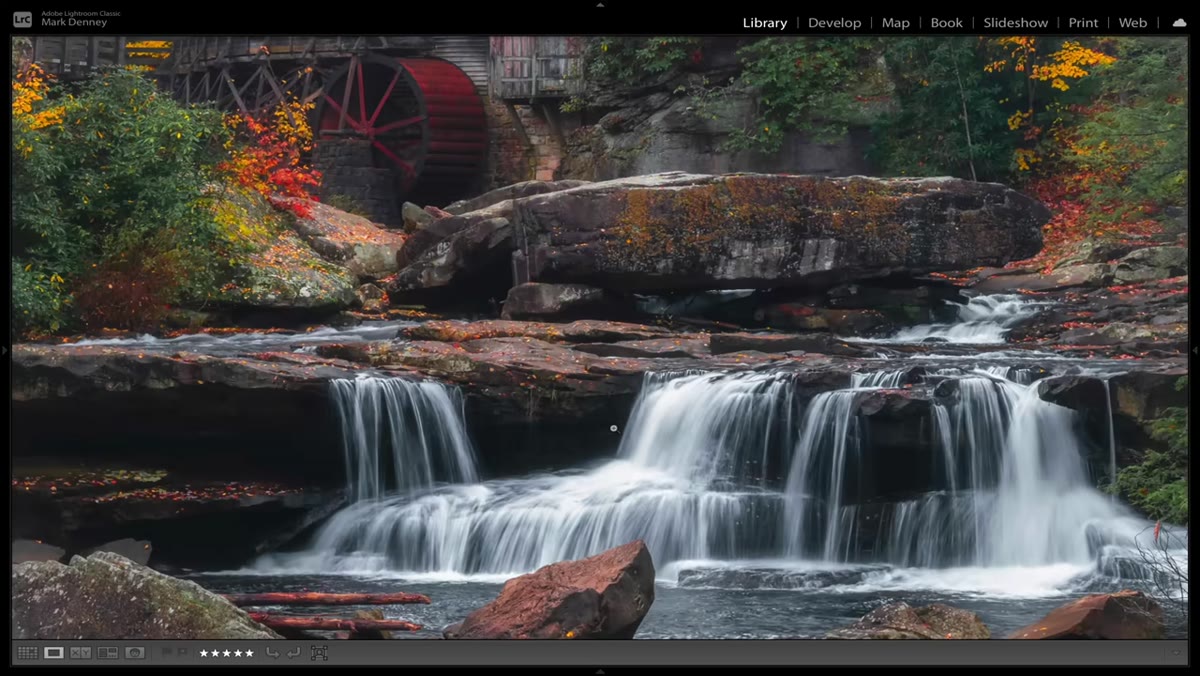
 Slow shutter speed waterfall with silky smooth glass-like water
Before you change a single setting, Denney wants you to get clear on the vocabulary. A “slow” shutter speed in this context means roughly 2 seconds and longer, anywhere up to 30 seconds or even several minutes depending on conditions and your creative intent. A “fast” shutter speed, on the other hand, means fractions of a second, something like 1/250s or 1/500s. These two ends of the spectrum produce completely different images of the same water, and neither is automatically “correct.”
Slow shutter speed waterfall with silky smooth glass-like water
Before you change a single setting, Denney wants you to get clear on the vocabulary. A “slow” shutter speed in this context means roughly 2 seconds and longer, anywhere up to 30 seconds or even several minutes depending on conditions and your creative intent. A “fast” shutter speed, on the other hand, means fractions of a second, something like 1/250s or 1/500s. These two ends of the spectrum produce completely different images of the same water, and neither is automatically “correct.”
Slow shutter speeds remove detail from water. At a long enough exposure, ocean water can look completely glass-like, almost mirror-smooth, reflecting the sky with no trace of wave texture. Waterfalls become soft, painterly ribbons. Fast shutter speeds do the opposite: they freeze individual water droplets mid-air, reveal the raw energy and chaos of moving water, and create a much more intense, almost aggressive mood in the image.
Step 2: Match Your Shutter Speed to the Story You Want to Tell
 Side-by-side comparison of different shutter speeds on moving water
This is the heart of Denney’s method. Instead of picking a shutter speed based purely on exposure math, ask yourself what feeling you want this image to convey. A slow shutter that creates silky, blurred water tends to communicate calm, stillness, and serenity. A fast shutter that freezes the water suggests power, movement, and energy.
Side-by-side comparison of different shutter speeds on moving water
This is the heart of Denney’s method. Instead of picking a shutter speed based purely on exposure math, ask yourself what feeling you want this image to convey. A slow shutter that creates silky, blurred water tends to communicate calm, stillness, and serenity. A fast shutter that freezes the water suggests power, movement, and energy.
Think about the specific scene in front of you. A gentle forest waterfall photographed at golden hour might feel more cohesive with a slow exposure that leans into the tranquil mood. A crashing ocean wave against rugged rocks might hit harder with a faster shutter that shows the brute force of the water. Neither choice is wrong. The mistake is choosing randomly without connecting the setting to an intentional feeling.
Step 3: Know the Middle Ground and When to Use It
 Medium shutter speed showing partial motion blur in waterfall
There’s a range that often gets overlooked, somewhere between about 1/4 of a second and 2 seconds, and Denney points out that this middle ground can be surprisingly useful. At these speeds, water is neither fully frozen nor fully smoothed out. You start to see motion blur but can still make out individual streams and the texture of the water as it moves.
Medium shutter speed showing partial motion blur in waterfall
There’s a range that often gets overlooked, somewhere between about 1/4 of a second and 2 seconds, and Denney points out that this middle ground can be surprisingly useful. At these speeds, water is neither fully frozen nor fully smoothed out. You start to see motion blur but can still make out individual streams and the texture of the water as it moves.
For waterfalls in particular, this range can create a sense of movement that still feels grounded and real. The water looks like it’s actually flowing rather than hovering in a frozen moment or dissolved into mist. It’s worth experimenting here because the exact right speed depends heavily on how fast the water is moving. A fast-moving mountain stream will blur much more at 1/4s than a slow, wide river will.
Step 4: Set Up for Long Exposures Correctly
 Tripod setup with camera on coastal rocks near water
To actually execute slow shutter speeds in the field, you need a stable tripod. This isn’t optional. Even 1 second of handheld shooting will introduce camera shake that ruins the image. Once you’re on a tripod, use your camera’s 2-second self-timer or a remote shutter release to avoid any vibration from pressing the shutter button physically.
Tripod setup with camera on coastal rocks near water
To actually execute slow shutter speeds in the field, you need a stable tripod. This isn’t optional. Even 1 second of handheld shooting will introduce camera shake that ruins the image. Once you’re on a tripod, use your camera’s 2-second self-timer or a remote shutter release to avoid any vibration from pressing the shutter button physically.
If you’re shooting in bright conditions like midday or at a sunny coastline and you need a 2-second exposure, you’ll also need a neutral density (ND) filter to block light from entering the lens. ND filters come in different strengths, commonly labeled in stops: a 6-stop ND reduces light significantly, while a 10-stop ND can turn a midday scene into a long-exposure opportunity. Start with a 6-stop or 10-stop ND and experiment from there. Shoot in manual mode so your aperture and ISO stay locked while you adjust the shutter speed independently.
Step 5: Review, Adjust, and Commit to Intentional Iteration
 Reviewing image on camera LCD screen checking water detail
After your first frame, zoom into the water on your LCD and look critically at what you got. Does the blur level match what you envisioned before you shot? If the water looks too still and you’ve lost all texture and energy, dial the shutter speed up (shorter exposure). If it looks too chaotic and frozen, go slower.
Reviewing image on camera LCD screen checking water detail
After your first frame, zoom into the water on your LCD and look critically at what you got. Does the blur level match what you envisioned before you shot? If the water looks too still and you’ve lost all texture and energy, dial the shutter speed up (shorter exposure). If it looks too chaotic and frozen, go slower.
Denney’s point here isn’t that you’ll nail it on the first try. It’s that each adjustment should be a deliberate response to what you saw in the previous frame, not a random turn of the dial. This iterative process is what separates intentional photographers from ones who just hope something works. Keep your creative goal in mind as your reference point for each adjustment.
My Extension: Don’t Ignore the Water Speed Itself
Something I’d add from my own experience is that the speed of the water itself changes everything about which shutter speed works. I’ve been to locations where 1/30s gave me a gorgeous, dream-like blur and locations where that same setting made the water look like it was barely moving. A raging waterfall after heavy rain moves so much faster than the same falls in dry season. A tidal surge moves faster than a calm tide.
Before I lock in any settings, I now spend a minute just watching the water. I try to gauge how fast it’s actually moving and use that to calibrate my starting point. If the water is moving quickly, I’ll start slower than I think I need to. If it’s sluggish, I’ll try faster speeds first to add some life to the image. That one-minute observation habit has saved me a lot of unnecessary trial and error at the dial.
The single most important thing Denney’s framework gave me was a question to ask before I ever pick up the camera: what do I want this water to feel like? Everything else follows from that answer. Shutter speed in water photography is a creative tool first and an exposure control second, and treating it that way changes the images you walk away with.
Watch the full tutorial on YouTube to see Denney’s before-and-after examples from Acadia National Park, which make the difference between each shutter speed range immediately clear in a way that’s worth seeing for yourself.
Comments (2)
Bookmarked. Coming back to this one for sure.
Simple but effective. Sometimes that's all you need.
Leave a Comment