I have a Sunday morning photo walk tradition. Every week, no matter what. And after a few years of doing that faithfully, I have an embarrassing number of images sitting in Lightroom that I have never properly keyworded. Honestly, I don’t think I’ve ever met a photographer who genuinely enjoys keywording. It’s the kind of task you promise yourself you’ll do later, and later never comes.
That’s exactly why this tutorial from Matt Kloskowski stopped me mid-scroll. In Watch the full tutorial on YouTube, he walks through a feature inside Lightroom (the cloud version) that’s been quietly doing the keywording for you using Adobe’s AI technology. No manual tagging. No hours of metadata entry. Just a search bar and results that actually make sense. As someone who came up teaching beginners how to stay organized without burning out on the boring parts, this is the kind of tool I wish I had talked about sooner.
What Matt demonstrates is genuinely practical, not flashy. This isn’t AI replacing your creative eye. It’s AI handling the filing cabinet work so you can spend more time actually making pictures. Here’s how to use it.
Step 1: Make Sure You’re in the Right Version of Lightroom
 Lightroom cloud version open, not Lightroom Classic
This only works in Lightroom, the cloud-based version. Not Lightroom Classic. These are two separate applications from Adobe, and it’s a distinction worth getting clear on before you go hunting for a feature that won’t be there. If you open your app and it says Lightroom Classic in the header or module tabs across the top, that’s not the one. The cloud version of Lightroom has a simpler, cleaner interface and syncs across your devices. If you’re not sure which one you have, check your Creative Cloud app to see what’s installed.
Lightroom cloud version open, not Lightroom Classic
This only works in Lightroom, the cloud-based version. Not Lightroom Classic. These are two separate applications from Adobe, and it’s a distinction worth getting clear on before you go hunting for a feature that won’t be there. If you open your app and it says Lightroom Classic in the header or module tabs across the top, that’s not the one. The cloud version of Lightroom has a simpler, cleaner interface and syncs across your devices. If you’re not sure which one you have, check your Creative Cloud app to see what’s installed.
This feature also works on the Lightroom mobile app on your phone and tablet, which matters a lot if you’re someone who shoots on your phone regularly. (And yes, I still do. My most-liked Instagram photo was taken on a $200 phone, so I’m never going to be snobbish about that.)
Step 2: Open a Folder or Collection
 Landscapes folder open inside Lightroom cloud
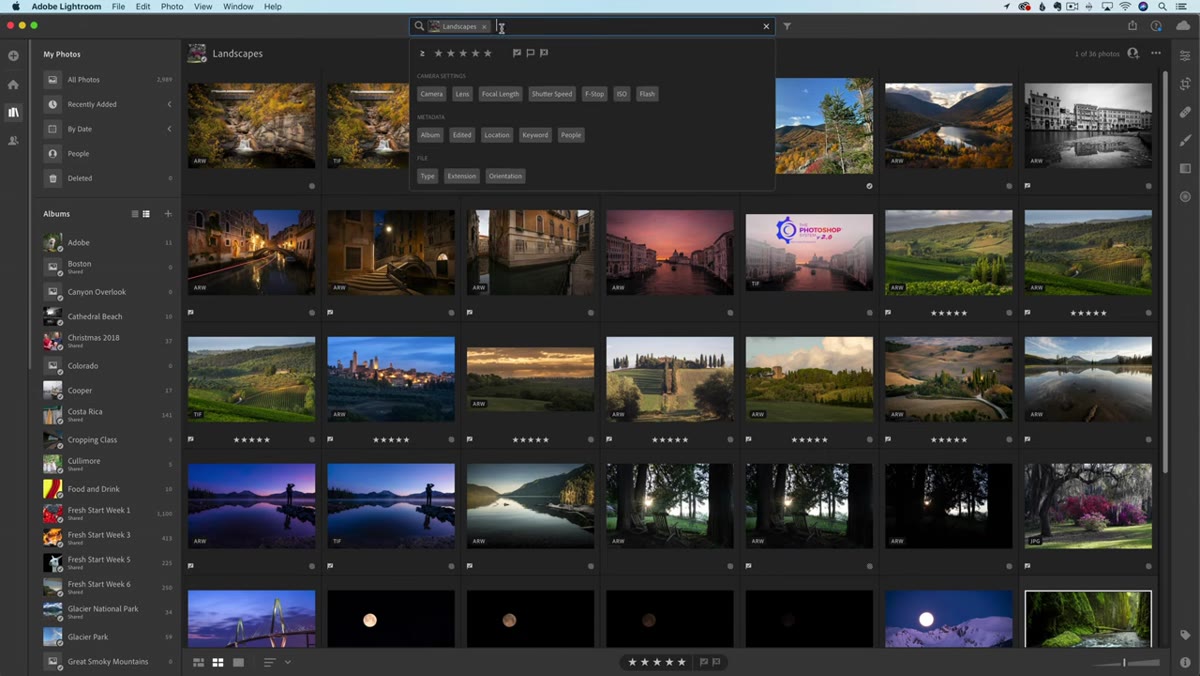
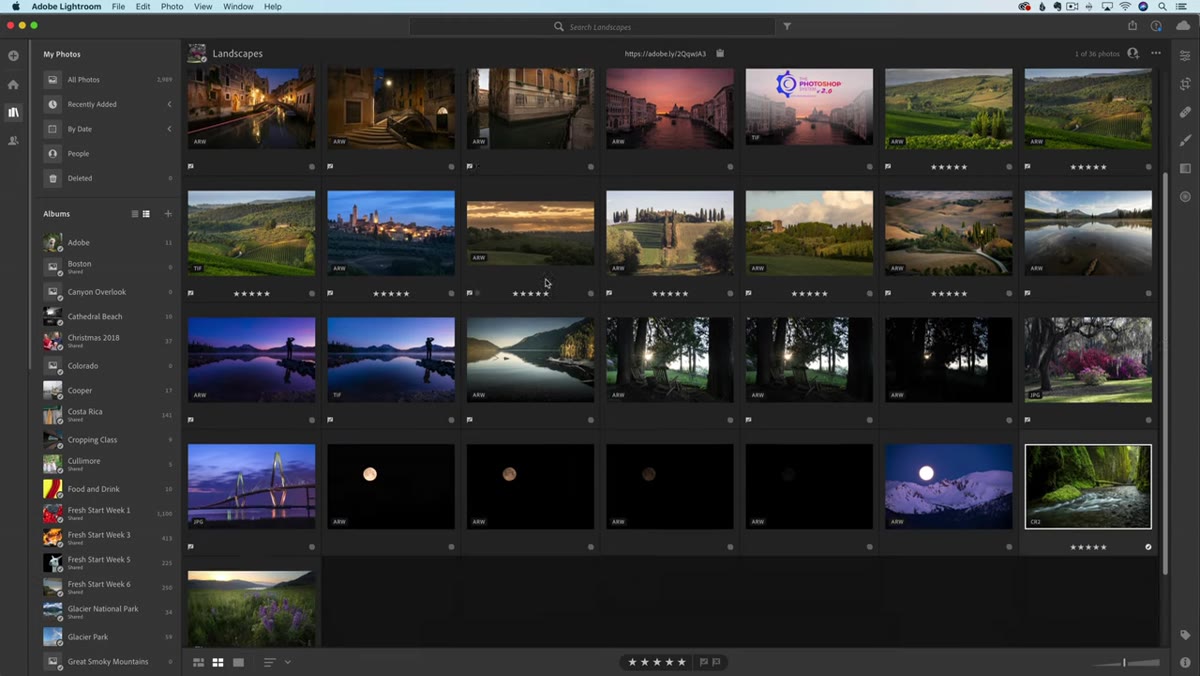
With Lightroom open, navigate to any folder or collection where you have photos stored. Matt uses a landscapes folder in the tutorial, and then later demonstrates the same thing inside a wildlife collection. The AI analysis runs across whatever images are synced to the cloud, so any folder you’ve already imported and synced is ready to search.
Landscapes folder open inside Lightroom cloud
With Lightroom open, navigate to any folder or collection where you have photos stored. Matt uses a landscapes folder in the tutorial, and then later demonstrates the same thing inside a wildlife collection. The AI analysis runs across whatever images are synced to the cloud, so any folder you’ve already imported and synced is ready to search.
You don’t need to do anything to activate or prepare the analysis. Adobe’s Sensei AI has already been scanning your images in the background, identifying visual characteristics, subjects, colors, and scenes. The work is done before you even open the search bar.
Step 3: Click the Search Field at the Top
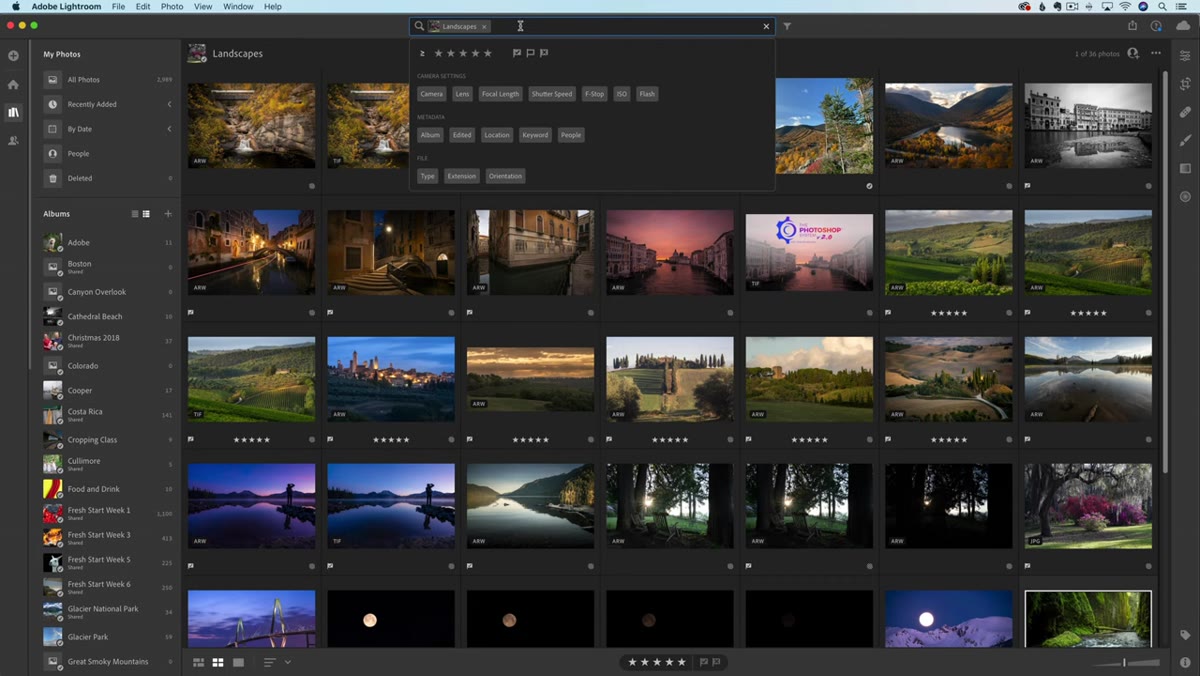 Search bar at the top of Lightroom with folder name shown
Look for the search field near the top of the interface. When you click into it without typing anything yet, Lightroom shows you a set of searchable categories automatically. One of them is camera, which pulls from your metadata and shows you the different cameras you’ve shot with in that folder. But the more interesting categories are the ones driven by visual AI, where the software is identifying what’s actually in the frame.
Search bar at the top of Lightroom with folder name shown
Look for the search field near the top of the interface. When you click into it without typing anything yet, Lightroom shows you a set of searchable categories automatically. One of them is camera, which pulls from your metadata and shows you the different cameras you’ve shot with in that folder. But the more interesting categories are the ones driven by visual AI, where the software is identifying what’s actually in the frame.
This is a good moment to just explore. Click into the search field and see what categories and suggestions appear for your own library. It gives you a fast sense of what the system has already learned about your photos.
Step 4: Type a Subject or Visual Keyword
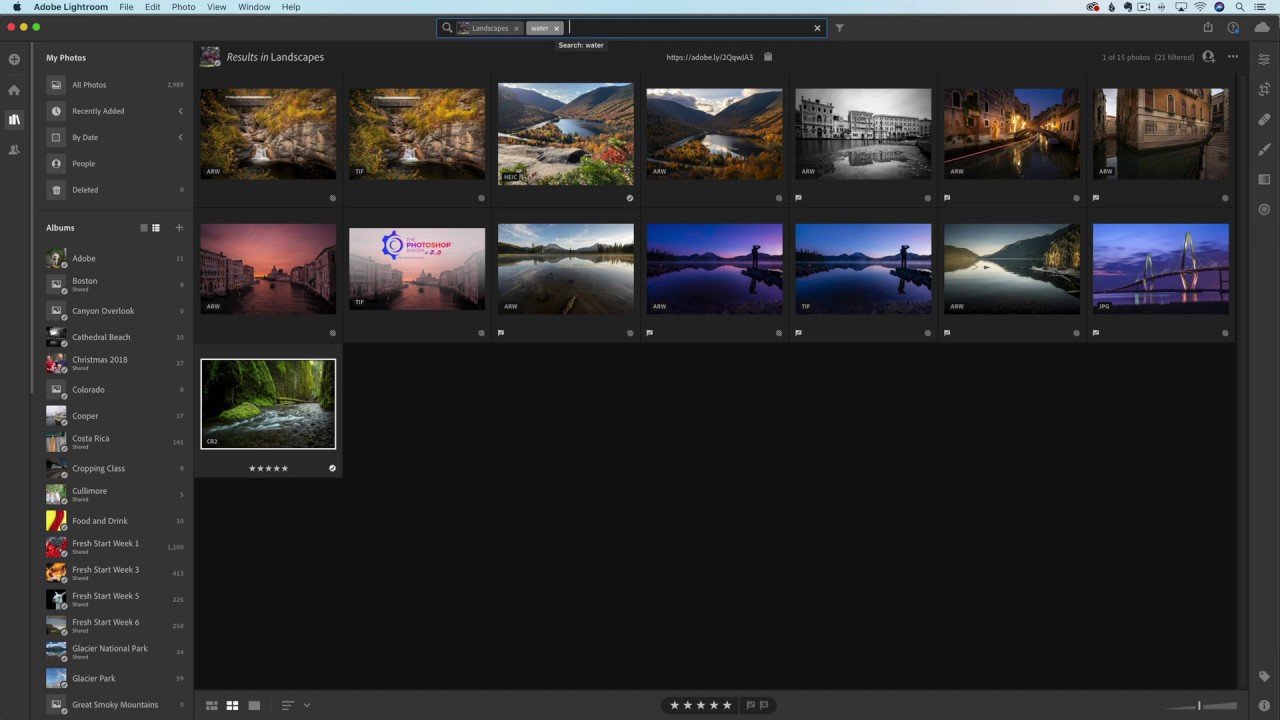
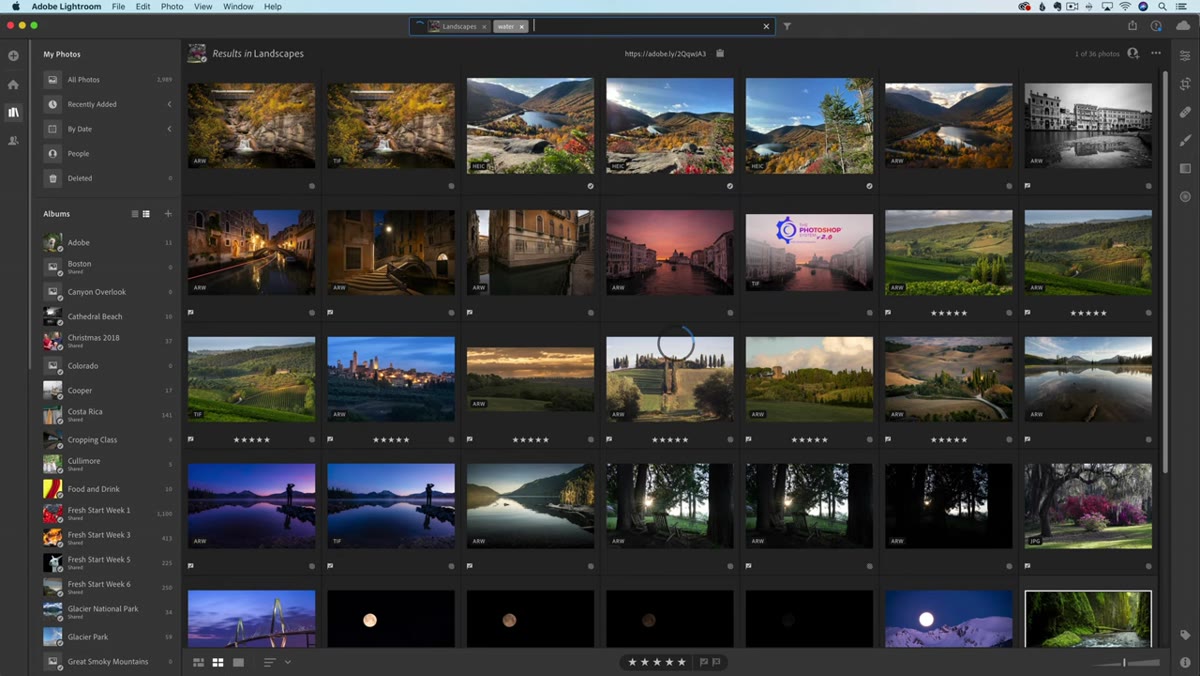 Typing “water” into the search bar and results appearing
Type a word that describes something visual. Matt types “water” and gets back a solid set of landscape images that include rivers, lakes, and coastal shots, all without a single keyword ever being applied manually. Try words like “sunset,” “fog,” “forest,” “bridge,” or anything that describes content you’d remember shooting.
Typing “water” into the search bar and results appearing
Type a word that describes something visual. Matt types “water” and gets back a solid set of landscape images that include rivers, lakes, and coastal shots, all without a single keyword ever being applied manually. Try words like “sunset,” “fog,” “forest,” “bridge,” or anything that describes content you’d remember shooting.
The results aren’t perfect, and Matt is upfront about that. He searches for “bridge” and the results are close but not flawless. That’s fine. The point isn’t perfection. The point is that searching a word and getting mostly-correct results, across thousands of untagged images, in seconds, is a genuinely useful thing that didn’t exist in your workflow before.
Step 5: Try Color and Subject Searches in the Mobile App
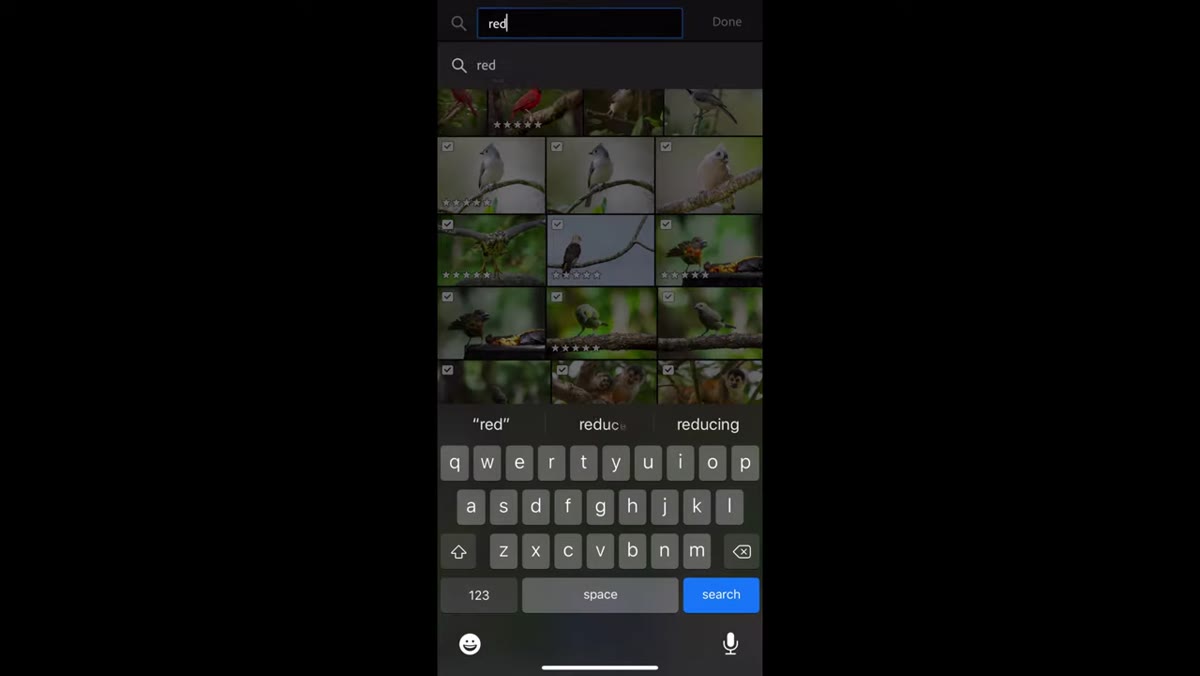 Lightroom mobile app open, wildlife collection, search field tapped
On your phone, open the Lightroom app and navigate to a collection. Tap the search icon and try the same kind of content searches. Matt searches “red” inside a wildlife collection and pulls out cardinal photos. He searches “tree” and gets tree images back. The mobile experience works the same way the desktop version does because it’s all pulling from the same synced cloud library and the same AI analysis.
Lightroom mobile app open, wildlife collection, search field tapped
On your phone, open the Lightroom app and navigate to a collection. Tap the search icon and try the same kind of content searches. Matt searches “red” inside a wildlife collection and pulls out cardinal photos. He searches “tree” and gets tree images back. The mobile experience works the same way the desktop version does because it’s all pulling from the same synced cloud library and the same AI analysis.
If you shoot a lot on your phone or use Lightroom mobile as your primary editing app on travel days, this is especially useful. You can pull up a specific shot mid-conversation without scrolling forever.
What I’d Add From My Own Experience
I want to be clear about where this tool fits in your workflow and where it doesn’t replace intentional organization. The AI search is excellent for finding photos you already roughly remember. “I shot something with a red boat in Iceland” works. But if you’re a working photographer who needs to license images or deliver specific shots to a client with very exact requirements, you’ll still want some level of manual tagging on your hero shots.
That said, for the vast majority of photographers I talk to, especially those building a personal archive or learning the craft, manual keywording has always been a barrier. It’s the reason people don’t organize at all, because the alternative felt so tedious. This removes that barrier. You can now build a searchable library without changing a single habit. Just import, let it sync, and search when you need something.
Matt makes a point in the video that stuck with me. He draws a line between AI that handles production work (useful, welcome) and AI that makes your creative decisions for you (less interesting, at least to those of us who got into photography because we love the craft). I land in the same place. I want AI to find my cardinal photos. I don’t want it to decide how to process them.
The single most important takeaway here is that your Lightroom cloud library may already be searchable in ways you haven’t tested yet. Open the app, type one word, and see what comes back. You might be surprised how much is already there waiting for you.
Watch the full tutorial on YouTube and see Matt walk through it live. It’s a short one, well worth the few minutes.
Comments (1)
I tried this on a client project yesterday and the results were way better than expected.
Leave a Comment