Every photographer I know has a folder they hope nobody finds. Mine is called “Drafts” — which is a polite name for “photos I took when I was confident and shouldn’t have been.” A blurry heron from last Sunday’s photo walk. A restaurant dish shot with the wrong white balance. A travel portrait where the focus landed on someone’s ear instead of their eyes. These happen to everyone, including photographers you follow and admire.
That’s actually the premise of Watch the full tutorial on YouTube — a candid, practical video where Peter McKinnon opens with something most photographers quietly avoid: admitting he took a genuinely bad photo. An eagle shot. Out of focus, wrong aperture, wrong focal length, wrong everything. And then, instead of deleting it, he walks through exactly how he pulled it back from the edge. The tutorial is part rescue operation, part honest conversation about what separates intentional photography from guesswork.
I’ve watched a lot of editing tutorials, but this one stuck with me because it names a real habit problem. We talk about getting shots right in camera constantly, but when we fail at that, what do we actually do? McKinnon’s answer is structured, transparent, and genuinely useful. Here’s the full walkthrough.
Step 1: Assess the Damage Honestly
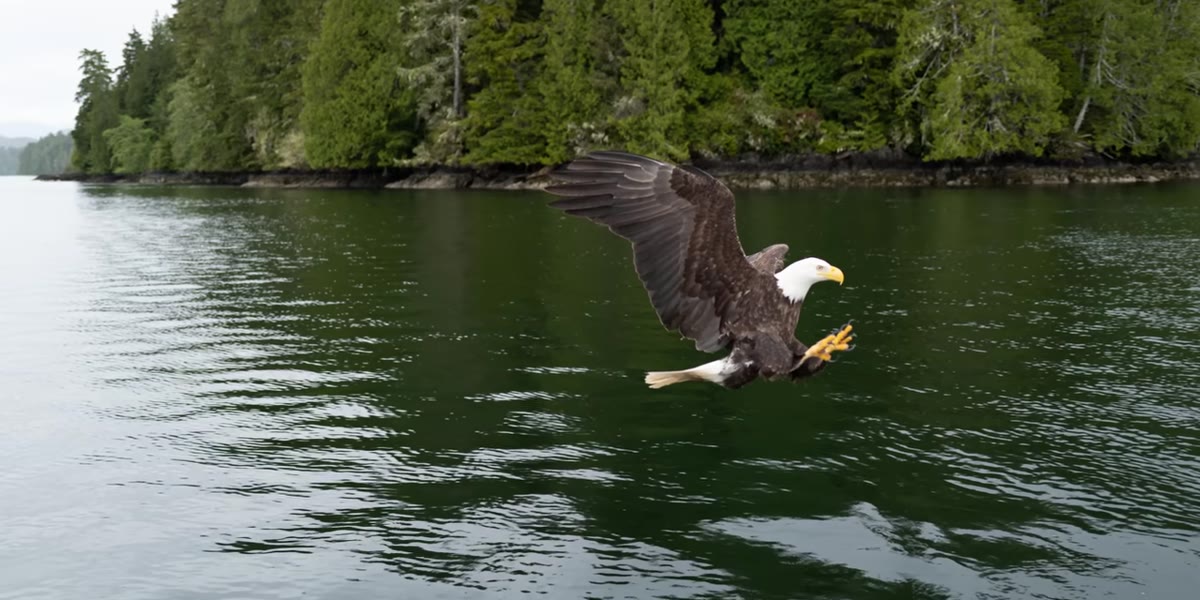 Out-of-focus eagle photo displayed on screen
Before reaching for any editing software, look at the photo without excuses. McKinnon zooms in on his eagle shot and evaluates it the way a doctor reads an X-ray: what’s sharp, what isn’t, and by how much. In his case, the feathers and talons are soft, but they’re close to acceptable. That distinction matters. Editing tools can do a lot, but they cannot conjure detail that was never captured. If a subject is wildly, completely blurred, no amount of AI sharpening will fix it. If it’s borderline, you have options.
Out-of-focus eagle photo displayed on screen
Before reaching for any editing software, look at the photo without excuses. McKinnon zooms in on his eagle shot and evaluates it the way a doctor reads an X-ray: what’s sharp, what isn’t, and by how much. In his case, the feathers and talons are soft, but they’re close to acceptable. That distinction matters. Editing tools can do a lot, but they cannot conjure detail that was never captured. If a subject is wildly, completely blurred, no amount of AI sharpening will fix it. If it’s borderline, you have options.
This step costs nothing and takes thirty seconds, but skipping it wastes a lot of editing time. When I look at a questionable photo now, I ask: is this out of focus, or just soft? Is the composition broken, or just unpolished? Knowing the difference tells you whether to invest in the edit or move on.
Step 2: Apply AI Sharpening in Luminar Neo
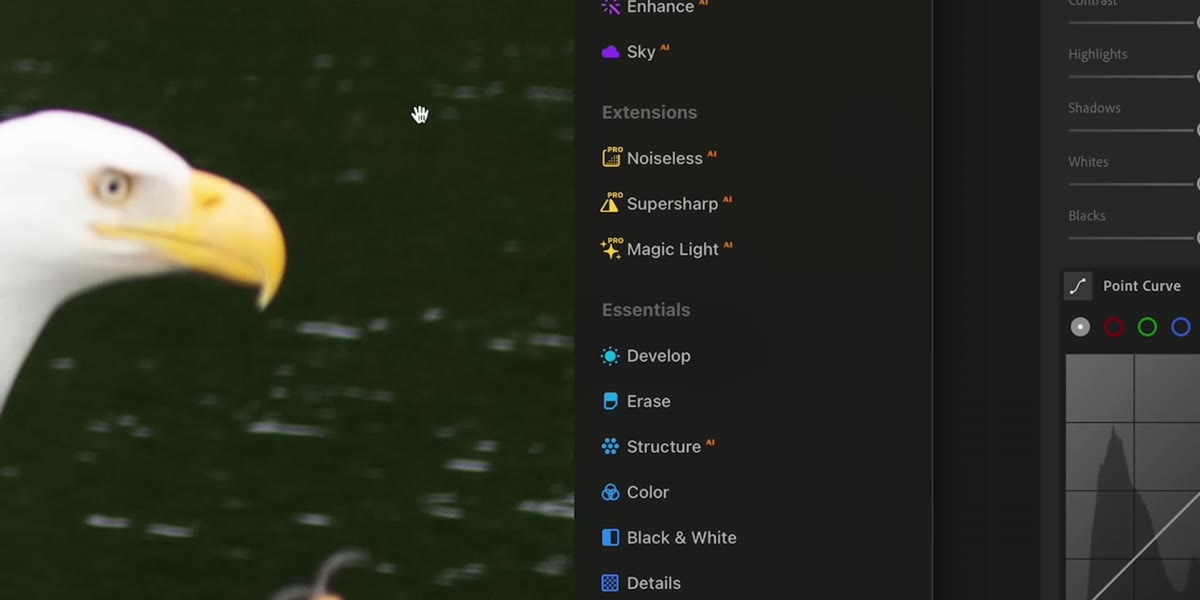 Dragging image into Luminar Neo editing interface
McKinnon imports the eagle shot into Luminar Neo and navigates to Extensions, then selects Super Sharp AI. He sets it to a middle value and lets it process. The before and after is noticeable: the image moves from soft and mushy to genuinely crisp around the subject’s feathers. The key caveat he makes is worth repeating here: this tool works on images that are almost in focus. If your photo is significantly blurred, no AI tool currently available is going to save it.
Dragging image into Luminar Neo editing interface
McKinnon imports the eagle shot into Luminar Neo and navigates to Extensions, then selects Super Sharp AI. He sets it to a middle value and lets it process. The before and after is noticeable: the image moves from soft and mushy to genuinely crisp around the subject’s feathers. The key caveat he makes is worth repeating here: this tool works on images that are almost in focus. If your photo is significantly blurred, no AI tool currently available is going to save it.
For this step, Luminar Neo is the specific tool used, but similar AI sharpening exists in other apps, including Topaz Sharpen AI and even the “Enhance” panel inside Adobe Camera Raw. The principle is the same: use the tool to close the gap between what you captured and what was technically possible. Set sharpening at a moderate level first, zoom in to 100 percent to check, and only increase if the result still looks soft rather than artificially crunchy.
Step 3: Export and Move to Lightroom for Color Work
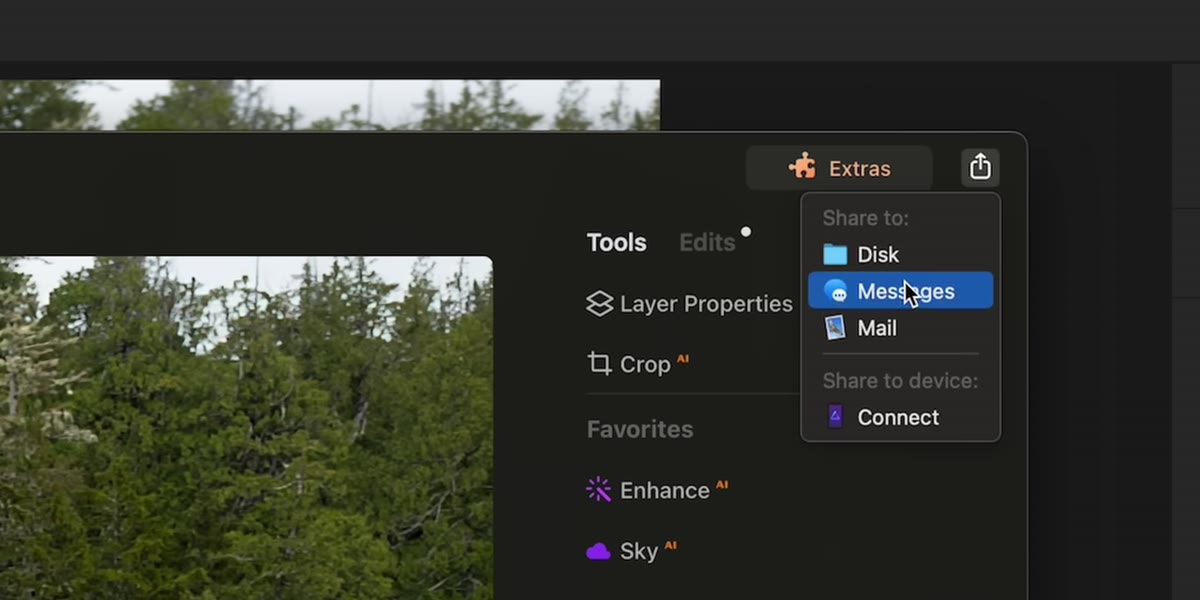 Exporting image from Luminar Neo to Lightroom
Once sharpening is done in Luminar Neo, McKinnon exports the file and brings it into Lightroom for the color and tone adjustments. This two-app workflow might feel like extra steps, but it’s actually smart: use the best tool for each specific job rather than forcing one app to do everything. Luminar Neo earned its place for AI sharpening. Lightroom earns its place for tone curves, color grading, and masking.
Exporting image from Luminar Neo to Lightroom
Once sharpening is done in Luminar Neo, McKinnon exports the file and brings it into Lightroom for the color and tone adjustments. This two-app workflow might feel like extra steps, but it’s actually smart: use the best tool for each specific job rather than forcing one app to do everything. Luminar Neo earned its place for AI sharpening. Lightroom earns its place for tone curves, color grading, and masking.
If you only have Lightroom, the sharpening panel under Detail is still a solid starting point. But if you’re regularly dealing with focus issues, it’s worth trying a dedicated sharpening tool, even on a trial basis, just to understand the quality difference.
Step 4: Adjust the Tone Curve and Strip Problem Colors
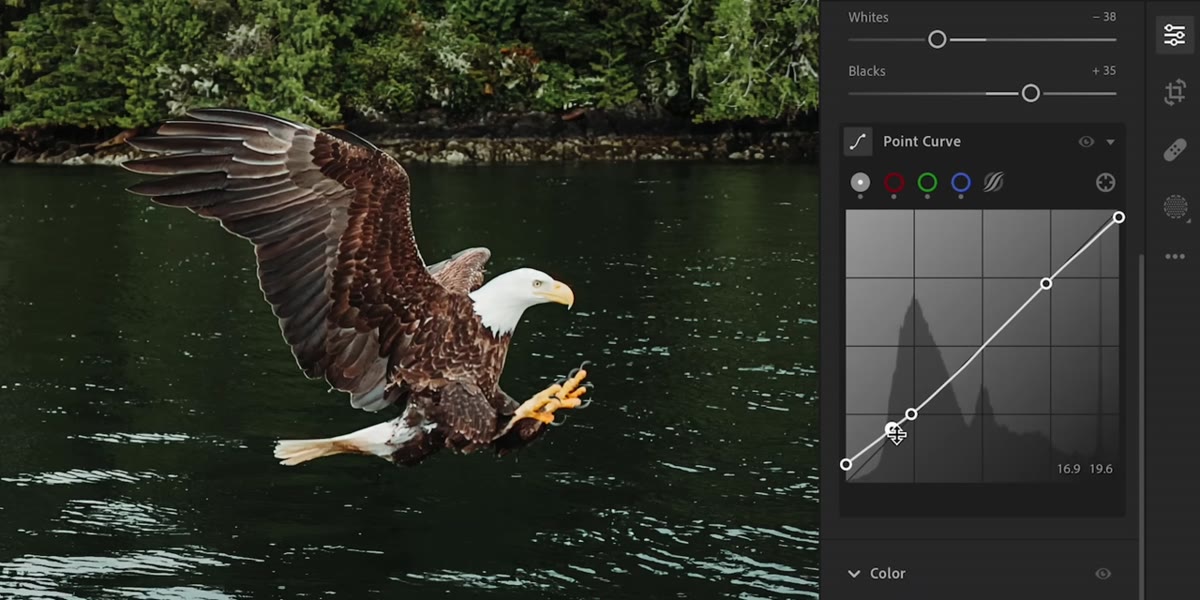 Tone curve adjustment panel open in Lightroom
McKinnon’s color work here is deliberate and minimal. He lifts the blacks on the tone curve slightly to give the image a matte, less harsh look. Then he identifies the specific color problem: the scene is reading too green and yellow. He reduces both, bringing the palette into something more neutral and less distracting from the eagle itself. He also pulls back the overall exposure, which has the effect of making the subject stand out more against the background.
Tone curve adjustment panel open in Lightroom
McKinnon’s color work here is deliberate and minimal. He lifts the blacks on the tone curve slightly to give the image a matte, less harsh look. Then he identifies the specific color problem: the scene is reading too green and yellow. He reduces both, bringing the palette into something more neutral and less distracting from the eagle itself. He also pulls back the overall exposure, which has the effect of making the subject stand out more against the background.
When you have a color problem in a nature or outdoor shot, the HSL panel in Lightroom is your best starting point. Target the specific hue that’s causing the issue, then reduce saturation and luminance until it reads naturally. Don’t try to fix everything with the white balance slider alone. It’s a blunt tool. The HSL panel is a scalpel.
Step 5: Reframe with a Deliberate Crop
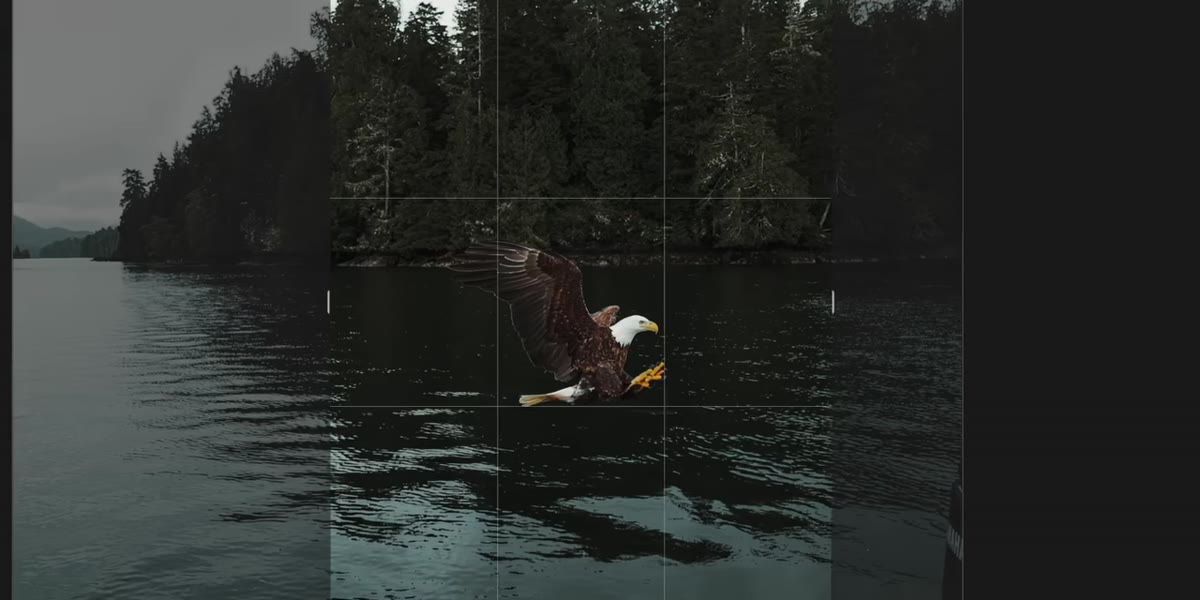 Crop tool applied with 4x5 ratio selected
The original composition on the eagle shot has no clear structure. McKinnon addresses this by cropping to a 4x5 ratio and centering the subject. It’s a simple decision, but it transforms the image from something that wanders into something that holds your attention. The 4x5 ratio is popular on Instagram, but more than that, it forces a tighter frame that removes dead space.
Crop tool applied with 4x5 ratio selected
The original composition on the eagle shot has no clear structure. McKinnon addresses this by cropping to a 4x5 ratio and centering the subject. It’s a simple decision, but it transforms the image from something that wanders into something that holds your attention. The 4x5 ratio is popular on Instagram, but more than that, it forces a tighter frame that removes dead space.
When you’re rescuing a photo, reframing is often your highest-leverage edit. A sloppy wide shot can become a strong portrait-style image with the right crop. Think about what the photo is actually about, then cut everything that isn’t that.
Step 6: Finish with a Vignette for Visual Weight
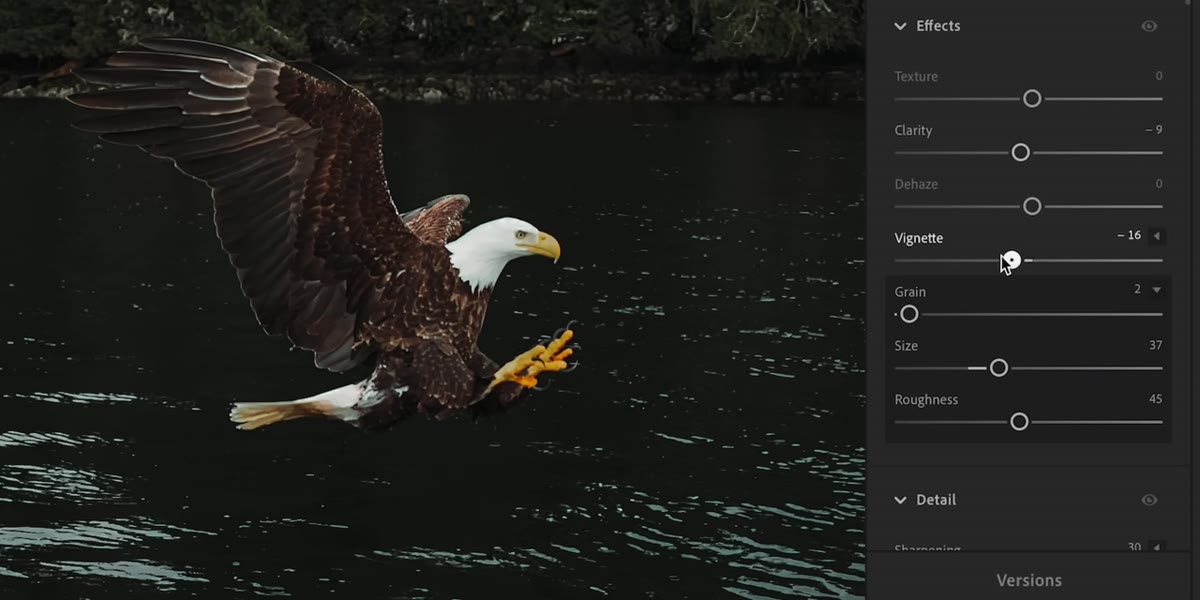 Vignette being added in Lightroom effects panel
The final touch McKinnon applies is a subtle vignette, darkening the edges of the frame to pull the viewer’s eye toward the center. He keeps it light, the goal being to soften rather than to dramatize. A vignette used too heavily feels like a filter from 2012. Used with restraint, it adds depth and keeps the subject from competing with its surroundings.
Vignette being added in Lightroom effects panel
The final touch McKinnon applies is a subtle vignette, darkening the edges of the frame to pull the viewer’s eye toward the center. He keeps it light, the goal being to soften rather than to dramatize. A vignette used too heavily feels like a filter from 2012. Used with restraint, it adds depth and keeps the subject from competing with its surroundings.
In Lightroom, the Vignette slider lives under Effects. Start at around -15 and see how it feels. For wildlife shots especially, a gentle vignette keeps the animal from getting visually swallowed by a busy background.
A Note From Someone Who Shoots on Her Phone Sometimes on Purpose
The deeper lesson I take from McKinnon’s tutorial isn’t really about rescue editing. It’s about the mental habit he describes: get it right in camera first, and make edits improve a good shot rather than resuscitate a bad one. That principle took me years to internalize.
My most-liked Instagram photo was taken on a $200 phone. Not because phone cameras are magic, but because I was paying attention to light, composition, and timing rather than relying on settings to do the work. McKinnon’s eagle shot and the effort it took to recover it is a great case study in what it costs when those decisions are skipped. The editing time, the quality ceiling you hit, the compromise you accept. Rescue shots are worth practicing. But prevention is still the better investment.
The single most important takeaway here: editing is most powerful when it’s enhancing a solid image, not carrying a broken one. Use AI sharpening tools for borderline focus issues, fix specific color problems with the HSL panel rather than global sliders, and crop with intention rather than habit.
Watch the full tutorial on YouTube to see McKinnon’s before and after comparisons in real time. Seeing the transformation visually is worth the watch even if you’ve followed every step above.
Comments (2)
I tried this on a client project yesterday and the results were way better than expected.
Tried this technique this morning. Game changer for real.
Leave a Comment