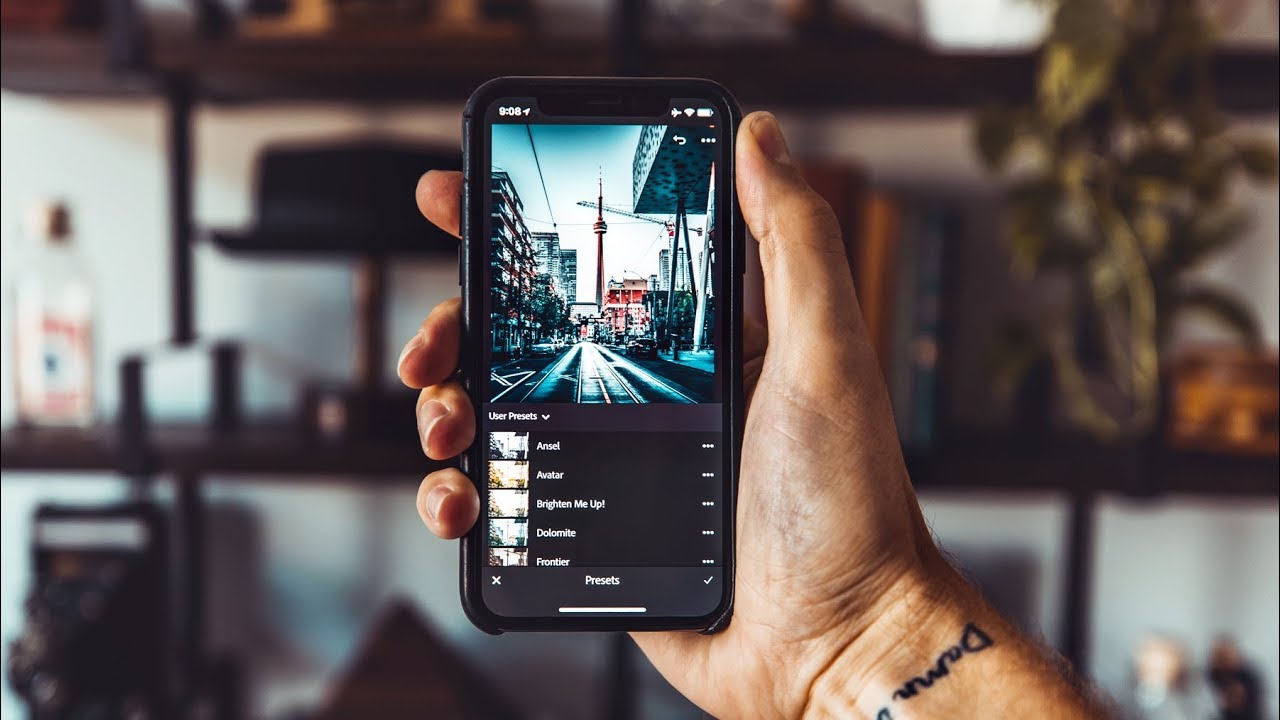
I’ll be honest with you: some of my favorite photos I’ve ever taken were shot on my phone. My most-liked Instagram post to this day came from a $200 Android, which started a whole conversation about whether gear actually matters as much as we think. The answer, for the record, is no. But here’s what does matter: consistency in your editing style. And for a long time, that was the one thing I couldn’t carry with me when I left my camera at home. My phone shots looked totally different from my camera shots because I couldn’t apply the same presets I’d spent years refining in Lightroom.
That changed when Adobe quietly rolled out the ability to sync your desktop Lightroom presets to the Lightroom mobile app. It sounds small, but it’s genuinely a big deal if you edit your camera work in Lightroom and want your phone photos to match. In this Peter McKinnon tutorial, he walks through the exact process of getting your presets from Lightroom Classic onto your phone, including the part that tripped him up and will probably trip you up too. Watch the full tutorial on YouTube if you want to see it in action alongside this written guide.
The workflow has a few moving parts, but once it clicks, it takes about ten minutes total. Here’s how to do it.
Step 1: Understand Which Version of Lightroom You’re Using
 Two Lightroom versions shown side by side in Creative Cloud
This is where most people get confused, and it’s worth pausing on before you do anything else. Adobe has two separate desktop applications: Lightroom Classic CC and Lightroom CC. They are not the same program. Classic is the full-featured version most working photographers use, with a library panel, folders on your hard drive, and all the tools you’re used to. Lightroom CC is a newer, cloud-first version that syncs everything automatically.
Two Lightroom versions shown side by side in Creative Cloud
This is where most people get confused, and it’s worth pausing on before you do anything else. Adobe has two separate desktop applications: Lightroom Classic CC and Lightroom CC. They are not the same program. Classic is the full-featured version most working photographers use, with a library panel, folders on your hard drive, and all the tools you’re used to. Lightroom CC is a newer, cloud-first version that syncs everything automatically.
The mobile preset sync works through Lightroom CC. So even if you primarily work in Classic, you need to have Lightroom CC installed as well. Open your Creative Cloud desktop app, find Lightroom CC in the app list, and install it if you haven’t already. Think of it as a bridge between your Classic setup and your phone.
Step 2: Make Sure Syncing Is Enabled in Lightroom Classic
 Lightroom Classic menu showing sync status under user name
Open Lightroom Classic and look at the top-left corner where your Adobe account name appears. Click on it. You’ll see an option related to syncing. Make sure it is active and not paused. If syncing is paused or turned off, nothing is going to transfer anywhere, and you’ll spend a lot of time wondering why the process isn’t working.
Lightroom Classic menu showing sync status under user name
Open Lightroom Classic and look at the top-left corner where your Adobe account name appears. Click on it. You’ll see an option related to syncing. Make sure it is active and not paused. If syncing is paused or turned off, nothing is going to transfer anywhere, and you’ll spend a lot of time wondering why the process isn’t working.
This sync is what connects your Classic catalog to Adobe’s cloud, which is the same cloud that Lightroom CC and the mobile app pull from. Keeping it active is step one to making the whole system function.
Step 3: Install Your Presets Inside Lightroom CC (Not Just Classic)
 Lightroom CC file menu open, preset import option highlighted
Here’s the step that McKinnon flags as the thing that confused him most, and it’s the one I see people skip all the time. Even if your presets are already installed in Lightroom Classic, they are not automatically available in Lightroom CC. These are two separate applications with separate preset libraries.
Lightroom CC file menu open, preset import option highlighted
Here’s the step that McKinnon flags as the thing that confused him most, and it’s the one I see people skip all the time. Even if your presets are already installed in Lightroom Classic, they are not automatically available in Lightroom CC. These are two separate applications with separate preset libraries.
Open Lightroom CC on your desktop. Go to File in the menu bar and look for the option to import or install presets. You’ll point it to your preset files (.lrtemplate or .xmp format), and Lightroom CC will install them into its own system. If you have presets from multiple sources, such as ones you’ve built yourself, purchased packs, or freebies you’ve collected, you’ll want to import all of them now. Take the extra few minutes to get them all in one pass.
Step 4: Trigger the Cloud Sync in Lightroom CC
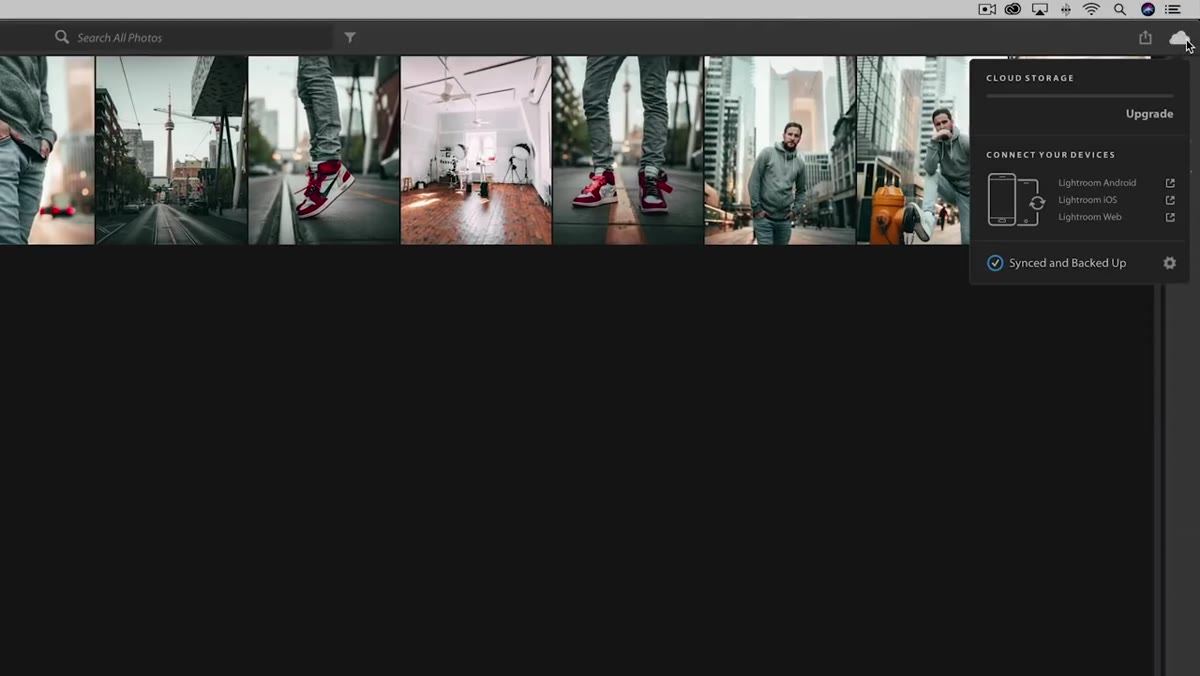 Cloud sync icon in Lightroom CC showing upload in progress
Once your presets are installed in Lightroom CC, look for the cloud icon in the upper right corner of the application. Clicking it will show you the current sync status. If it shows a number of items waiting to upload, just let it run. Depending on how many presets you have, this can take anywhere from a few seconds to a couple of minutes.
Cloud sync icon in Lightroom CC showing upload in progress
Once your presets are installed in Lightroom CC, look for the cloud icon in the upper right corner of the application. Clicking it will show you the current sync status. If it shows a number of items waiting to upload, just let it run. Depending on how many presets you have, this can take anywhere from a few seconds to a couple of minutes.
Do not close the application while it’s syncing. Let it finish completely. This is the moment your presets travel from your desktop to Adobe’s cloud servers, which is what makes them available on every device connected to your account.
Step 5: Open Lightroom Mobile and Find Your Presets
 Lightroom mobile app open with preset panel visible at bottom
Pick up your phone, open the Lightroom mobile app, and let it sync. You’ll see a small indicator if there’s anything new coming in. Once it settles, open any photo in your library and scroll to the far right of the editing toolbar at the bottom of the screen until you find “Presets.”
Lightroom mobile app open with preset panel visible at bottom
Pick up your phone, open the Lightroom mobile app, and let it sync. You’ll see a small indicator if there’s anything new coming in. Once it settles, open any photo in your library and scroll to the far right of the editing toolbar at the bottom of the screen until you find “Presets.”
Tap Presets, and your custom preset folders should now appear alongside the default Adobe ones. If they don’t show up immediately, give the app another minute and try again. The first sync can occasionally take a moment to populate fully. Once they appear, you can apply any of them to your phone photos with a single tap, exactly the same way you would in the desktop app.
A Note From My Own Workflow
I’ve been using this setup for a while now, and the one thing I’d add to McKinnon’s walkthrough is this: consider building a small collection of presets specifically tuned for mobile photos before you start relying on this heavily. Your phone camera captures light and color differently than your DSLR or mirrorless body. The presets that look perfect on a RAW file from your camera may hit slightly differently on a JPEG from your phone.
What I do on my Sunday morning photo walks in Seattle is shoot everything in Lightroom’s built-in DNG format on mobile rather than the standard phone JPEG. The Lightroom mobile camera app has this option built in. DNG files give you more latitude to adjust exposure and color, which means your presets have more to work with and the results look much closer to what you’d get editing a camera file. It’s a small change that makes a noticeable difference.
Getting your presets onto your phone is one of those things that sounds technical but is mostly just a sequencing problem: Classic syncs to the cloud, CC bridges the gap, mobile pulls it all down. Once the path is set up, it stays set up. The single most important takeaway here is that Lightroom CC is not optional in this process. It’s the link in the chain that makes everything else work, and trying to skip it is what sends most people in circles.
Watch the full tutorial on YouTube to follow along with Peter McKinnon’s walkthrough and see each step demonstrated live.
Comments (2)
Never thought of approaching it this way. Really creative.
Really solid breakdown. This pairs perfectly with the retouching work I've been writing about.
Leave a Comment