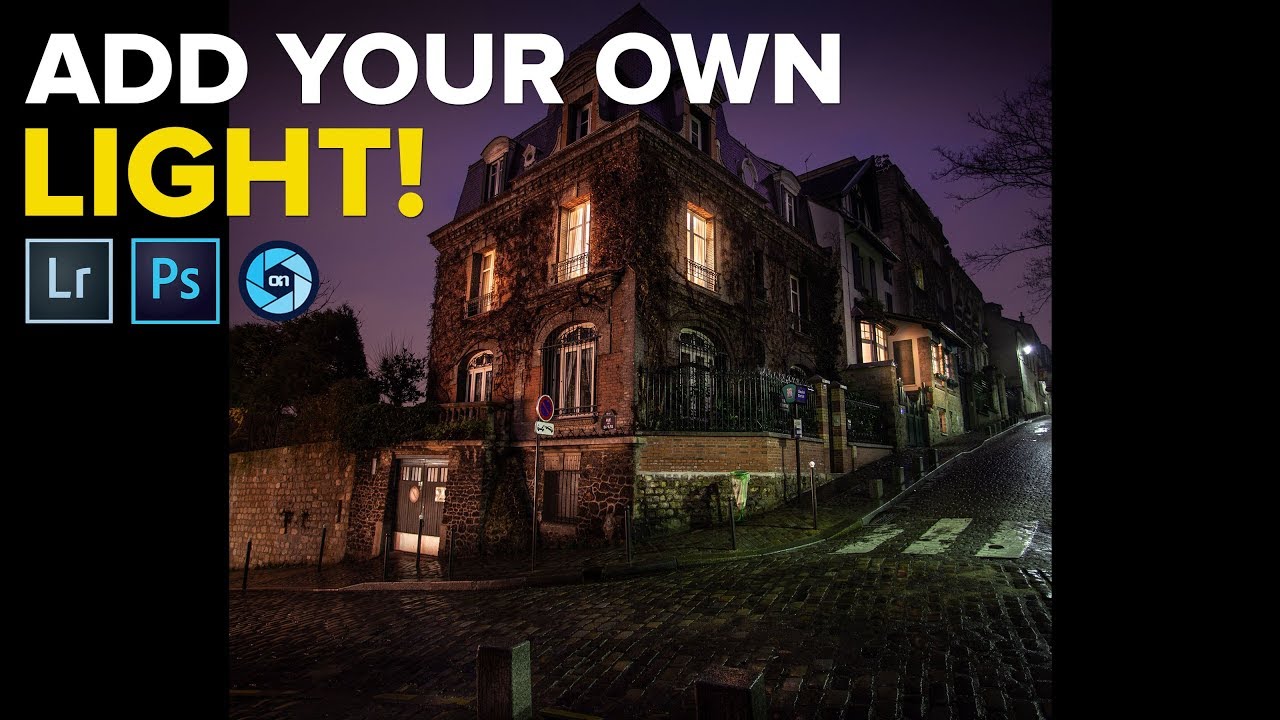
There’s a specific kind of frustration I know well: you’re out shooting at night, the scene is gorgeous, the windows of a building are glowing amber, and you come home with a photo that’s technically fine but emotionally flat. The warmth you felt standing there is just… gone. The light looks cold and purple and nothing like what drew you to the shot in the first place. I’ve been there more times than I can count, usually on a Sunday photo walk when the light does something magic and my camera somehow fails to feel it.
That’s exactly the problem this technique fixes. In this Matt Kloskowski tutorial, Watch the full tutorial on YouTube, Matt walks through how to use Lightroom’s radial filter to paint warm, glowing light into the windows of a photo that was shot at night. It’s the kind of edit that could easily go wrong and look fake, but when you understand the reasoning behind each adjustment, it lands beautifully. It’s also a great reminder that your old photo archive is full of images just waiting for you to look at them with new eyes.
One thing I want to flag before we dive in: Matt is upfront that this technique works best when there’s already some light present in the photo. You’re enhancing something real, not inventing it from scratch. Keep that in mind as you work through your own images.
Step 1: Choose the Right Photo
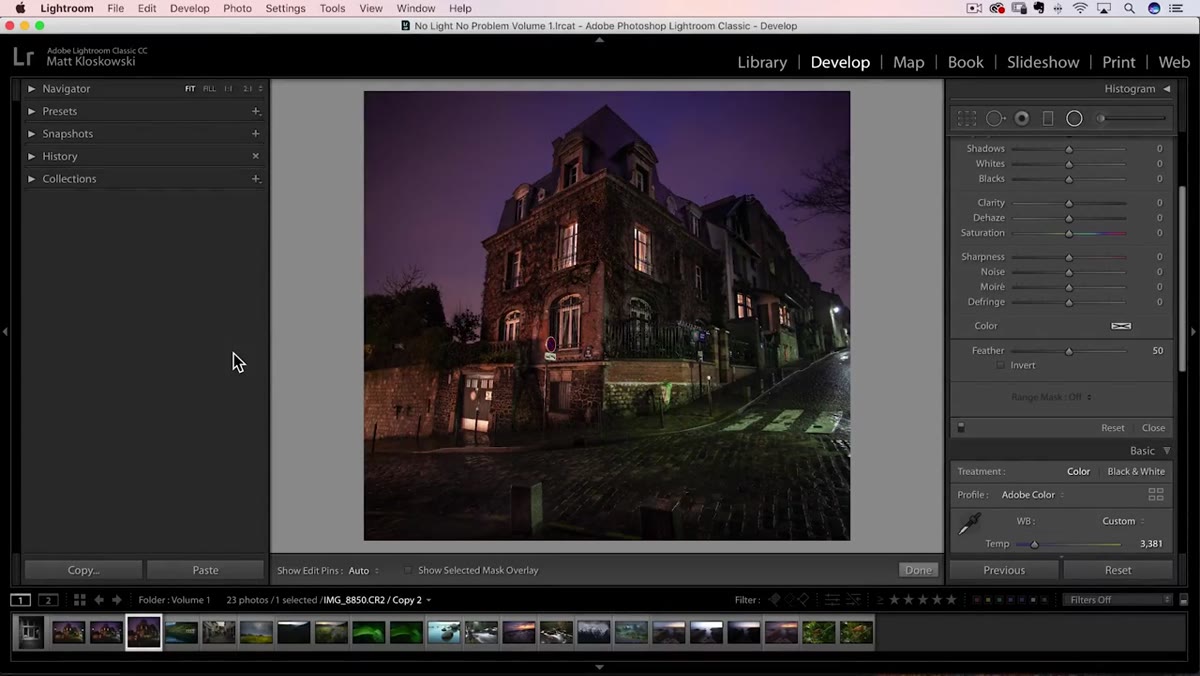 Before and after of a dark moody night photo with windows
Start by selecting a photo that actually gives this technique something to work with. Night photos, moody interiors, and architectural shots where windows or lamps are already lit are ideal. The scene should already have some ambient warmth trying to break through. The reason this works so well on night photos, as Matt explains, is that they tend to skew cool, with blue and purple tones dominating the shadows. That contrast is exactly what makes a warm glow pop. If you’re digging through old photos for something to try this on, look for any image where you remember thinking “the light looked better in person.”
Before and after of a dark moody night photo with windows
Start by selecting a photo that actually gives this technique something to work with. Night photos, moody interiors, and architectural shots where windows or lamps are already lit are ideal. The scene should already have some ambient warmth trying to break through. The reason this works so well on night photos, as Matt explains, is that they tend to skew cool, with blue and purple tones dominating the shadows. That contrast is exactly what makes a warm glow pop. If you’re digging through old photos for something to try this on, look for any image where you remember thinking “the light looked better in person.”
Step 2: Open the Radial Filter (or Radial Gradient)
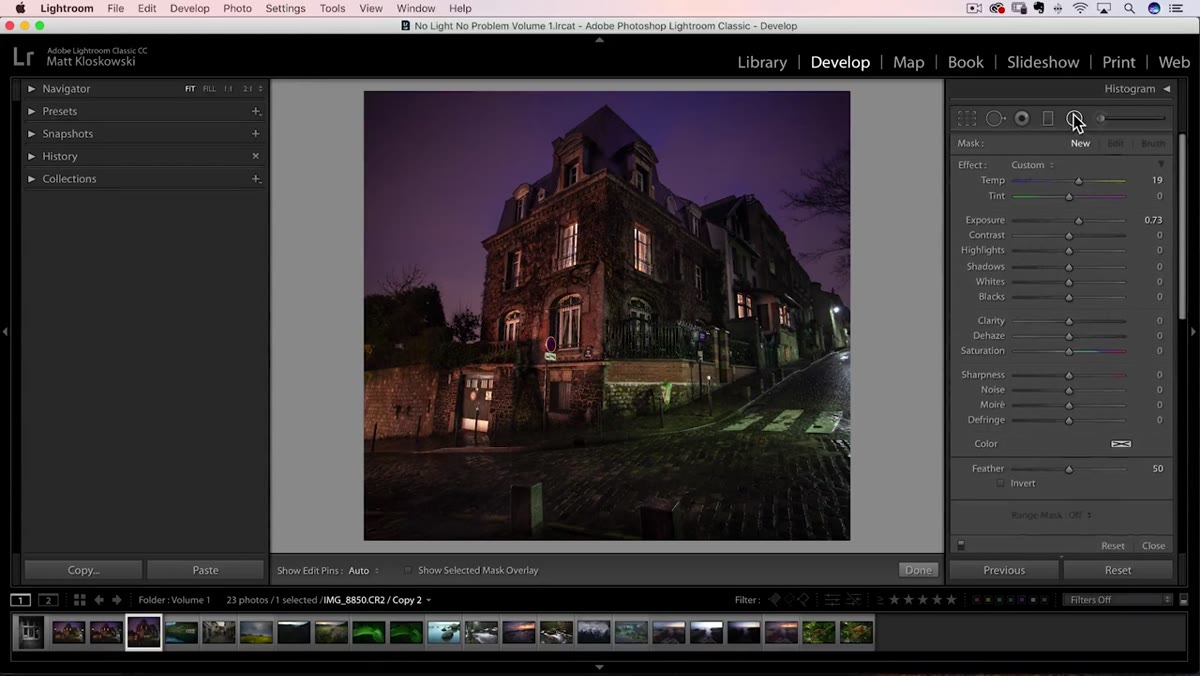 Lightroom toolbar with radial filter tool selected at the top
In Lightroom Classic, find the radial filter in the toolbar just below the histogram, in the panel above your sliders. In newer versions of Lightroom (and in Camera Raw inside Photoshop), this is called the Radial Gradient. Click it to activate it. If you’re using a different raw editor, check for a similar tool. Most modern editors have some version of a radial mask that lets you apply adjustments to a specific elliptical area of the image. The concept translates across software even if the exact name changes.
Lightroom toolbar with radial filter tool selected at the top
In Lightroom Classic, find the radial filter in the toolbar just below the histogram, in the panel above your sliders. In newer versions of Lightroom (and in Camera Raw inside Photoshop), this is called the Radial Gradient. Click it to activate it. If you’re using a different raw editor, check for a similar tool. Most modern editors have some version of a radial mask that lets you apply adjustments to a specific elliptical area of the image. The concept translates across software even if the exact name changes.
Step 3: Set Your Exposure and Temperature Before Drawing
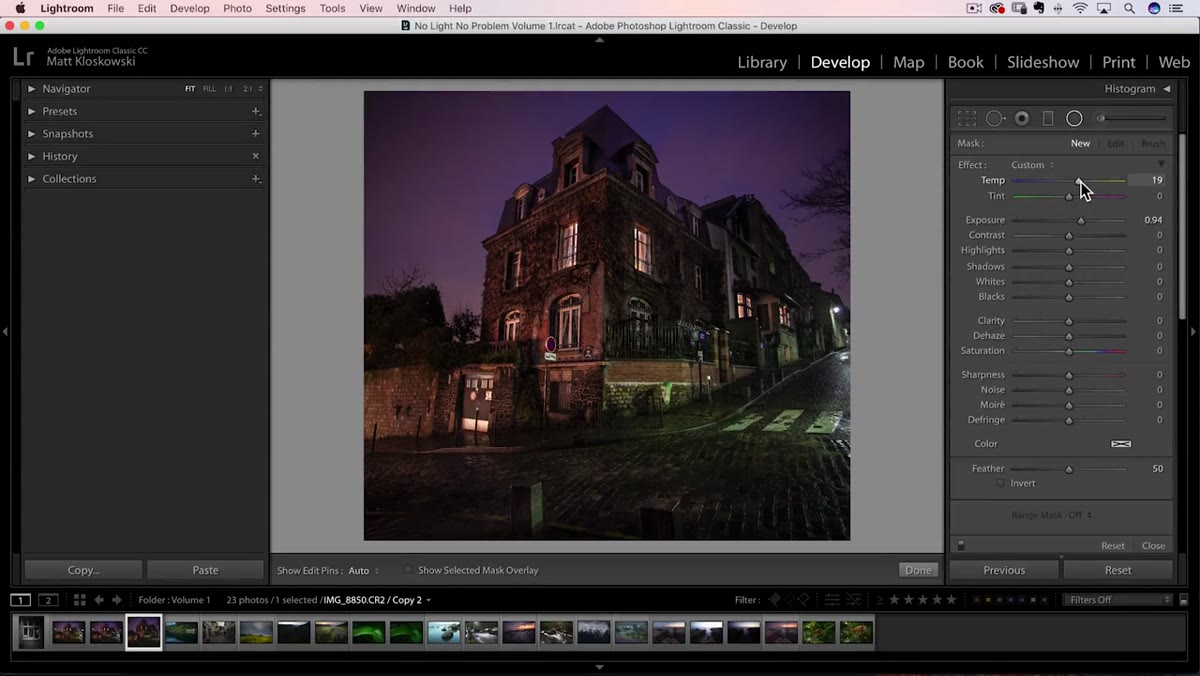 Lightroom radial filter panel showing exposure and temperature sliders adjusted
Before you draw your radial filter onto the image, dial in the adjustments you want to apply. Matt bumps up the Exposure slider to bring in more light, and he also raises the Temperature slider toward the warm (yellow-orange) end. You don’t need to be precise here yet. Getting in the ballpark before you draw just makes it easier to see what you’re doing in real time. A moderate exposure increase, somewhere in the range of 0.5 to 1.5 stops, combined with a warm temperature shift, is a good starting point. You can refine everything after.
Lightroom radial filter panel showing exposure and temperature sliders adjusted
Before you draw your radial filter onto the image, dial in the adjustments you want to apply. Matt bumps up the Exposure slider to bring in more light, and he also raises the Temperature slider toward the warm (yellow-orange) end. You don’t need to be precise here yet. Getting in the ballpark before you draw just makes it easier to see what you’re doing in real time. A moderate exposure increase, somewhere in the range of 0.5 to 1.5 stops, combined with a warm temperature shift, is a good starting point. You can refine everything after.
Step 4: Draw the Radial Filter Over a Window
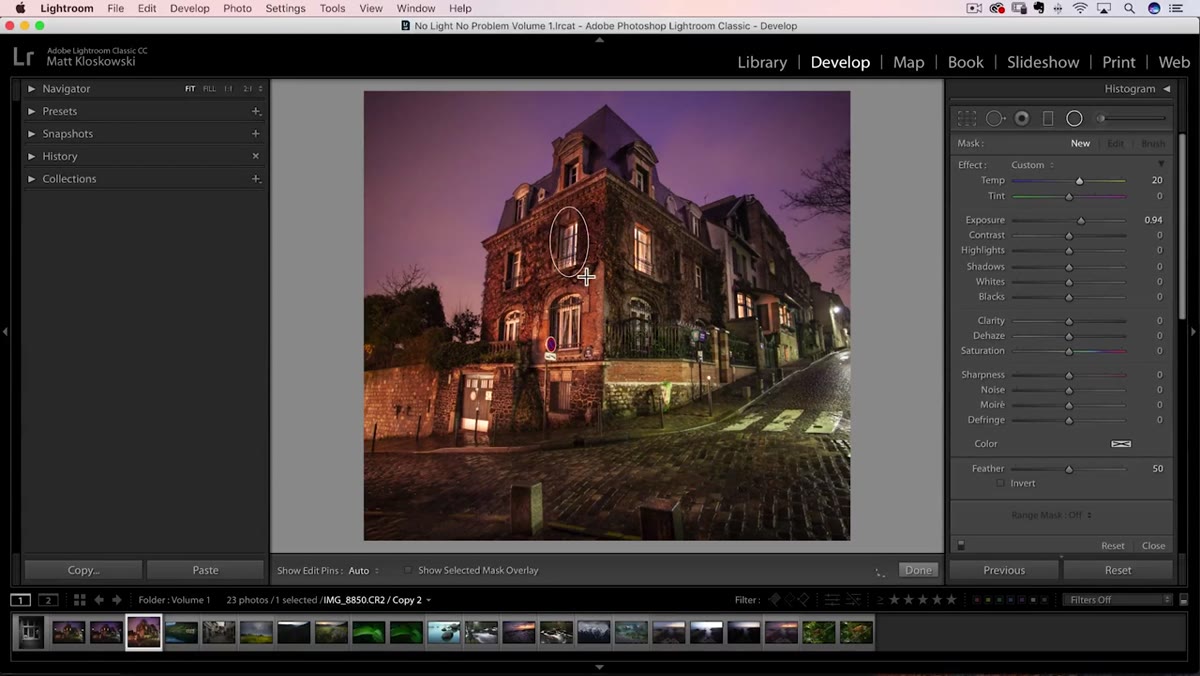 Radial filter being drawn over a window area in the photo
Click and drag to draw an oval shape over one of the lit windows in your photo. The goal is to contain the glow roughly within the window frame, letting it feather softly outward to simulate the way real light spills. Here’s the thing Matt mentions that trips up almost everyone at first: the adjustment might apply to the outside of the oval instead of the inside. If your whole image is getting warmer except the window, look for the “Invert” checkbox in the radial filter panel and toggle it. Once the adjustment is on the inside of the oval, you’re in the right place.
Radial filter being drawn over a window area in the photo
Click and drag to draw an oval shape over one of the lit windows in your photo. The goal is to contain the glow roughly within the window frame, letting it feather softly outward to simulate the way real light spills. Here’s the thing Matt mentions that trips up almost everyone at first: the adjustment might apply to the outside of the oval instead of the inside. If your whole image is getting warmer except the window, look for the “Invert” checkbox in the radial filter panel and toggle it. Once the adjustment is on the inside of the oval, you’re in the right place.
Step 5: Adjust the Feather to Sell the Effect
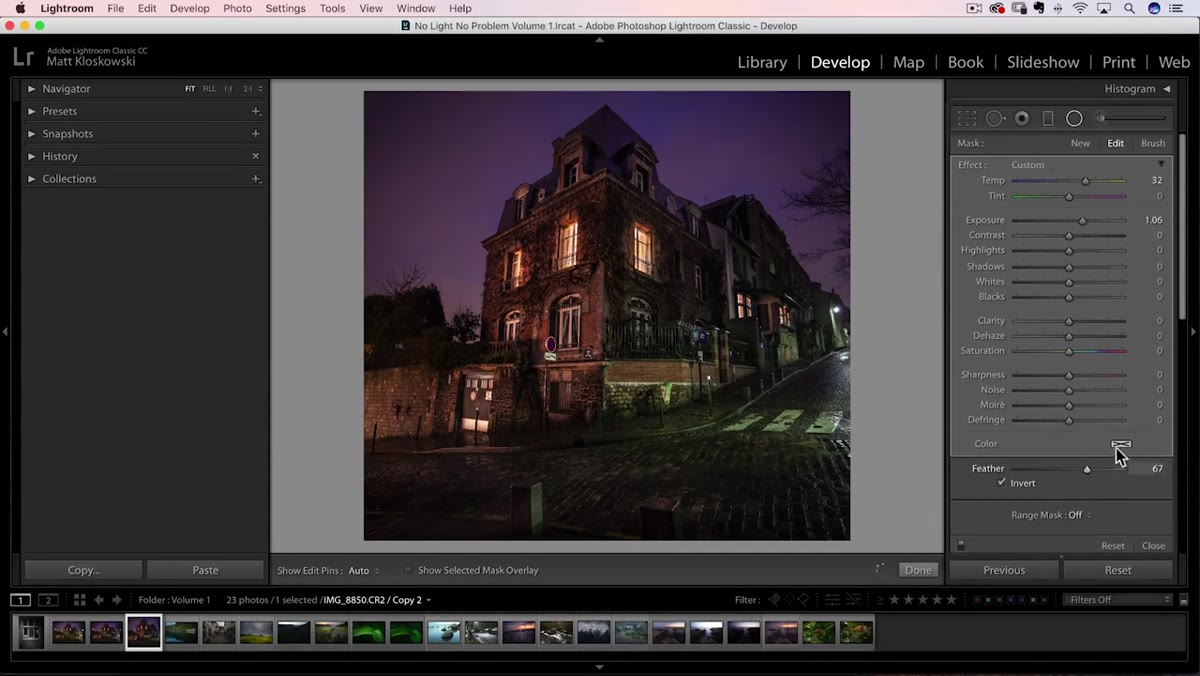 Feather slider in radial filter panel being adjusted for softer light falloff
The Feather slider is what separates a convincing glow from a pasted-on circle. A high feather value (think 70 to 90) gives you a gradual falloff from the bright center of the window outward, which is how light actually behaves. A low feather creates a hard edge that will look artificial immediately. Spend a little time here. Nudge the feather up and down while looking at the edges of your oval and ask yourself: does this look like light coming through a window, or does it look like a selection? Real light doesn’t have clean edges.
Feather slider in radial filter panel being adjusted for softer light falloff
The Feather slider is what separates a convincing glow from a pasted-on circle. A high feather value (think 70 to 90) gives you a gradual falloff from the bright center of the window outward, which is how light actually behaves. A low feather creates a hard edge that will look artificial immediately. Spend a little time here. Nudge the feather up and down while looking at the edges of your oval and ask yourself: does this look like light coming through a window, or does it look like a selection? Real light doesn’t have clean edges.
Step 6: Duplicate and Reuse the Filter for Multiple Windows
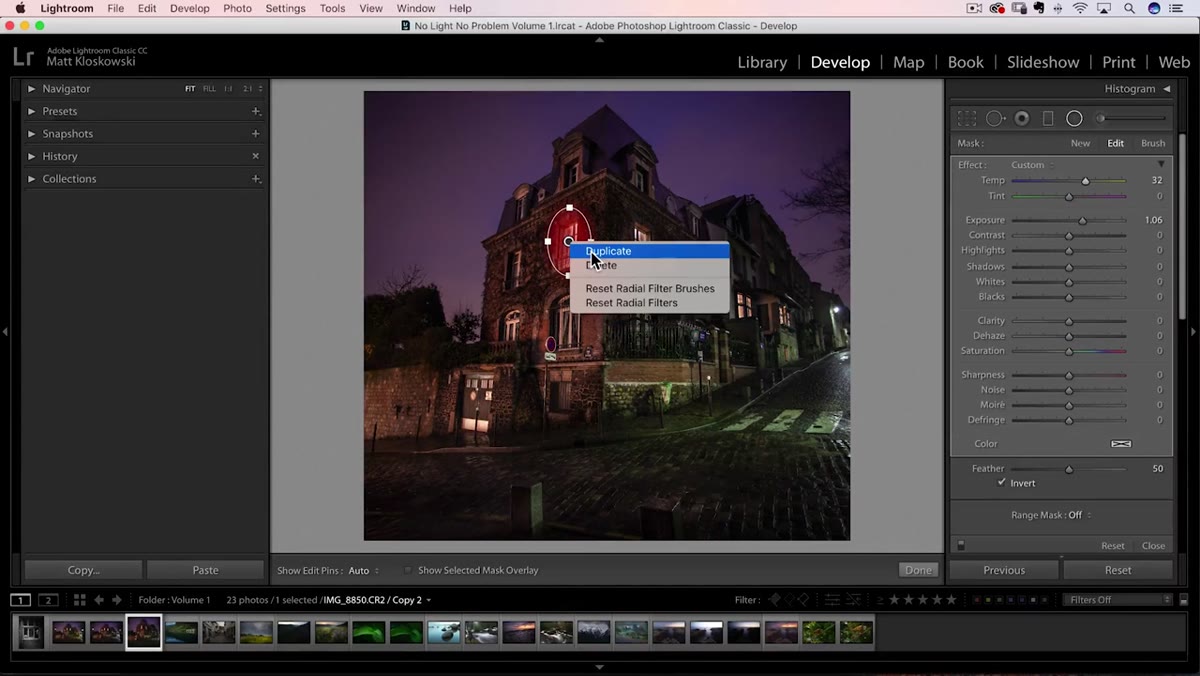 Right-click menu showing Duplicate option on a radial filter pin
If your photo has more than one window, you don’t need to rebuild the filter from scratch each time. Right-click on the adjustment pin (the small circle that appears when your radial filter is active) and choose Duplicate. Lightroom creates an exact copy of all your settings. Drag the copy over to the next window and resize or rotate the oval to fit. For windows where the light is dimmer or a lamp isn’t actually on, be more conservative with your Exposure and Temperature settings. Pushing those values too far on a dark window is exactly where the effect starts to look fake, and Matt is careful to point that out in the tutorial.
Right-click menu showing Duplicate option on a radial filter pin
If your photo has more than one window, you don’t need to rebuild the filter from scratch each time. Right-click on the adjustment pin (the small circle that appears when your radial filter is active) and choose Duplicate. Lightroom creates an exact copy of all your settings. Drag the copy over to the next window and resize or rotate the oval to fit. For windows where the light is dimmer or a lamp isn’t actually on, be more conservative with your Exposure and Temperature settings. Pushing those values too far on a dark window is exactly where the effect starts to look fake, and Matt is careful to point that out in the tutorial.
Step 7: Fine-Tune Each Pin Individually
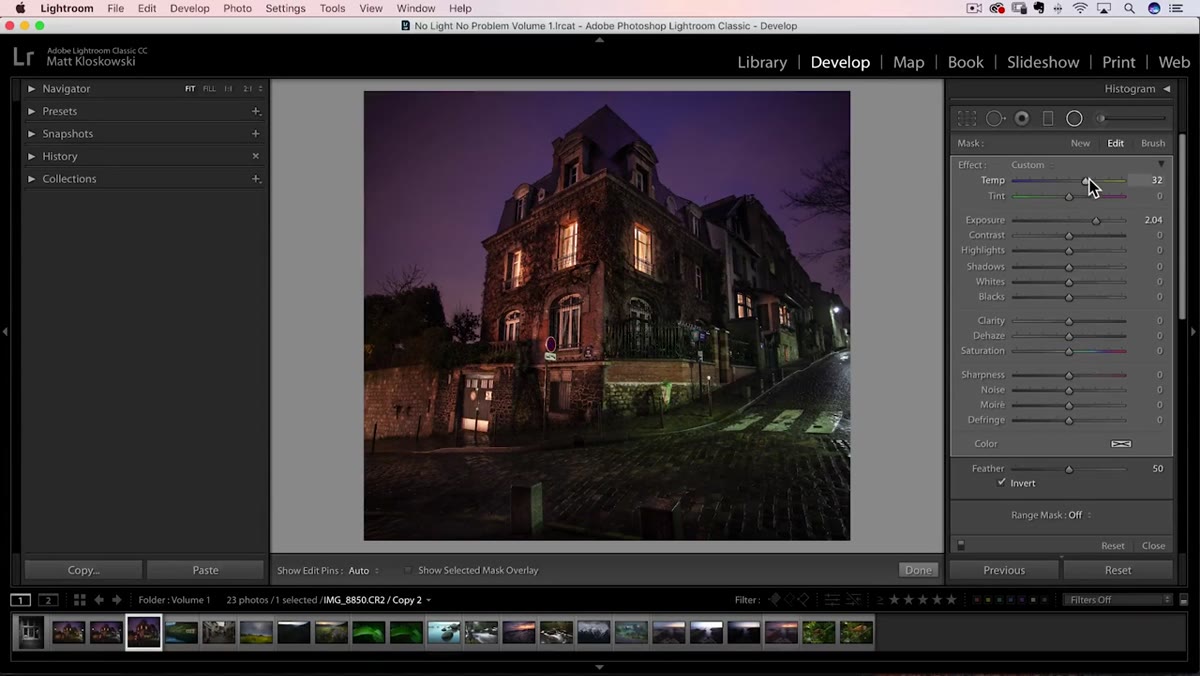 Individual radial filter pin selected and exposure being adjusted per window
Once you have radial filters on all your windows, go back and click each pin individually to review and refine the settings. Not every window needs the same treatment. A large, brightly lit window might need more exposure than a small partially obscured one. Adjusting each one separately keeps the edit from looking uniform and mechanical. Real light sources in a scene vary in intensity, and your edit should reflect that.
Individual radial filter pin selected and exposure being adjusted per window
Once you have radial filters on all your windows, go back and click each pin individually to review and refine the settings. Not every window needs the same treatment. A large, brightly lit window might need more exposure than a small partially obscured one. Adjusting each one separately keeps the edit from looking uniform and mechanical. Real light sources in a scene vary in intensity, and your edit should reflect that.
What I’d Add From My Own Experience
The Thomas Kincade comparison Matt makes is funny because it’s accurate, and it’s also a useful gut check. If your edit is starting to look like a cottage painting, pull the temperature back a touch. The sweet spot for this effect is warm enough to feel intentional but cool enough to still read as a photograph. I’ve found that dropping the Saturation slider slightly on each radial filter, just a few points, helps keep the warmth from going orange in a cartoonish way. It keeps the color grounded. I also like to zoom out to 50% or less when evaluating this edit. Pixel-peeping at 100% will make every radial filter look fake. The effect is designed to be read at a normal viewing distance, the way someone would actually see the photo on a screen or a print.
The biggest takeaway here is that you don’t need better light in every photo. Sometimes you need better editing instincts about the light that’s already there, even if it’s faint. This technique won’t rescue a completely flat daytime photo, but for night shots, moody architecture, and any scene where warm interior light is part of the story, it’s one of the most efficient tools in the editing kit. Your old photo library probably has ten images right now that would benefit from exactly this.
Watch the full tutorial on YouTube to see Matt walk through the whole process in real time. It’s short, practical, and worth the ten minutes.
Comments
Leave a Comment