If you’ve ever recorded a screen share or a picture-in-picture segment and stared at that blank white or default black background, you know the feeling. It looks unfinished. It looks like you forgot something. For a while, I just lived with it, because I assumed animated backgrounds required serious motion graphics skills I didn’t have. Turns out, the fix is surprisingly simple, and it took one Peter McKinnon tutorial to completely change how I set up video segments that need a secondary display.
In this Peter McKinnon tutorial, he walks through how to build a seamlessly looping background using your own logo inside After Effects. The result is a tiled, gently animated pattern that sits behind picture-in-picture windows or screen content, making everything look intentional and on-brand instead of slapped together. The technique uses one single effect, Motion Tile, and a grand total of two keyframes. That’s it. I’ve since used this for every tutorial video I’ve posted this year, and it takes me about ten minutes to set up from scratch.
The whole thing comes down to understanding how After Effects tiles and animates a single element across a composition. Once that clicks, you’ll wonder why you ever left those backgrounds blank.
Step 1: Create a New Composition
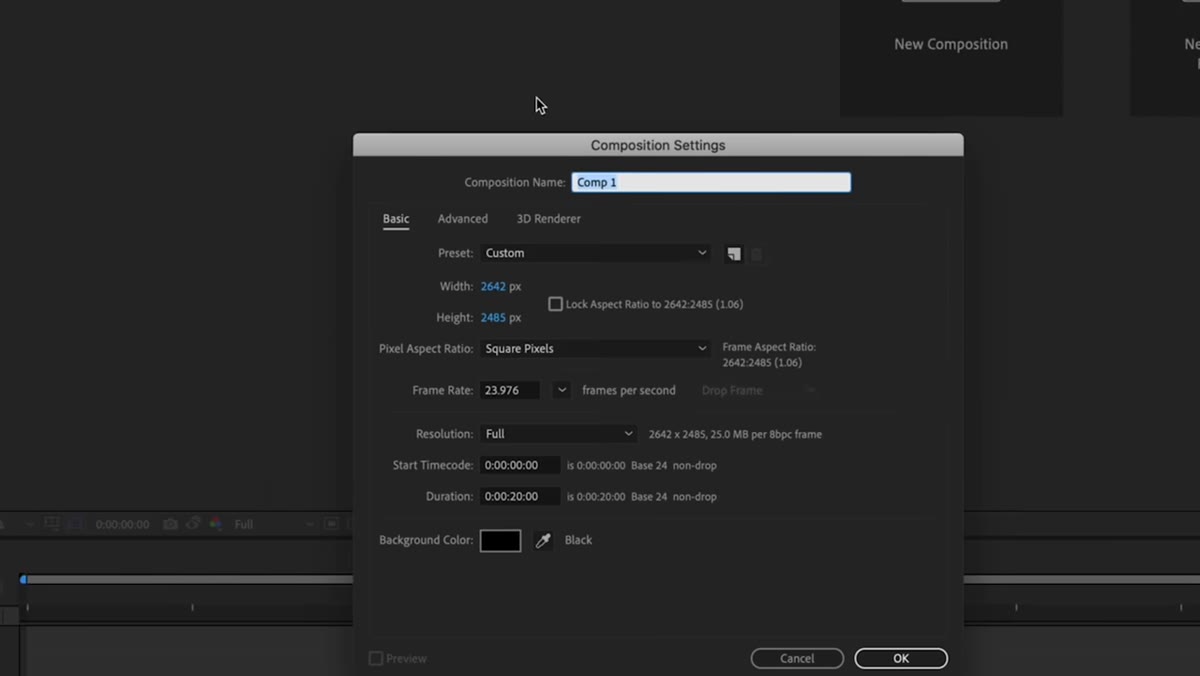 New Composition dialog box open in After Effects
Open After Effects and go to Composition, then New Composition. Give it a name that makes sense to you, something like “Looping Background” so you can find it later. Set the dimensions to 1920 by 1080 for a standard HD composition, and set the duration to 20 seconds. That length gives you enough room to work with and is easy to loop in your editing timeline. Click OK and you’ve got your canvas.
New Composition dialog box open in After Effects
Open After Effects and go to Composition, then New Composition. Give it a name that makes sense to you, something like “Looping Background” so you can find it later. Set the dimensions to 1920 by 1080 for a standard HD composition, and set the duration to 20 seconds. That length gives you enough room to work with and is easy to loop in your editing timeline. Click OK and you’ve got your canvas.
Step 2: Import Your Logo and Add It to the Timeline
 PNG logo file being dragged onto the After Effects timeline
You’ll need your logo as a PNG file with a transparent background. That transparency is important because the composition’s background color will show through wherever your logo isn’t, which is what creates the tiled pattern look. Locate the file in your project panel on the left side and drag it directly onto the timeline. It’ll probably appear larger than you want, so don’t panic.
PNG logo file being dragged onto the After Effects timeline
You’ll need your logo as a PNG file with a transparent background. That transparency is important because the composition’s background color will show through wherever your logo isn’t, which is what creates the tiled pattern look. Locate the file in your project panel on the left side and drag it directly onto the timeline. It’ll probably appear larger than you want, so don’t panic.
Step 3: Scale the Logo Down Using the Transform Controls
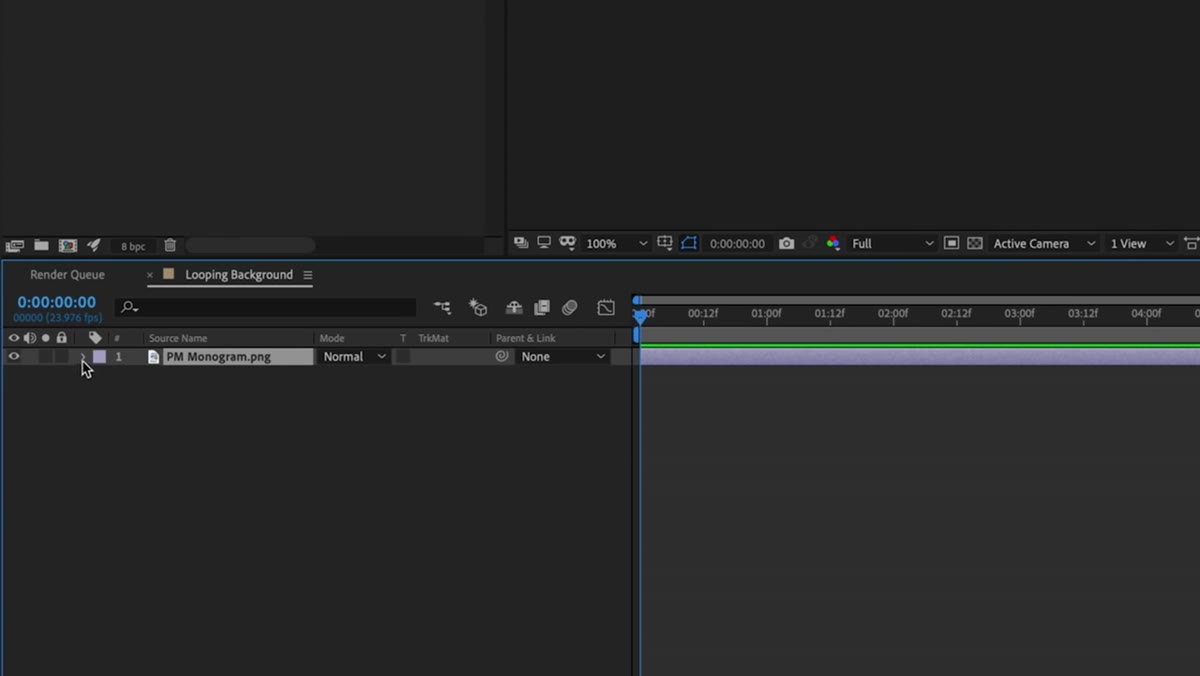 Transform dropdown open showing Scale property at 20 percent
Click the small arrow next to your logo layer in the timeline to expand its properties. Click the arrow next to Transform to open a second set of options, and find Scale. Click and drag the Scale value down to around 20 percent. That number is relative to your specific logo’s original size, so adjust until it looks like a reasonable repeating tile element rather than something that fills the whole frame. You’re just setting the base size here before the tiling effect does the heavy lifting.
Transform dropdown open showing Scale property at 20 percent
Click the small arrow next to your logo layer in the timeline to expand its properties. Click the arrow next to Transform to open a second set of options, and find Scale. Click and drag the Scale value down to around 20 percent. That number is relative to your specific logo’s original size, so adjust until it looks like a reasonable repeating tile element rather than something that fills the whole frame. You’re just setting the base size here before the tiling effect does the heavy lifting.
Step 4: Pre-Compose the Layer
 Pre-compose dialog box with layer name field highlighted
Right-click on your logo layer in the timeline and select Pre-compose from the menu. A dialog box will appear. Rename the pre-comp something like “Pre-Comp Logo” and click OK. Pre-composing nests your layer, which makes it much easier to apply effects cleanly. Think of it the same way you’d nest a clip in Premiere Pro when you want effects to treat everything as one unit. This step keeps things tidy and prevents the Motion Tile effect from behaving unexpectedly later.
Pre-compose dialog box with layer name field highlighted
Right-click on your logo layer in the timeline and select Pre-compose from the menu. A dialog box will appear. Rename the pre-comp something like “Pre-Comp Logo” and click OK. Pre-composing nests your layer, which makes it much easier to apply effects cleanly. Think of it the same way you’d nest a clip in Premiere Pro when you want effects to treat everything as one unit. This step keeps things tidy and prevents the Motion Tile effect from behaving unexpectedly later.
Step 5: Apply the Motion Tile Effect
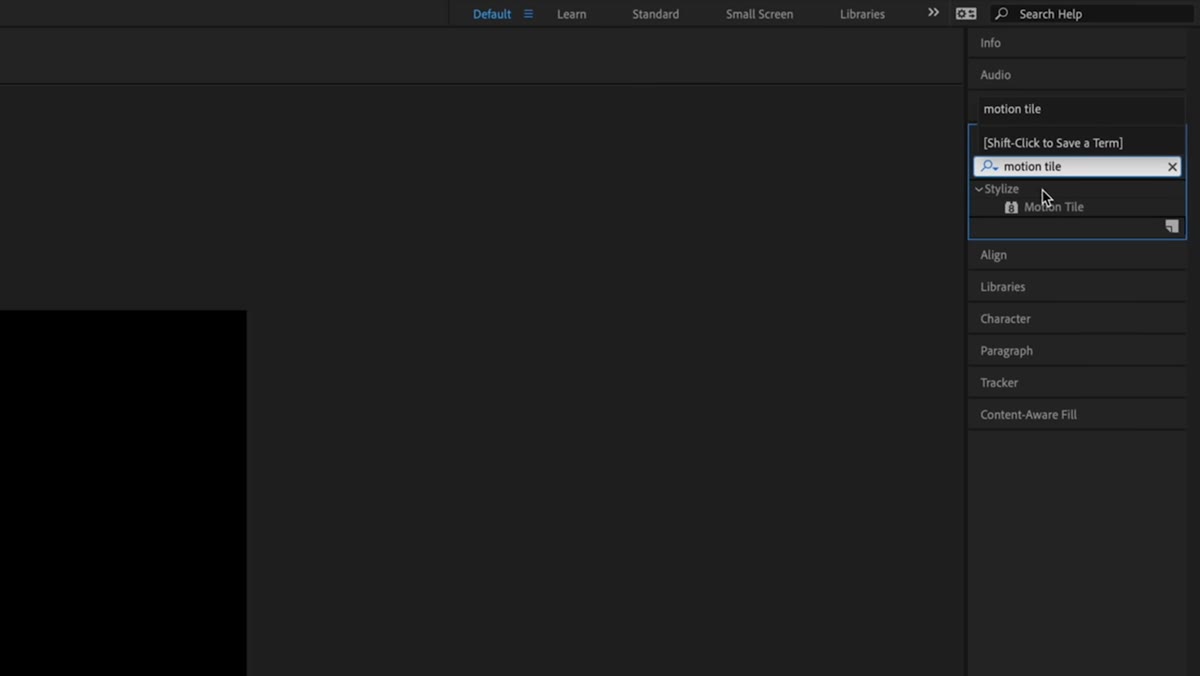 Motion Tile effect being dragged from Effects panel onto the timeline layer
Open the Effects and Presets panel, which is usually docked on the right side of your workspace. Type “Motion Tile” into the search bar. When it appears, drag it directly onto your pre-comp layer in the timeline. You’ll see the Effect Controls panel on the left side update immediately with all the Motion Tile parameters. This single effect is responsible for repeating your logo across the entire composition, so take a second to look at what’s available before touching anything.
Motion Tile effect being dragged from Effects panel onto the timeline layer
Open the Effects and Presets panel, which is usually docked on the right side of your workspace. Type “Motion Tile” into the search bar. When it appears, drag it directly onto your pre-comp layer in the timeline. You’ll see the Effect Controls panel on the left side update immediately with all the Motion Tile parameters. This single effect is responsible for repeating your logo across the entire composition, so take a second to look at what’s available before touching anything.
Step 6: Expand the Output Width and Height
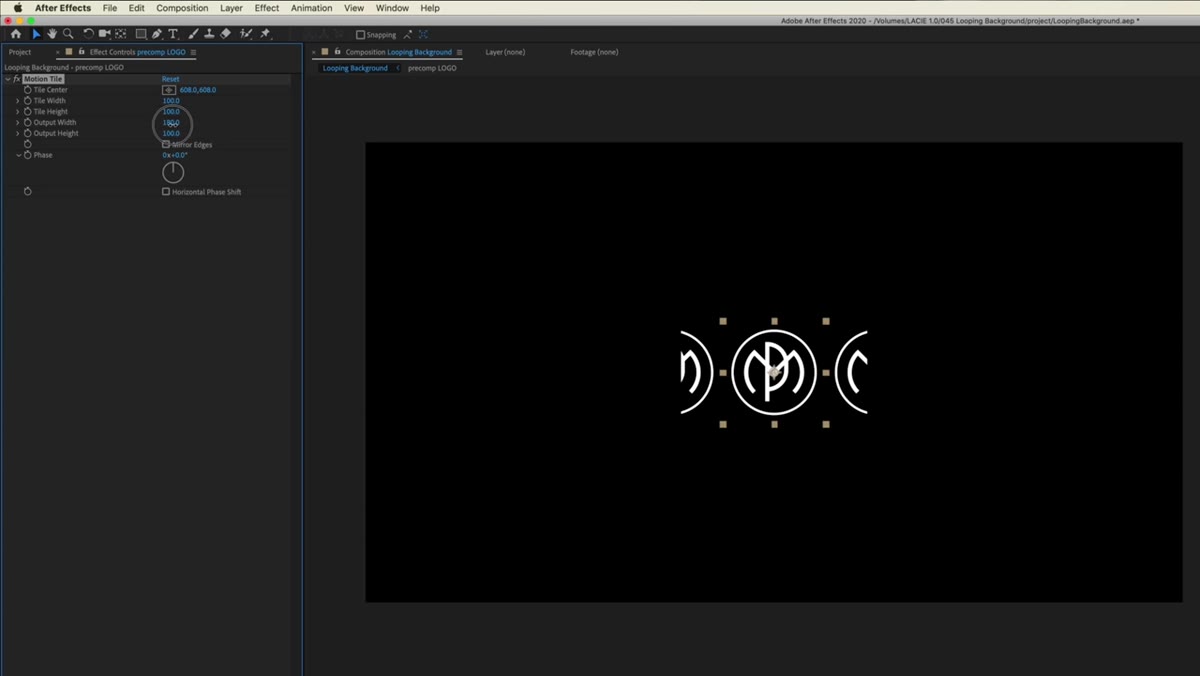 Output Width value being dragged to expand tiled logo pattern across frame
Inside the Effect Controls, you’ll see settings for Output Width and Output Height. Click and drag the Output Width value to the right. Watch your composition preview window as you drag and you’ll see your logo begin tiling horizontally across the frame. It fills in like a pattern, repeating in every direction. Then do the same for Output Height, dragging it until the logo tiles fill the full vertical space as well. Once both are expanded, your entire composition should be covered in a repeating grid of your logo.
Output Width value being dragged to expand tiled logo pattern across frame
Inside the Effect Controls, you’ll see settings for Output Width and Output Height. Click and drag the Output Width value to the right. Watch your composition preview window as you drag and you’ll see your logo begin tiling horizontally across the frame. It fills in like a pattern, repeating in every direction. Then do the same for Output Height, dragging it until the logo tiles fill the full vertical space as well. Once both are expanded, your entire composition should be covered in a repeating grid of your logo.
From here you can also adjust the Phase setting to offset the rows so the logos stagger instead of lining up in a rigid grid. Dragging the Phase value shifts everything into a more visually interesting brick-like pattern. There’s also a horizontal phase option if you check the corresponding box. Neither of these is required, but the staggered look tends to feel a bit softer and less mechanical on screen.
Step 7: Animate the Pattern with Two Keyframes
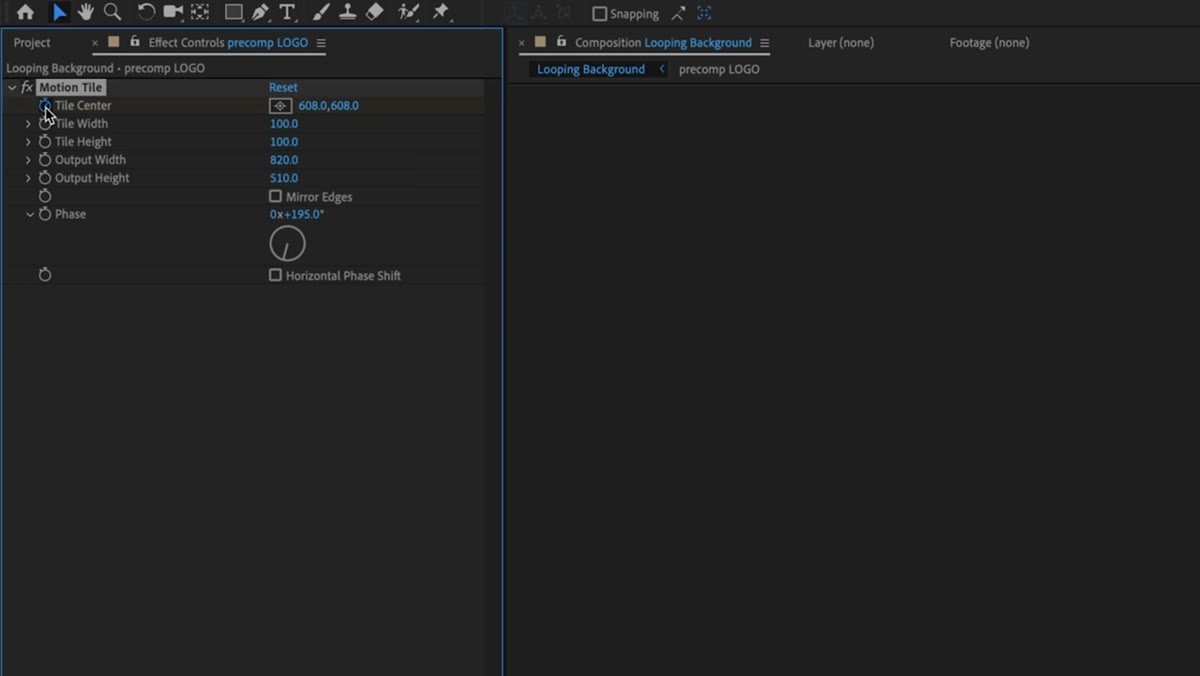 Stopwatch icon being clicked to set first keyframe on Tile Center property
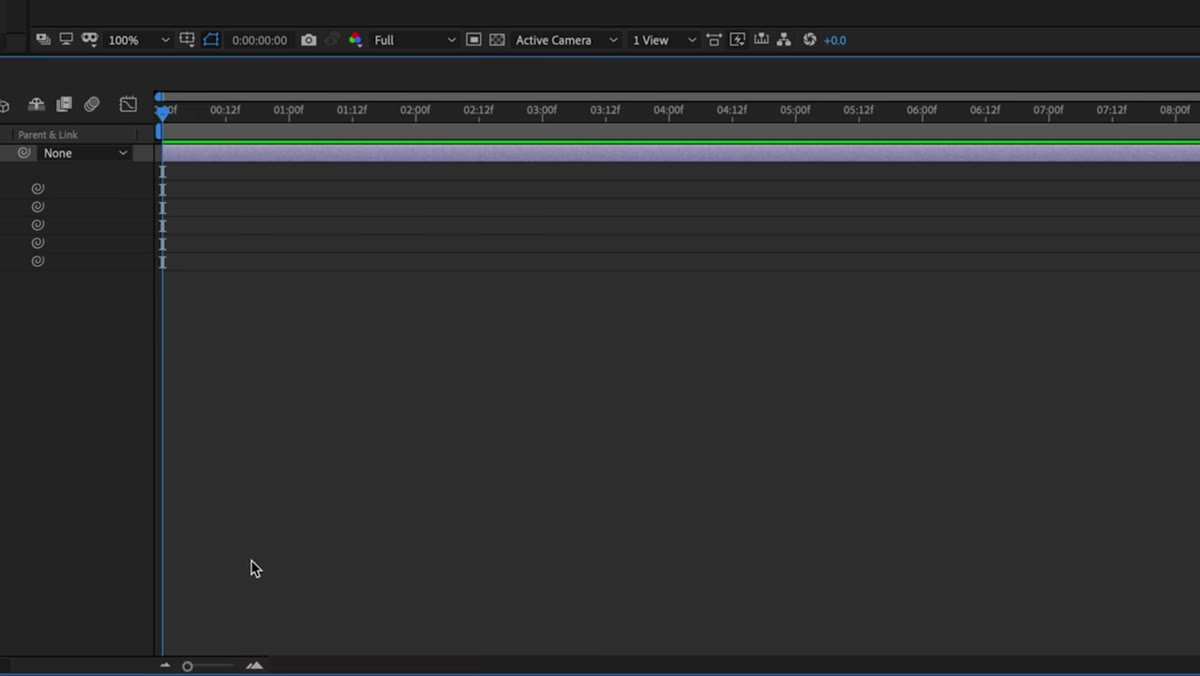
Make sure your playhead is at the very beginning of the timeline, at zero seconds. In the Effect Controls panel, find the Tile Center property and click the stopwatch icon next to it. That sets your first keyframe. Now drop down into the layer’s effect properties in the timeline panel to see the keyframe you just created.
Stopwatch icon being clicked to set first keyframe on Tile Center property
Make sure your playhead is at the very beginning of the timeline, at zero seconds. In the Effect Controls panel, find the Tile Center property and click the stopwatch icon next to it. That sets your first keyframe. Now drop down into the layer’s effect properties in the timeline panel to see the keyframe you just created.
Move your playhead all the way to the end of the timeline, to the 20-second mark. Now go back to Tile Center and drag the Y value until the center logo has moved down exactly one full logo-height, landing precisely where the logo directly below it started. This is the part that requires a careful eye. If the movement is even slightly off, the loop won’t be seamless. The goal is for the ending position to match exactly where the next logo in the pattern begins, so when the video loops back to frame one it looks continuous and uninterrupted.
A Note on Color and Opacity
The tutorial covers the mechanics perfectly, but one thing I’ve added to my own workflow is adjusting the opacity of the logo layer before I pre-compose it. Dropping it to around 15 or 20 percent gives the background a much more subtle, watermark-style feel rather than a busy pattern that competes with whatever content is displayed on top. If you’re using this behind a picture-in-picture window, you want the background to say “this is my brand” without screaming it. Low opacity is the difference between a polished backdrop and a distraction.
I also keep a few pre-built versions at different background colors saved as separate After Effects files. One dark, one light, one in my brand’s primary color. When I need one, I just swap out the export and I’m done in under a minute.
The single most important thing this technique teaches is that “animated” doesn’t have to mean complex. A looping background with two keyframes and one effect can make your videos look significantly more produced, and once you build it once, you can reuse it forever. Watch the full tutorial on YouTube to see Peter walk through each step in real time, especially the keyframe positioning, which is much easier to understand when you can see the logo snapping into place.
Comments (3)
Clear and practical. No fluff. Appreciate that.
This is exactly what I needed today. Been struggling with this for weeks.
Bookmarked. Coming back to this one for sure.
Leave a Comment