
Low-light photography is the situation that separates the photographers who understand their camera from the ones who are still guessing. I know this because I spent an embarrassing amount of time guessing. Sunday morning photo walks in Seattle will teach you humility fast - the light before 7am is gorgeous and completely unforgiving, and if you don’t know your settings, you’ll come home with a memory card full of blurry, muddy disappointments.
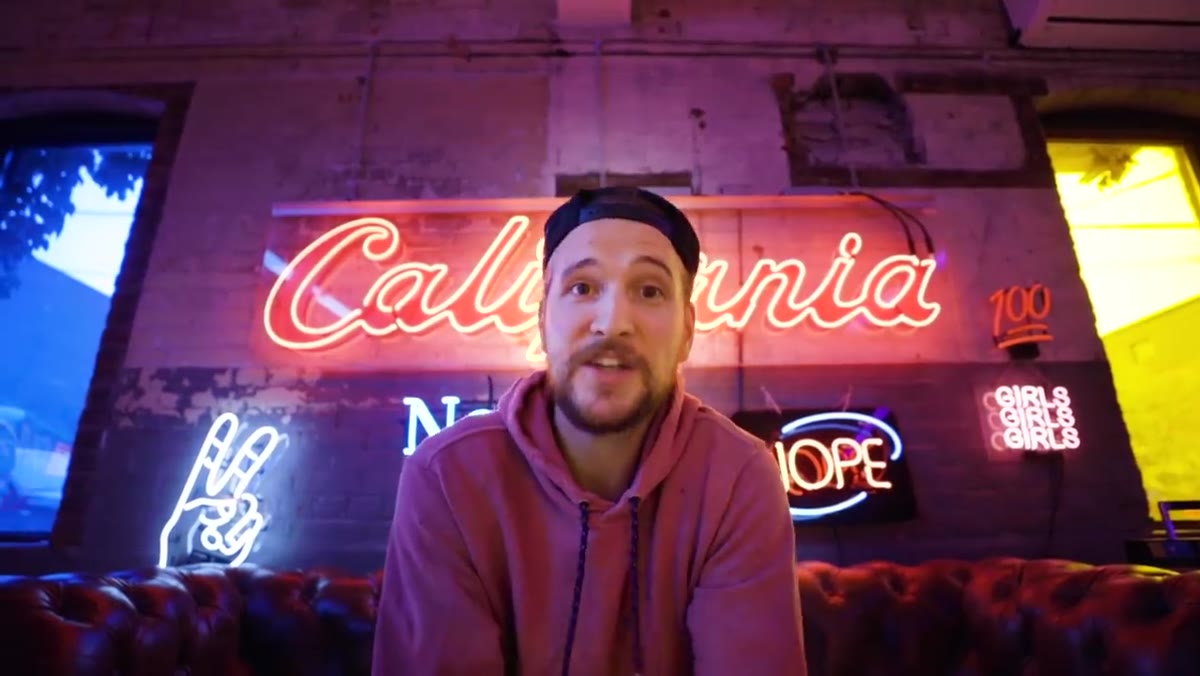
That’s exactly why this tutorial hit so close to home for me. In this Peter McKinnon tutorial, Watch the full tutorial on YouTube, Peter shoots inside a neon sign studio in Toronto - the kind of environment where the light is moody and beautiful but technically brutal. It’s a perfect testing ground. The problems he walks through are the exact same ones that fill my inbox every week: photos that are too blurry because something moved, or too grainy because the camera was compensating in the wrong direction.
What I like about how he breaks this down is that it’s not abstract. He connects every setting to a real scenario you’ve probably already lived through - the dog running through the frame, the kids in a dim living room, the shot that looked fine on your LCD and then fell apart on your laptop screen. Here’s the full walkthrough so you can follow along and apply it immediately.
Step 1: Identify the Two Culprits Ruining Your Low-Light Shots
 Peter explaining blur and noise as the two main low-light problems
Before you touch a single setting, you need to know what you’re actually fighting. In low-light situations, almost every bad photo comes down to one of two things: motion blur, because your shutter speed is too slow to freeze movement, or digital noise, because your camera is trying to compensate for the dark. Most people try to fix one and accidentally make the other worse. Knowing which problem you have tells you exactly where to start.
Peter explaining blur and noise as the two main low-light problems
Before you touch a single setting, you need to know what you’re actually fighting. In low-light situations, almost every bad photo comes down to one of two things: motion blur, because your shutter speed is too slow to freeze movement, or digital noise, because your camera is trying to compensate for the dark. Most people try to fix one and accidentally make the other worse. Knowing which problem you have tells you exactly where to start.
Step 2: Set Your Shutter Speed Using the Focal Length Rule
 Peter describing the double-your-focal-length shutter speed rule
Here’s the rule Peter lays out, and it’s one I give beginners constantly because it actually sticks. Whatever focal length you’re shooting at, your minimum shutter speed should be at least double that number. Shooting with a 50mm lens? Your shutter speed should be at least 1/100th of a second. On a 85mm? You want at least 1/160th or 1/200th. This gives you enough speed to handle both your own hand movement and whatever is moving in the frame. It’s not a perfect rule for every situation, but it’s a reliable floor, especially when the light is working against you.
Peter describing the double-your-focal-length shutter speed rule
Here’s the rule Peter lays out, and it’s one I give beginners constantly because it actually sticks. Whatever focal length you’re shooting at, your minimum shutter speed should be at least double that number. Shooting with a 50mm lens? Your shutter speed should be at least 1/100th of a second. On a 85mm? You want at least 1/160th or 1/200th. This gives you enough speed to handle both your own hand movement and whatever is moving in the frame. It’s not a perfect rule for every situation, but it’s a reliable floor, especially when the light is working against you.
Step 3: Compensate for a Faster Shutter Speed by Raising Your ISO
 Peter explaining ISO as a compensation tool for shutter speed
Once you lock in a faster shutter speed, the image is going to get darker - that’s just physics. Less time for light to hit the sensor means less exposure. This is where ISO comes in. Raising your ISO artificially amplifies your sensor’s sensitivity to light, which lets you maintain that faster shutter speed without ending up with a completely black frame. Peter suggests pushing to ISO 3200 or even 6400 depending on how dark your environment is. Yes, this introduces grain. That’s expected and - importantly - manageable.
Peter explaining ISO as a compensation tool for shutter speed
Once you lock in a faster shutter speed, the image is going to get darker - that’s just physics. Less time for light to hit the sensor means less exposure. This is where ISO comes in. Raising your ISO artificially amplifies your sensor’s sensitivity to light, which lets you maintain that faster shutter speed without ending up with a completely black frame. Peter suggests pushing to ISO 3200 or even 6400 depending on how dark your environment is. Yes, this introduces grain. That’s expected and - importantly - manageable.
The key is not to be afraid of high ISO. Modern cameras handle noise so much better than they did ten years ago. I’ve shot usable images at ISO 6400 on a mid-range mirrorless that would have been unusable at those settings on the crop sensor DSLR I started with. Know your camera’s limits by testing it in a controlled environment before you need those settings in the field.
Step 4: Reduce Noise in Lightroom Using Luminance Adjustment
 Peter adjusting the Luminance slider in Lightroom’s Detail panel
You’ve gotten the shot. Now it’s a little grainy in post. Open Lightroom, go to the Detail panel on the right side, and look for the Noise Reduction section - specifically the Luminance slider. Dragging it to the right smooths out grain in the luminance channel, which is the brightness information in your image. It works fast and the results are visible immediately.
Peter adjusting the Luminance slider in Lightroom’s Detail panel
You’ve gotten the shot. Now it’s a little grainy in post. Open Lightroom, go to the Detail panel on the right side, and look for the Noise Reduction section - specifically the Luminance slider. Dragging it to the right smooths out grain in the luminance channel, which is the brightness information in your image. It works fast and the results are visible immediately.
The caution here - and Peter emphasizes this - is to not overdo it. If you push Luminance too far, your subjects start to look plastic. Skin loses texture, fabric looks painted on, and the whole image feels artificial. I usually pull it until the grain stops being distracting, then back off about 10 points from there. A little grain in a low-light photo isn’t a failure. Sometimes it’s the thing that makes the photo feel real.
Step 5: Shoot in RAW, Especially in Low Light
 Peter and John discussing the importance of shooting RAW in low light
This one comes up in the tutorial as a point Peter’s friend John raises, and it’s worth stopping on. If you are shooting JPEG in low light, you are leaving a significant amount of recovery potential on the table. A RAW file preserves all the data your sensor captured before the camera processed and compressed it. That means in Lightroom or Capture One, you can pull detail back from shadows, correct exposure by a stop or two, and apply noise reduction that actually has information to work with.
Peter and John discussing the importance of shooting RAW in low light
This one comes up in the tutorial as a point Peter’s friend John raises, and it’s worth stopping on. If you are shooting JPEG in low light, you are leaving a significant amount of recovery potential on the table. A RAW file preserves all the data your sensor captured before the camera processed and compressed it. That means in Lightroom or Capture One, you can pull detail back from shadows, correct exposure by a stop or two, and apply noise reduction that actually has information to work with.
A JPEG that’s underexposed in a dark room is often just gone. A RAW file from the same shot might be completely salvageable. Make the switch if you haven’t yet. The files are larger, yes, but storage is cheap compared to re-shooting something you can’t go back to.
One Thing I’d Add from My Own Shooting
Peter’s framework covers the technical side cleanly, and I use every one of these steps myself. The thing I’d layer on top is this: before you change any settings, look for existing light sources you can use to your advantage. Neon signs, streetlights, lamp glow, even a phone screen across the room - repositioning yourself or your subject relative to those sources can buy you a full stop or two of light before you ever touch ISO. That’s a full stop less noise, a full stop more flexibility on your shutter speed.
I learned this the hard way on a travel shoot where I was blowing out my ISO trying to expose for a scene, and a local photographer standing nearby said, “just move them there,” and pointed to a patch of ambient light I’d completely ignored. Sometimes the best low-light technique is noticing what’s already there.
The single most important thing to take away from Peter’s tutorial is this: shutter speed, ISO, and post-processing noise reduction work as a system. You’re not choosing one - you’re balancing all three against each other until the image looks right. Understand that relationship, and low-light stops being the thing you dread and starts being one of the most interesting conditions to shoot in.
Watch the full tutorial on YouTube to see Peter shoot through these techniques live inside that neon sign studio - the visual examples make the concepts land even faster.
Comments (3)
Would love to see a follow-up going deeper into this topic.
Quality content like this is rare. Keep it up.
Great article! I actually covered something related on my site — the landscape angle is really complementary to this.
Leave a Comment