Every time I shoot travel content, I run into the same problem: where do I put the title? Slapping text in a corner feels lazy. Animating it over a solid color card feels dated. What I actually want is for the text to feel like it belongs in the scene, like it’s been painted on a wall or resting on a tabletop. That’s exactly what 3D tracking lets you do, and once you try it, you’ll wonder why you ever did it any other way.
In this Peter McKinnon tutorial, he breaks the technique down across three progressively complex examples, from text tracked onto a flat wall, to text floating perpendicular to a coffee table, to a real-world application inside one of his published vlogs. I’m going to walk you through the core process step by step, because the first time I watched a tracking tutorial I got lost somewhere between “drag the effect” and “now it’s done.” This one is genuinely fast. Faster, honestly, than the single-point tracking method a lot of people start with.
One quick note before we dive in: Watch the full tutorial on YouTube if you want to follow along with Peter’s footage. His examples are clear and visual, and seeing the tracking dots in motion helps. That said, the steps below are written so you can follow them with your own clips.
Step 1: Import Your Clip and Open the Effects Panel
 After Effects timeline with a video clip loaded
Bring your footage into After Effects and drop it onto a new composition. For your first attempt, choose a clip with a clear, flat surface in frame, a wall, a floor, a countertop. The more texture and detail on that surface, the better the tracker will perform. A plain white wall with no markings will give the tracker very little to grip onto.
After Effects timeline with a video clip loaded
Bring your footage into After Effects and drop it onto a new composition. For your first attempt, choose a clip with a clear, flat surface in frame, a wall, a floor, a countertop. The more texture and detail on that surface, the better the tracker will perform. A plain white wall with no markings will give the tracker very little to grip onto.
Once your clip is in the timeline and selected, open the Effects and Presets panel on the right side of the interface.
Step 2: Apply the 3D Camera Tracker Effect
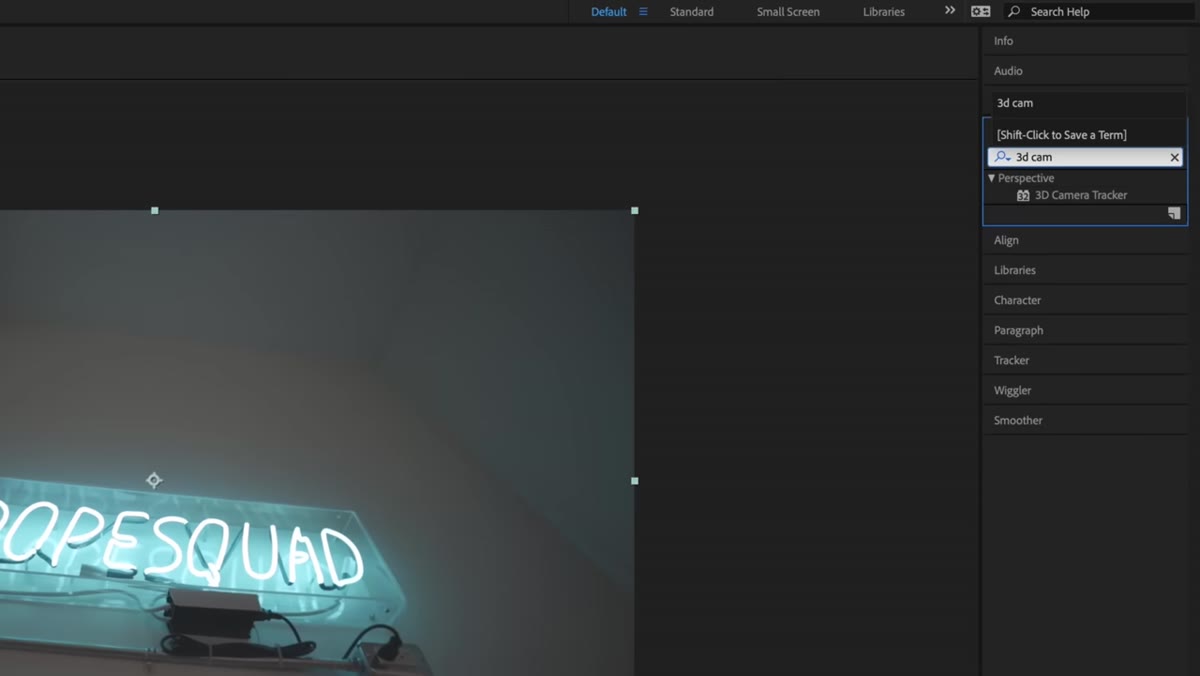 Effects and Presets panel with “3D Camera Tracker” typed in the search bar
In the search bar of the Effects and Presets panel, type “3D cam” and the 3D Camera Tracker effect will appear in the results. Drag it directly onto your footage in the timeline. After Effects will immediately begin analyzing the clip in the background. Depending on your clip length and machine speed, this can take anywhere from a few seconds to a couple of minutes.
Effects and Presets panel with “3D Camera Tracker” typed in the search bar
In the search bar of the Effects and Presets panel, type “3D cam” and the 3D Camera Tracker effect will appear in the results. Drag it directly onto your footage in the timeline. After Effects will immediately begin analyzing the clip in the background. Depending on your clip length and machine speed, this can take anywhere from a few seconds to a couple of minutes.
This is the part that surprised me the first time: you don’t have to set up any tracking points manually. After Effects analyzes the entire scene and maps out the three-dimensional space on its own. It’s doing a lot of math behind the scenes, but you don’t need to understand the math to use the result.
Step 3: Let the Analysis Complete, Then Review the Tracking Points
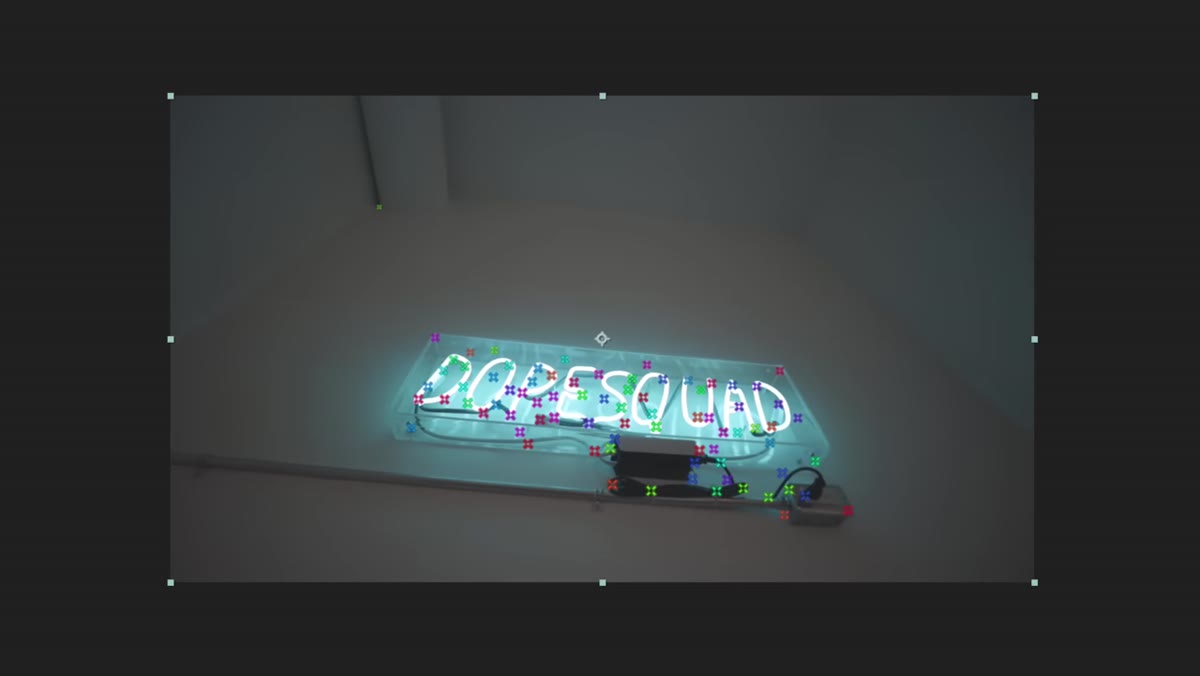 Composition panel showing colorful tracking dots spread across the footage
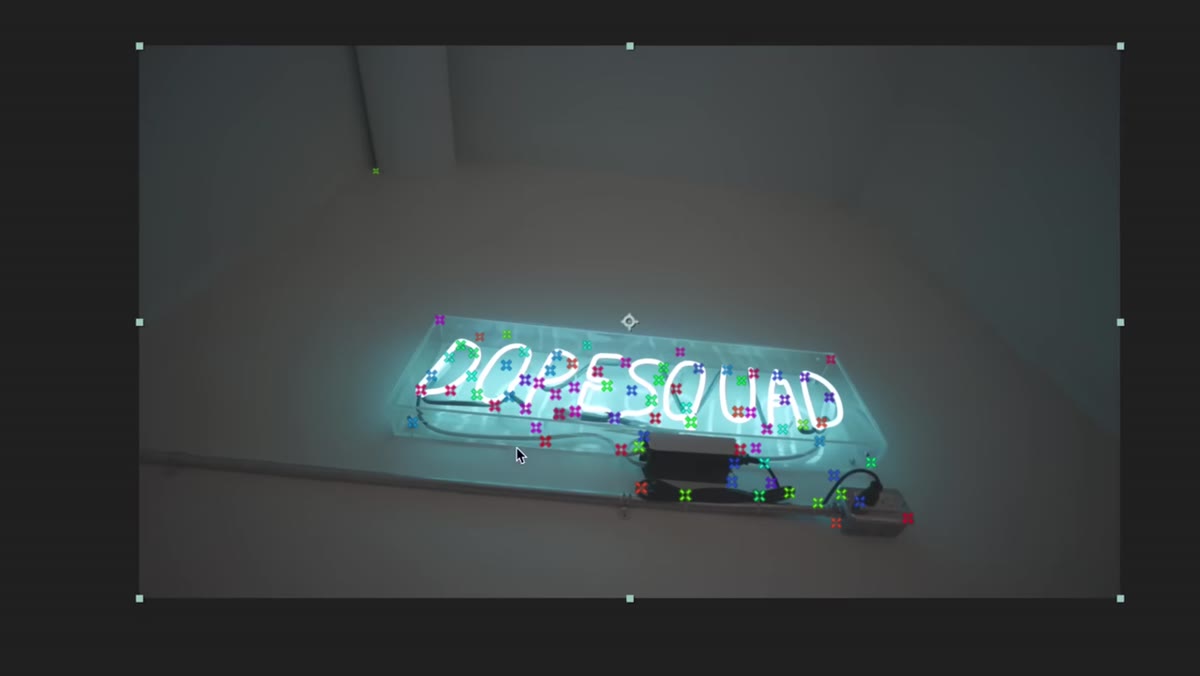
Once the analysis finishes, you’ll see a field of small colorful dots scattered across your composition. Peter calls these “skittles,” which is honestly the most accurate description. Each dot represents a point in 3D space that After Effects has identified and is now tracking through the clip. Scrub through your timeline to see them animate, moving with the camera as if they’re physically attached to the scene.
Composition panel showing colorful tracking dots spread across the footage
Once the analysis finishes, you’ll see a field of small colorful dots scattered across your composition. Peter calls these “skittles,” which is honestly the most accurate description. Each dot represents a point in 3D space that After Effects has identified and is now tracking through the clip. Scrub through your timeline to see them animate, moving with the camera as if they’re physically attached to the scene.
If the tracker had trouble, you may see a warning or sparse dot coverage in certain areas. That’s a signal that the footage might be too flat, too blurry, or too short. For learning purposes, stick with well-lit footage that has visible surface detail.
Step 4: Find the Right Tracking Plane with the Target Disc
 Composition panel showing the circular target disc hovering between tracking dots
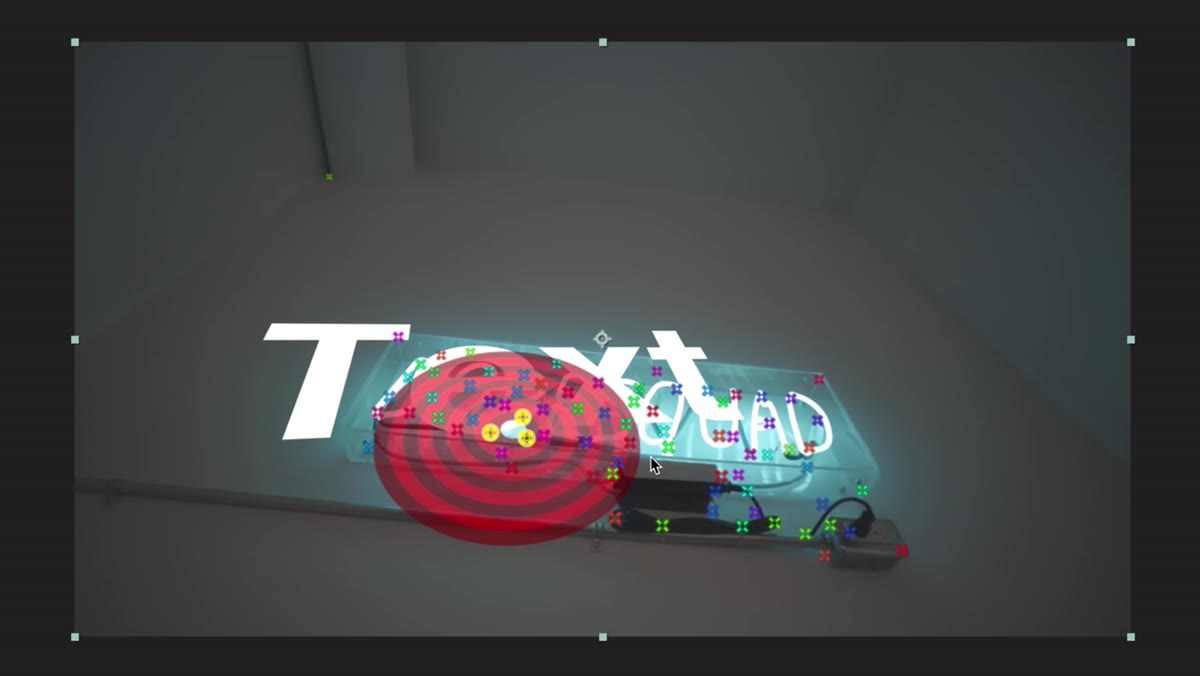
This is the step most tutorials skip over, and it’s the most important one. Hover your mouse between different clusters of tracking dots in the composition panel. As you move your cursor, After Effects will display a circular disc (it looks a little like a bullseye) that shows you the plane it’s calculating based on the nearby points.
Composition panel showing the circular target disc hovering between tracking dots
This is the step most tutorials skip over, and it’s the most important one. Hover your mouse between different clusters of tracking dots in the composition panel. As you move your cursor, After Effects will display a circular disc (it looks a little like a bullseye) that shows you the plane it’s calculating based on the nearby points.
The key is to watch the angle of that disc carefully. If you’re trying to place text on a wall, the disc should appear roughly vertical. If you’re targeting a tabletop, it should appear horizontal. The disc will tilt and shift as you move your mouse because different groups of tracking points describe different surfaces. Take your time here. Move slowly between the dots until the disc sits flush with the surface you actually want to track.
Step 5: Right-Click and Create a Text Layer or Null Object
 Right-click context menu over the tracking disc in the composition panel
Once the disc is sitting on the correct plane and angle, right-click directly on it. A context menu will appear with options including “Create Text and Camera” and “Create Null and Camera.” For placing a title directly in scene, choose “Create Text and Camera.” After Effects will generate a new text layer and a 3D camera, both matched to that tracked plane.
Right-click context menu over the tracking disc in the composition panel
Once the disc is sitting on the correct plane and angle, right-click directly on it. A context menu will appear with options including “Create Text and Camera” and “Create Null and Camera.” For placing a title directly in scene, choose “Create Text and Camera.” After Effects will generate a new text layer and a 3D camera, both matched to that tracked plane.
The text will appear in your composition, already attached to the surface you targeted. Double-click the text layer to edit the content, and use the character panel to adjust your font, size, and color. The text will now move with the surface through the entire clip.
Step 6: Refine Position and Apply It to Real Footage
 Composition panel showing text tracked onto a surface, moving with the scene
At this point you have a working 3D track, but you’ll likely need to nudge the text into a better position. Use the selection tool to move it along the surface, and adjust the Z position if it appears to float or sink into the material. Scrub through the clip at a few different points to confirm the text holds its position throughout the whole shot, not just at the frame where you placed it.
Composition panel showing text tracked onto a surface, moving with the scene
At this point you have a working 3D track, but you’ll likely need to nudge the text into a better position. Use the selection tool to move it along the surface, and adjust the Z position if it appears to float or sink into the material. Scrub through the clip at a few different points to confirm the text holds its position throughout the whole shot, not just at the frame where you placed it.
Peter’s third example in the tutorial applies this exact workflow to a real vlog title sequence, which is worth watching because you can see how he handles slightly imperfect tracking results and adjusts on the fly.
A Note From My Own Editing Sessions
The one thing I’d add from my own experience: 3D tracking works brilliantly for wide or medium shots, but it can get unstable with very shallow depth of field footage or fast handheld movement. If the tracker keeps producing a disc that won’t sit flat on your surface, try trimming your clip to a calmer section, running the tracker on that portion, and then extending the effect afterward. Also, if you’re using phone footage (and yes, I still shoot on my phone sometimes), the stabilization baked into mobile video can actually interfere with the tracker. Try turning off any in-camera stabilization before you shoot if you know you’ll be 3D tracking the clip later.
The single most important takeaway here is that 3D tracking is not the advanced scary technique it sounds like. The hardest part is step four, reading the tracking disc correctly, and once that clicks, the rest is just typography. Watch the full tutorial on YouTube to see Peter’s three examples in sequence. The progression from simple to complex makes the whole system feel approachable, and the final vlog example alone is worth the ten minutes.
Comments
Leave a Comment