HDR photography has a bit of a reputation problem. Mention it in certain circles and someone will immediately picture those over-cooked, hyper-saturated skies from the mid-2000s that looked more like a video game than a real place. But here’s the thing: HDR done well is invisible. It’s just a photo where the sky isn’t blown out and the shadows aren’t a muddy mess. That’s a goal worth chasing, especially when you’re shooting in tricky light, which, if you’re anything like me, is basically every time you’re outside during golden hour.
If you’ve spent any time in the HDR space, Photomatix Pro is probably a name you recognize. It has been around long enough to be considered the software that put HDR on the map for everyday photographers. The team recently released version 6, and in this Matt Kloskowski tutorial on YouTube, Matt walks through the new features with his usual clarity. I’ve pulled out the key steps below so you can follow along at your own pace. Watch the full tutorial on YouTube if you want to see it in motion, but the breakdown below should get you moving on your own.
Step 1: Understand Why Bracketing Exists
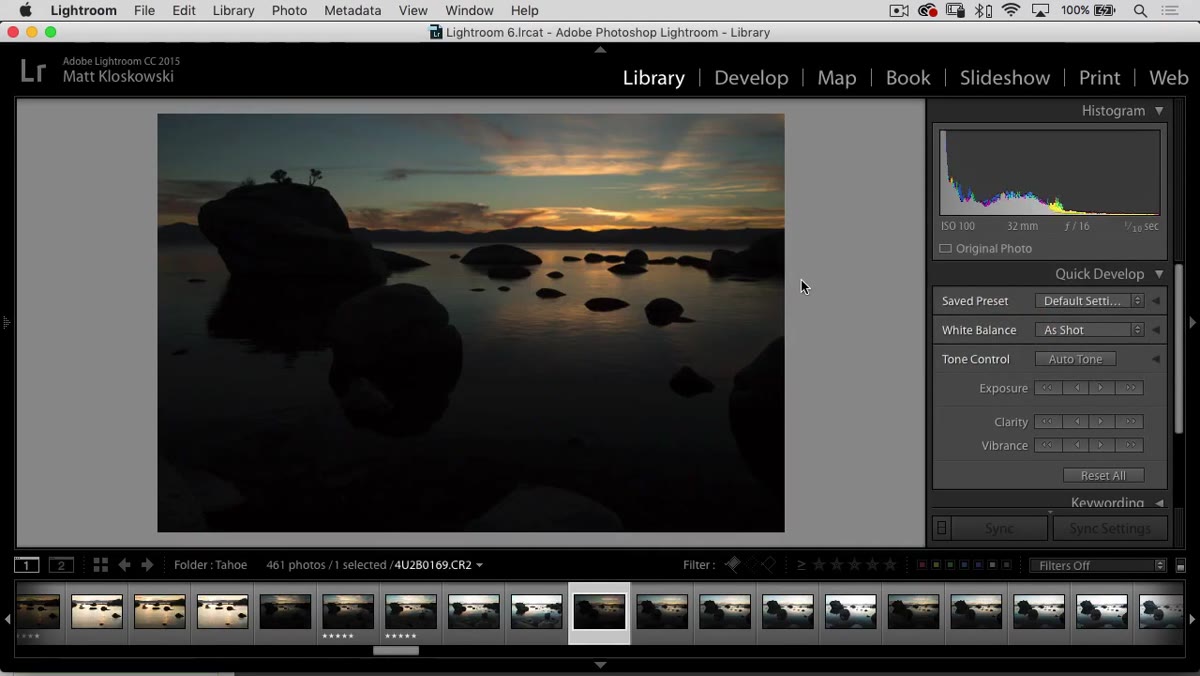 Lightroom filmstrip showing five bracketed exposure images
Before touching any software, you need a set of bracketed exposures to work with. Bracketing means capturing the same scene at multiple exposure values, typically a range from underexposed to overexposed, so you can capture detail across the full tonal range of a scene. Matt shoots five frames in his demo, but he’s honest that three is usually plenty. A spread of minus two stops, zero (your metered exposure), and plus two stops gives Photomatix enough data to blend a well-rounded result. The point is that no single frame captures everything when you’re shooting toward a bright window or an open sky. Some parts will always clip or block up. Bracketing solves that at the capture stage, before you even open an editor.
Lightroom filmstrip showing five bracketed exposure images
Before touching any software, you need a set of bracketed exposures to work with. Bracketing means capturing the same scene at multiple exposure values, typically a range from underexposed to overexposed, so you can capture detail across the full tonal range of a scene. Matt shoots five frames in his demo, but he’s honest that three is usually plenty. A spread of minus two stops, zero (your metered exposure), and plus two stops gives Photomatix enough data to blend a well-rounded result. The point is that no single frame captures everything when you’re shooting toward a bright window or an open sky. Some parts will always clip or block up. Bracketing solves that at the capture stage, before you even open an editor.
Step 2: Select Your Bracketed Images in Lightroom
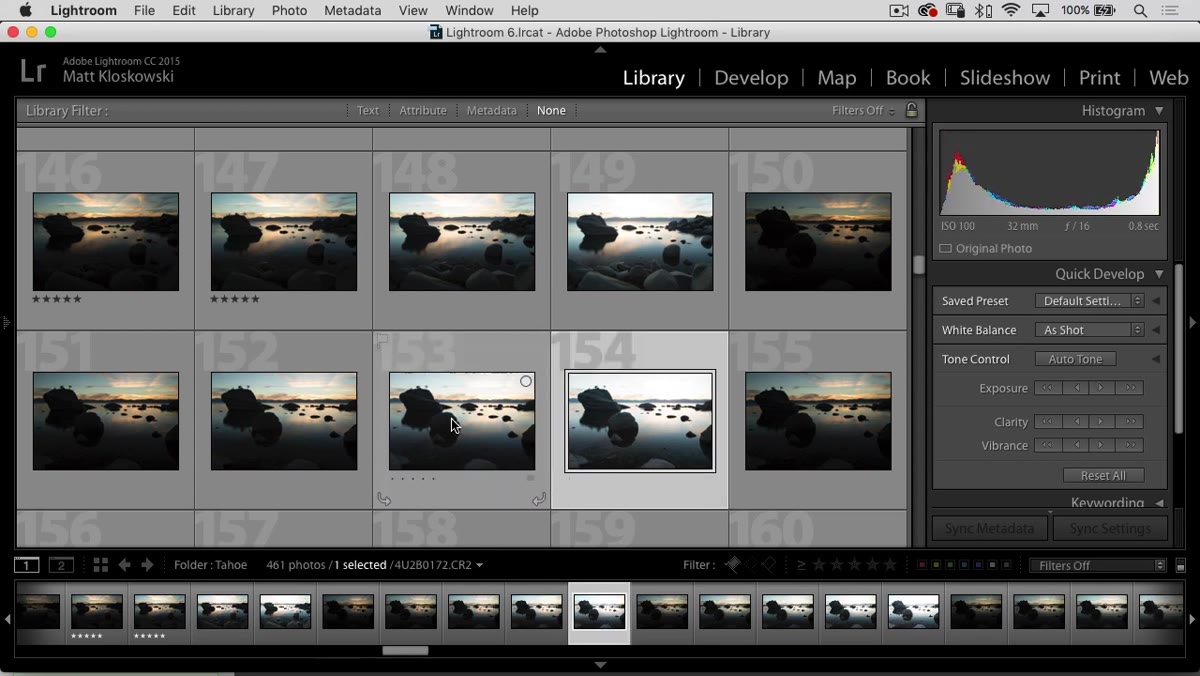 Lightroom filmstrip with five bracketed photos selected
Inside Lightroom, go to your filmstrip and shift-click to select all the frames from your bracket. You don’t have to launch Photomatix from Lightroom - the software runs as a standalone application and has its own file browser. But the Lightroom integration is genuinely smooth, and if you already organize your shoots there, it’s the faster path. Once you have your bracketed frames highlighted, you’re ready to hand them off.
Lightroom filmstrip with five bracketed photos selected
Inside Lightroom, go to your filmstrip and shift-click to select all the frames from your bracket. You don’t have to launch Photomatix from Lightroom - the software runs as a standalone application and has its own file browser. But the Lightroom integration is genuinely smooth, and if you already organize your shoots there, it’s the faster path. Once you have your bracketed frames highlighted, you’re ready to hand them off.
Step 3: Export to Photomatix Pro via Plug-in Extras
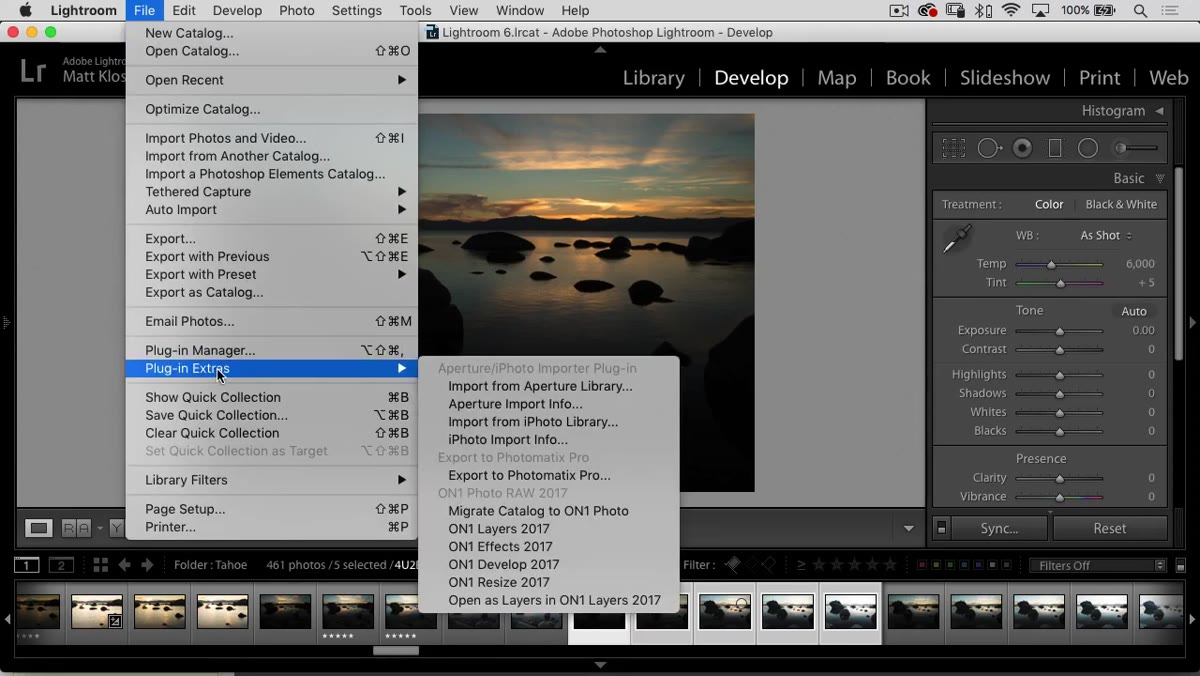 Lightroom File menu open showing Plug-in Extras option
With your images selected, go to the File menu in Lightroom and look for Plug-in Extras. When you install Photomatix Pro, it registers itself here automatically. Choose “Export to Photomatix Pro” and the handoff begins. This is one of those workflow details that sounds minor but saves real time. You’re not exporting TIFFs to a folder and then re-importing them somewhere else. The files move cleanly from Lightroom into Photomatix without that extra round trip.
Lightroom File menu open showing Plug-in Extras option
With your images selected, go to the File menu in Lightroom and look for Plug-in Extras. When you install Photomatix Pro, it registers itself here automatically. Choose “Export to Photomatix Pro” and the handoff begins. This is one of those workflow details that sounds minor but saves real time. You’re not exporting TIFFs to a folder and then re-importing them somewhere else. The files move cleanly from Lightroom into Photomatix without that extra round trip.
Step 4: Configure the Export Dialog
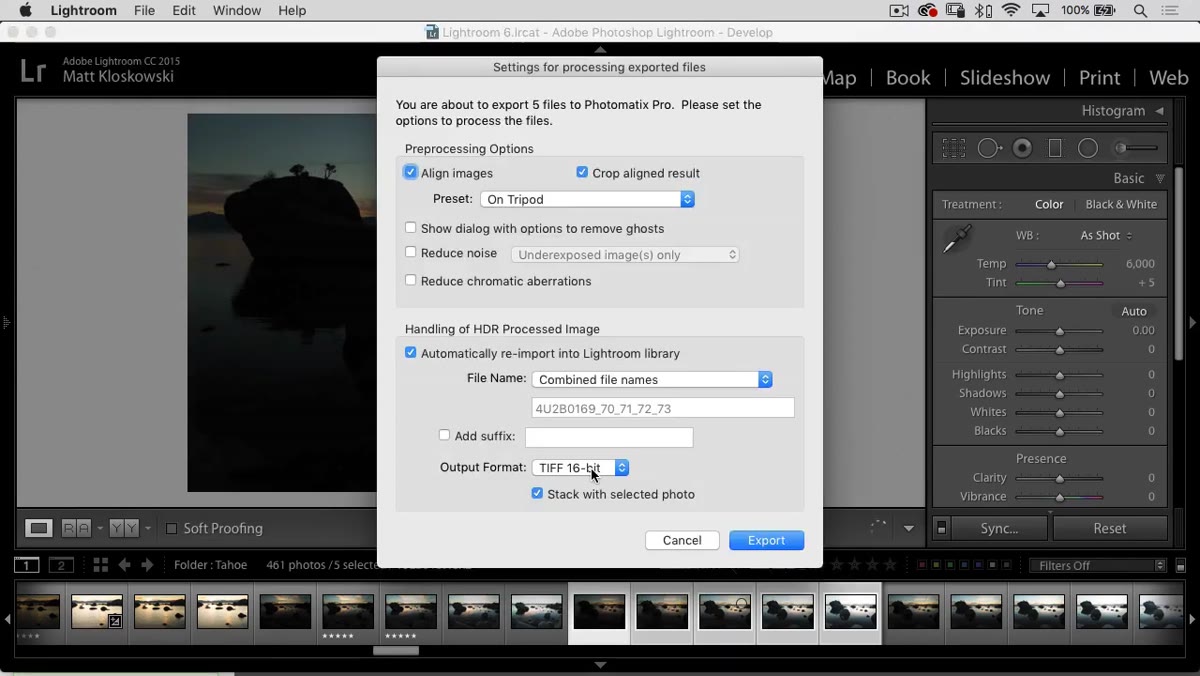 Photomatix export dialog box with alignment and ghosting options visible
A dialog box will appear asking you how you want Photomatix to handle the merge. There are a few settings here worth paying attention to. First, alignment correction. Even on a tripod, small vibrations or mirror slap can shift frames slightly relative to each other. Turn this on as a habit. Matt recommends it, and I agree. The visual difference between aligned and unaligned layers in a merged HDR can range from subtle fringing to outright double-image ghosting, and neither is fun to fix later.
Photomatix export dialog box with alignment and ghosting options visible
A dialog box will appear asking you how you want Photomatix to handle the merge. There are a few settings here worth paying attention to. First, alignment correction. Even on a tripod, small vibrations or mirror slap can shift frames slightly relative to each other. Turn this on as a habit. Matt recommends it, and I agree. The visual difference between aligned and unaligned layers in a merged HDR can range from subtle fringing to outright double-image ghosting, and neither is fun to fix later.
The second setting is deghosting. This is for anything that moved between frames, like a tree branch in the wind, a passing car, or a person walking through the edge of your frame. If your scene was completely static, you can leave it off. If there was any movement at all, experiment with the deghosting strength. Getting this right at the merge stage is much cleaner than trying to patch it afterward.
Step 5: Apply Noise Reduction During the Merge
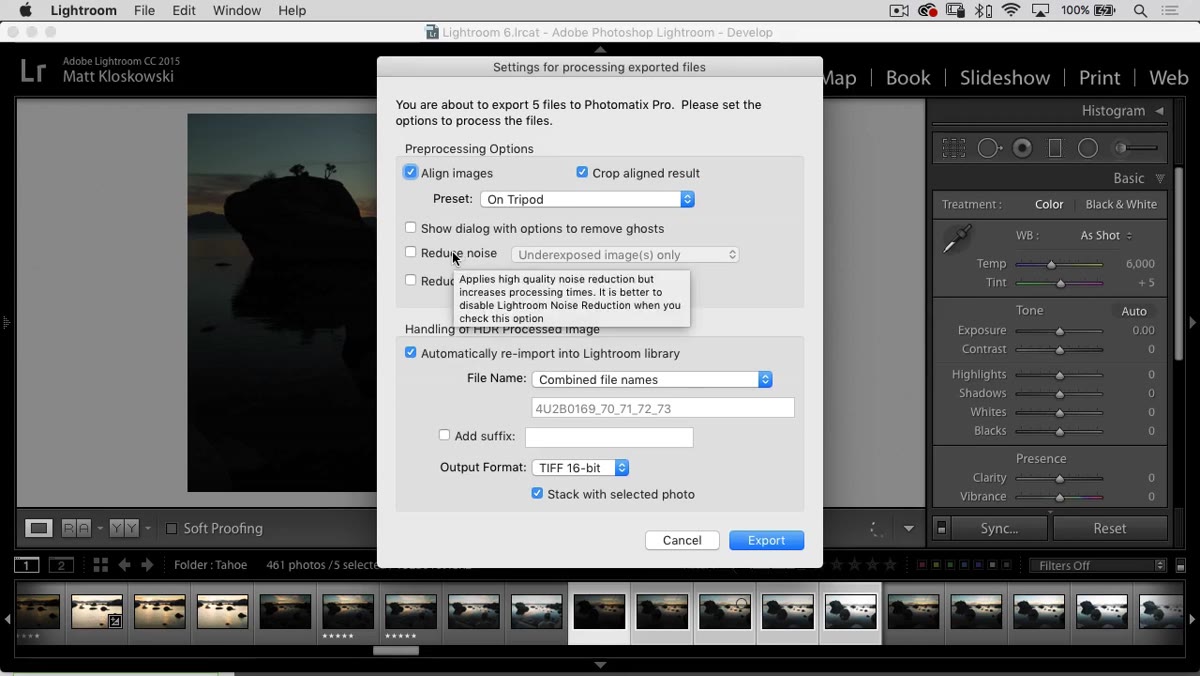 Export dialog showing noise reduction toggle option
The third option in that dialog is noise reduction, and this one matters more than people expect. When Photomatix blends your exposures together, it’s working with raw pixel data from multiple frames. The underexposed frames, the ones that protected your highlights, often carry luminance noise in the shadows. Applying noise reduction during the merge means the software is working on the data before tone mapping happens, which tends to produce cleaner results than trying to reduce noise after the fact. Matt keeps this on, and unless you have a specific reason not to, you probably should too.
Export dialog showing noise reduction toggle option
The third option in that dialog is noise reduction, and this one matters more than people expect. When Photomatix blends your exposures together, it’s working with raw pixel data from multiple frames. The underexposed frames, the ones that protected your highlights, often carry luminance noise in the shadows. Applying noise reduction during the merge means the software is working on the data before tone mapping happens, which tends to produce cleaner results than trying to reduce noise after the fact. Matt keeps this on, and unless you have a specific reason not to, you probably should too.
Step 6: Let Photomatix Merge and Begin Tone Mapping
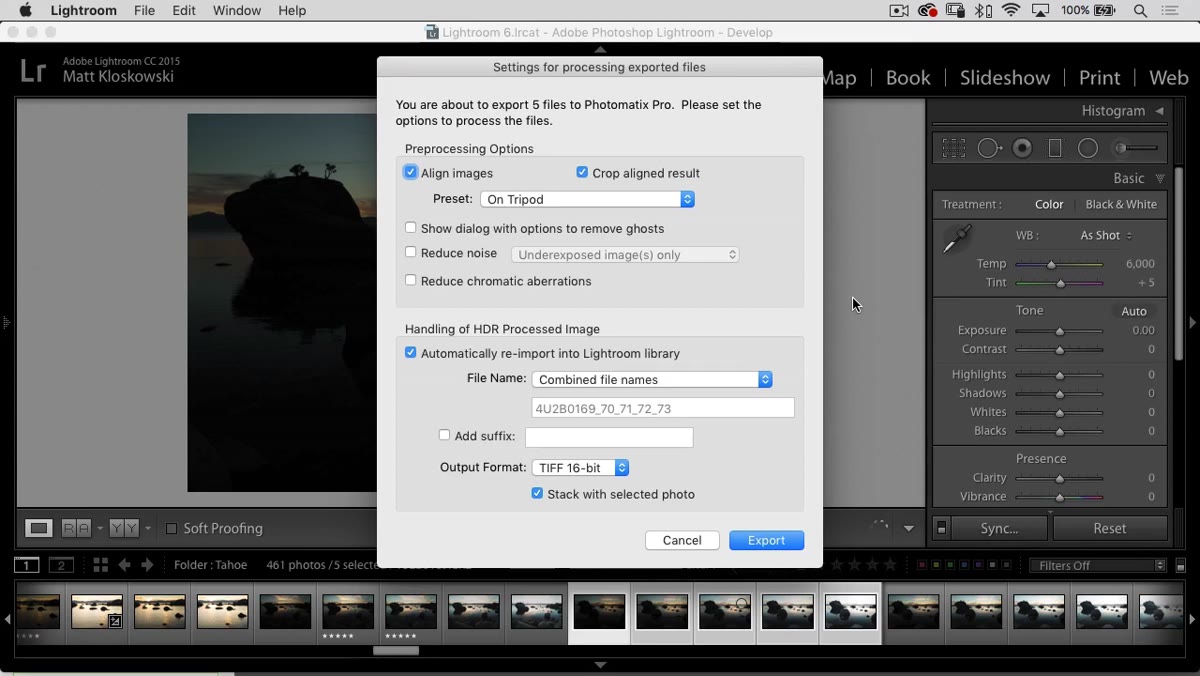 Photomatix processing the bracketed exposures into a merged HDR file
Once you confirm the dialog settings, Photomatix takes over and merges your exposures into a 32-bit HDR file. This is the raw combined data before any tone mapping. From here, you’ll move into Photomatix’s tone mapping panel, where you can control how the final image looks. Version 6 refines several of these controls, and the preview rendering is noticeably faster than earlier versions, which makes dialing in your settings less of a waiting game.
Photomatix processing the bracketed exposures into a merged HDR file
Once you confirm the dialog settings, Photomatix takes over and merges your exposures into a 32-bit HDR file. This is the raw combined data before any tone mapping. From here, you’ll move into Photomatix’s tone mapping panel, where you can control how the final image looks. Version 6 refines several of these controls, and the preview rendering is noticeably faster than earlier versions, which makes dialing in your settings less of a waiting game.
What I’d Add From My Own Workflow
One thing Matt doesn’t go deep on in this section of the tutorial, but that I’ve found genuinely useful, is treating Photomatix as one stop in a longer chain rather than the final destination. I almost always bring the result back into Lightroom for a finishing pass. Things like local adjustments, a touch of clarity in specific areas, or masking the sky separately are often cleaner to do in Lightroom after the HDR merge is done. Photomatix is excellent at the blend. Lightroom is excellent at the polish. Together they cover more ground than either does alone.
I also shoot HDR sequences on my Sunday morning photo walks here in Seattle, where the light off the water can go from flat grey to blown-out glare in minutes. Having a bracket set means I’m not gambling on a single exposure when the scene is doing something complicated. Three frames, two stops apart, and I have options. That flexibility is worth the few extra seconds of shooting.
The most important thing Photomatix Pro 6 gets right is that the workflow friction is low. The Lightroom integration, the alignment and deghosting options, the noise reduction during merge - these aren’t flashy features, but they’re the ones you’ll use every single time. Nail the settings in that export dialog and you’re most of the way to a clean result before tone mapping even starts.
Watch the full tutorial on YouTube to see Matt walk through the tone mapping panel and the rest of what’s new in version 6.
Comments
Leave a Comment