
Every Sunday morning I take a photo walk around Seattle. No agenda, no client brief, just me and whatever lens I feel like throwing on. The problem? I come home with a card full of shots that are almost there. The light was flat, I was standing in the wrong spot, or a tangle of power lines decided to photobomb my otherwise perfect frame. For years, fixing those “almost” shots meant opening Photoshop and losing an hour I didn’t have.
That’s exactly why this Peter McKinnon tutorial stopped me mid-scroll. Watch the full tutorial on YouTube - McKinnon walks through a complete photo edit using Luminar Neo, an AI-powered editing app, and the whole transformation takes maybe five minutes of actual effort. He’s upfront that this isn’t aimed at working professionals with established Lightroom workflows. It’s for hobbyists, casual shooters, and honestly anyone who wants results without a steep learning curve. I’d add: it’s also great for photographers like me who want to rescue a quick snap between client projects.
The photo he starts with is a wide shot of himself standing in a field. Shot at 15mm, it looks flat and a little boring. By the end, it looks like it was taken with a portrait lens on a different day entirely. Here’s exactly how he does it.
Step 1: Load Your Photo and Apply a Preset
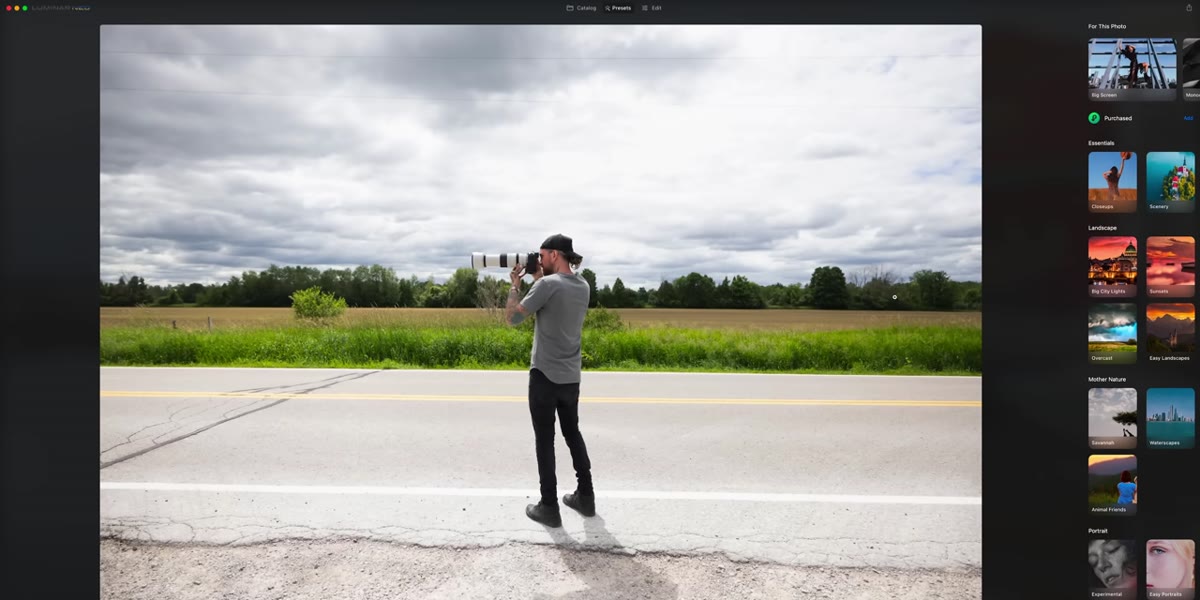 Luminar Neo interface with photo loaded and presets panel open
Open Luminar Neo and drag your photo into the workspace. Along the right side panel, you’ll see a presets library. Think of these the same way you’d think of Instagram filters, but with far more control. McKinnon clicks “Cold Frame,” which immediately shifts the tone of the image toward cooler, moodier colors. You’re not committing to anything permanent here, presets are just a starting point. Try a few, pick one that feels directionally right, and keep moving.
Luminar Neo interface with photo loaded and presets panel open
Open Luminar Neo and drag your photo into the workspace. Along the right side panel, you’ll see a presets library. Think of these the same way you’d think of Instagram filters, but with far more control. McKinnon clicks “Cold Frame,” which immediately shifts the tone of the image toward cooler, moodier colors. You’re not committing to anything permanent here, presets are just a starting point. Try a few, pick one that feels directionally right, and keep moving.
Step 2: Crop and Use Negative Space Intentionally
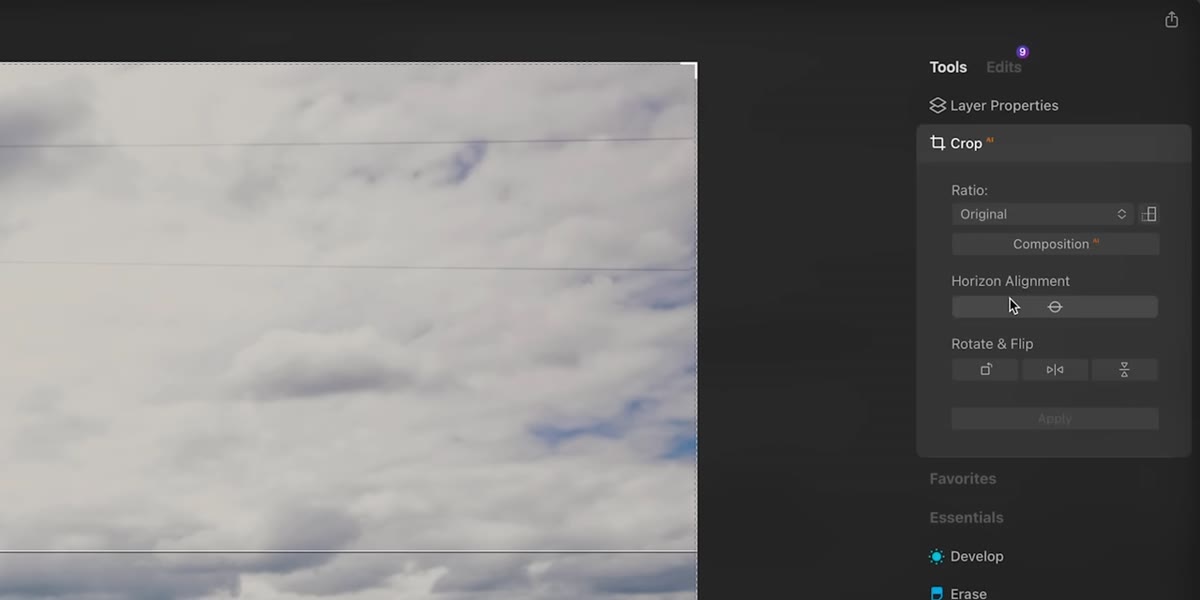 Crop tool active with horizon alignment engaged
Click the crop tool. Luminar Neo includes an automatic horizon alignment feature that will straighten a crooked horizon with one click. Once your image is level, think about composition rather than just trimming edges. McKinnon crops out the entire road at the bottom of the frame, leaving his subject centered with open sky and field surrounding him. This is negative space: giving the subject room to breathe by letting emptiness do visual work. When you have more open space than subject in a frame, the eye naturally travels to the subject first. It’s a simple compositional principle that instantly makes photos feel more intentional.
Crop tool active with horizon alignment engaged
Click the crop tool. Luminar Neo includes an automatic horizon alignment feature that will straighten a crooked horizon with one click. Once your image is level, think about composition rather than just trimming edges. McKinnon crops out the entire road at the bottom of the frame, leaving his subject centered with open sky and field surrounding him. This is negative space: giving the subject room to breathe by letting emptiness do visual work. When you have more open space than subject in a frame, the eye naturally travels to the subject first. It’s a simple compositional principle that instantly makes photos feel more intentional.
Step 3: Remove Power Lines with the Erase Tool
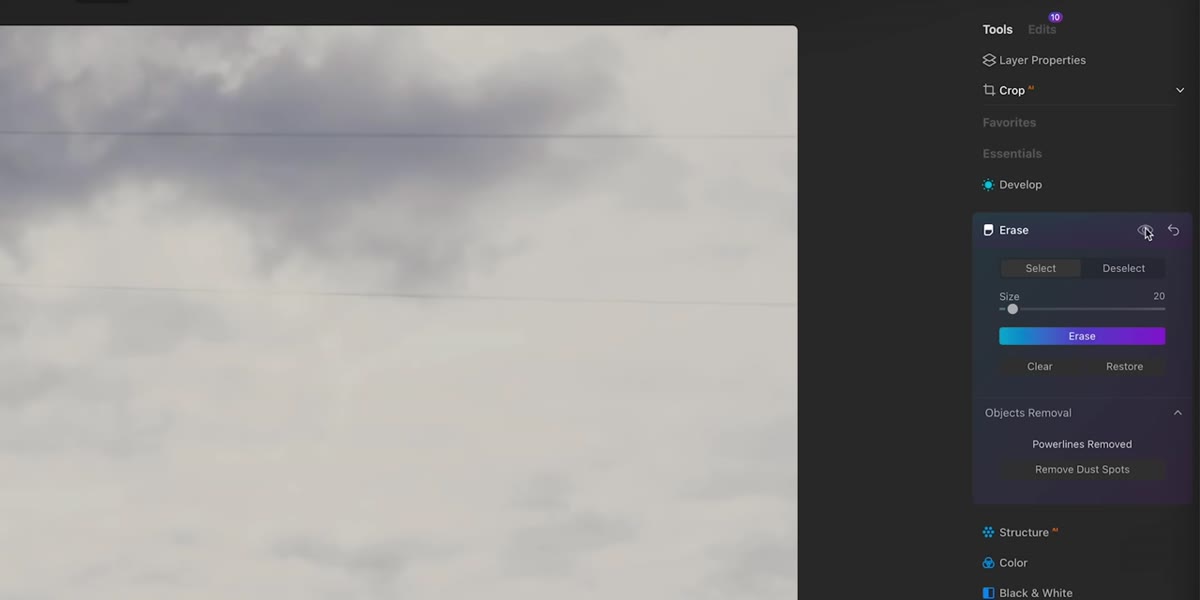
 Erase panel open with “Remove Power Lines” option visible
Navigate to the “Erase” tab in the right panel. You’ll see a specific option labeled “Remove Power Lines.” Click it, then wait. Luminar Neo uses AI to scan the entire image and identify the lines, then it removes them and fills in the background behind them. The first time this worked for me on a test image, I genuinely sat back in my chair. What would take five to ten minutes of careful clone-stamping in Photoshop happens automatically in under a minute here. Use the eyeball icon at the top of the panel to toggle the edit on and off and check the result. The edges around the removed lines are clean enough that you often don’t need to touch them up at all.
Erase panel open with “Remove Power Lines” option visible
Navigate to the “Erase” tab in the right panel. You’ll see a specific option labeled “Remove Power Lines.” Click it, then wait. Luminar Neo uses AI to scan the entire image and identify the lines, then it removes them and fills in the background behind them. The first time this worked for me on a test image, I genuinely sat back in my chair. What would take five to ten minutes of careful clone-stamping in Photoshop happens automatically in under a minute here. Use the eyeball icon at the top of the panel to toggle the edit on and off and check the result. The edges around the removed lines are clean enough that you often don’t need to touch them up at all.
Step 4: Add Depth of Field with Portrait Bokeh
 Portrait Bokeh slider being dragged with background blur applied
Scroll down to the “Portrait” section in the editing panel and open “Portrait Bokeh.” This is the feature that made me slightly annoyed I didn’t find it sooner. Drag the slider to the right and the software does two things at once: it blurs the background, and it automatically creates a mask around the subject in the foreground so they stay sharp. You don’t draw the mask yourself. The AI detects where the person ends and the background begins and protects them from the blur automatically.
Portrait Bokeh slider being dragged with background blur applied
Scroll down to the “Portrait” section in the editing panel and open “Portrait Bokeh.” This is the feature that made me slightly annoyed I didn’t find it sooner. Drag the slider to the right and the software does two things at once: it blurs the background, and it automatically creates a mask around the subject in the foreground so they stay sharp. You don’t draw the mask yourself. The AI detects where the person ends and the background begins and protects them from the blur automatically.
If you’re not familiar with the term “mask,” here’s the short version: a mask is a selection that tells the software which part of the image to affect. In traditional editing, creating a clean mask around a person requires tracing their outline carefully, which takes real time and skill. Here, that step is handled the moment you move the slider. The result is a photo that mimics the look of a wider aperture lens even if you shot it on a kit zoom.
Step 5: Toggle Before and After to Check Your Work
 Eyeball toggle icon highlighted in the top toolbar
Before you export anything, use the before-and-after comparison feature. The eyeball icon in the top toolbar lets you see the original image by clicking and holding, then releases back to your edited version when you let go. McKinnon does this after removing the power lines, but it’s worth doing after every major adjustment. It keeps you honest. Sometimes you push the bokeh too far and the blur starts to look digital and fake. A quick comparison tells you when to pull back.
Eyeball toggle icon highlighted in the top toolbar
Before you export anything, use the before-and-after comparison feature. The eyeball icon in the top toolbar lets you see the original image by clicking and holding, then releases back to your edited version when you let go. McKinnon does this after removing the power lines, but it’s worth doing after every major adjustment. It keeps you honest. Sometimes you push the bokeh too far and the blur starts to look digital and fake. A quick comparison tells you when to pull back.
What I’d Add from My Own Experience
Luminar Neo’s AI tools are genuinely impressive, but they work best on images with clear subject-background separation. If you’re editing a street scene where the subject blends into a busy background, the Portrait Bokeh mask can get confused around the edges, especially around hair or loose clothing. My workaround is to use the manual mask brush to clean up the edges after the AI does the heavy lifting. It adds maybe two minutes to the process but makes the result look polished rather than processed.
I’d also say: don’t skip the preset step even if you plan to adjust everything manually after. Presets set a color direction, and having that anchor point helps you make better decisions about contrast and saturation as you work. It’s the same reason I build playlists for different shooting moods before a session. A direction you choose early shapes everything that comes after.
The single biggest thing this tutorial reinforced for me is that a limited skill set is not a reason to skip post-processing entirely. Editing doesn’t have to mean a two-hour session in a complex tool. Sometimes it means five minutes, one slider, and a photo that goes from “almost” to actually shareable. If you’ve been avoiding editing because it felt too technical, this workflow is the place to start.
Watch the full tutorial on YouTube and follow along with your own photo open in Luminar Neo. You’ll be surprised how fast it goes.
Comments
Leave a Comment