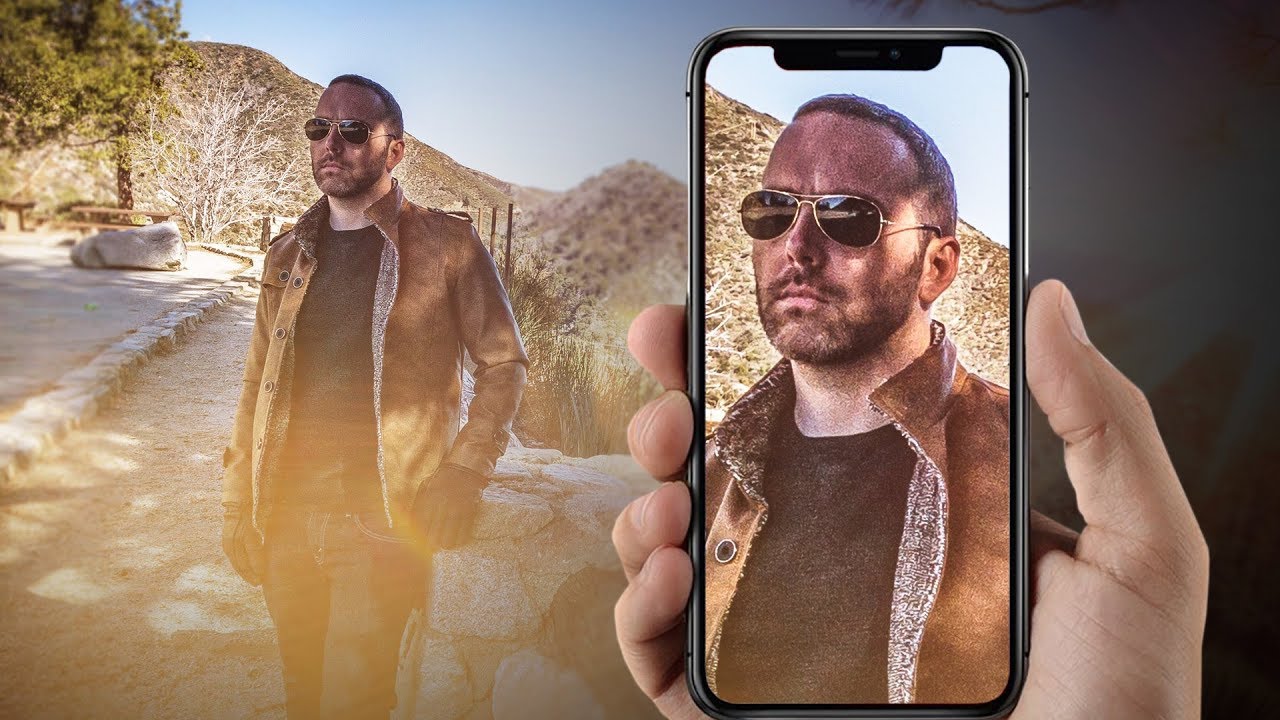
I take my camera on every trip. I also take my phone, and honestly, some of my favorite shots from the last few years came from the latter. There’s something useful about proving to yourself, and to students, that gear isn’t the ceiling. But using your phone well for serious photography isn’t just about pointing and tapping the shutter. It requires the same planning and workflow discipline you’d bring to any camera system. That’s exactly why I keep coming back to this topic.
Watch the full tutorial on YouTube
In this Kelvin Designs tutorial, Kelvin walks through twelve apps that form a complete iPhone photography workflow, from predicting where the sun will land to exporting a polished RAW edit. What struck me watching it was how much the app selection mirrors the mental checklist I run through before any shoot, mobile or otherwise. The planning tools especially. I’ve missed good light more times than I’d like to admit because I assumed I had more time than I did. These apps remove that guesswork.
Step 1: Use Sol to Track Golden Hour by Location
 Sol app open showing golden hour time at 4:13 PM
Sol is a sun-tracking app that tells you exactly when golden hour begins and ends for any location, including cities you haven’t traveled to yet. Open it to today’s view and tap through the timeline to see when afternoon light transitions into the golden window and when civil, nautical, and astronomical dusk each begin. Kelvin points out that for his location, golden hour kicks off at 4:13 PM, with full dark arriving around 6:30.
Sol app open showing golden hour time at 4:13 PM
Sol is a sun-tracking app that tells you exactly when golden hour begins and ends for any location, including cities you haven’t traveled to yet. Open it to today’s view and tap through the timeline to see when afternoon light transitions into the golden window and when civil, nautical, and astronomical dusk each begin. Kelvin points out that for his location, golden hour kicks off at 4:13 PM, with full dark arriving around 6:30.
The planning feature that matters most here is the location search. If you’re flying somewhere next week and want to book a sunrise session, you can look up that city in advance and know exactly what time you need to be in position. Build in at least 20 to 30 minutes before golden hour actually starts. You’ll want time to scout the area, account for buildings or hills that block the horizon, and not be fumbling with your settings when the light gets good.
Step 2: Use Sun Seeker to Visualize Where the Sun Will Actually Land
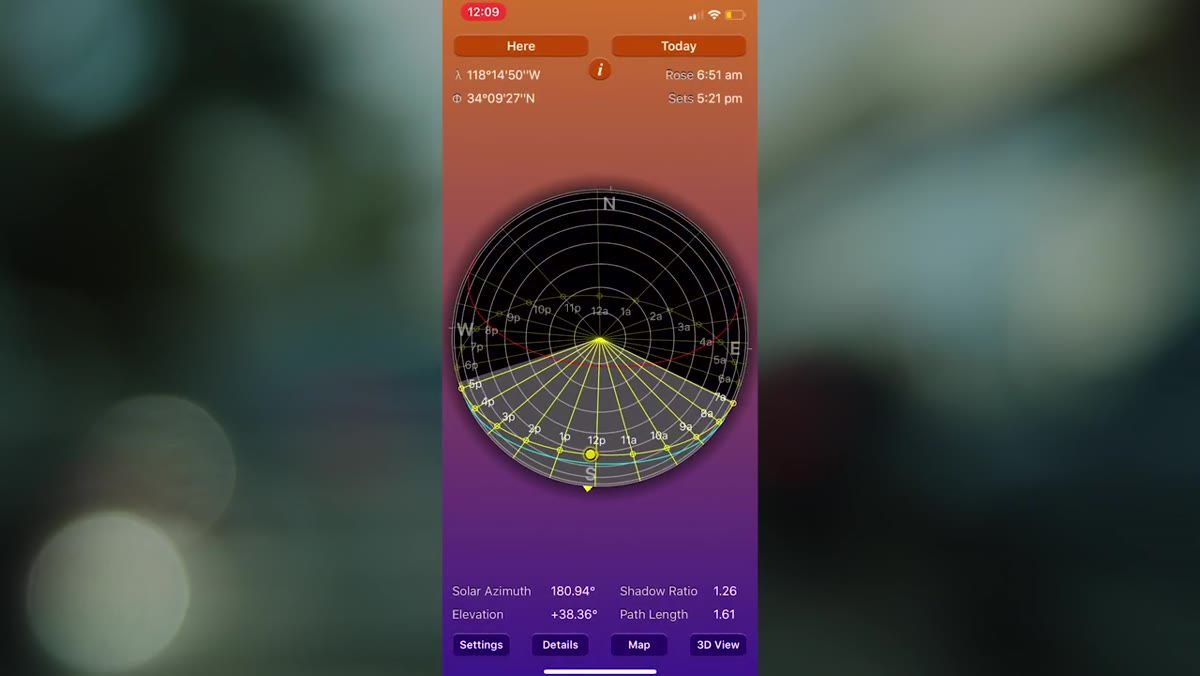 Sun Seeker app showing 3D sun position over landscape
Knowing when golden hour starts is only half the equation. Sun Seeker shows you where in the sky the sun will be at any given time, overlaid on a live camera view of your environment. Kelvin demonstrates the 3D view, pointing out that sunset for his location will drop behind a specific hill at around 3:30. That kind of spatial awareness is the difference between a planned composition and a scramble.
Sun Seeker app showing 3D sun position over landscape
Knowing when golden hour starts is only half the equation. Sun Seeker shows you where in the sky the sun will be at any given time, overlaid on a live camera view of your environment. Kelvin demonstrates the 3D view, pointing out that sunset for his location will drop behind a specific hill at around 3:30. That kind of spatial awareness is the difference between a planned composition and a scramble.
Walk around your location with Sun Seeker open before you commit to a spot. You can see the sun’s arc throughout the entire day, which helps you anticipate where shadows will fall, whether your subject will be backlit or side-lit, and whether that dramatic low-angle light will actually reach your frame or get blocked by a building. It’s a location scouting tool as much as it’s a sun tracker.
Step 3: Shoot in RAW Using Camera Plus
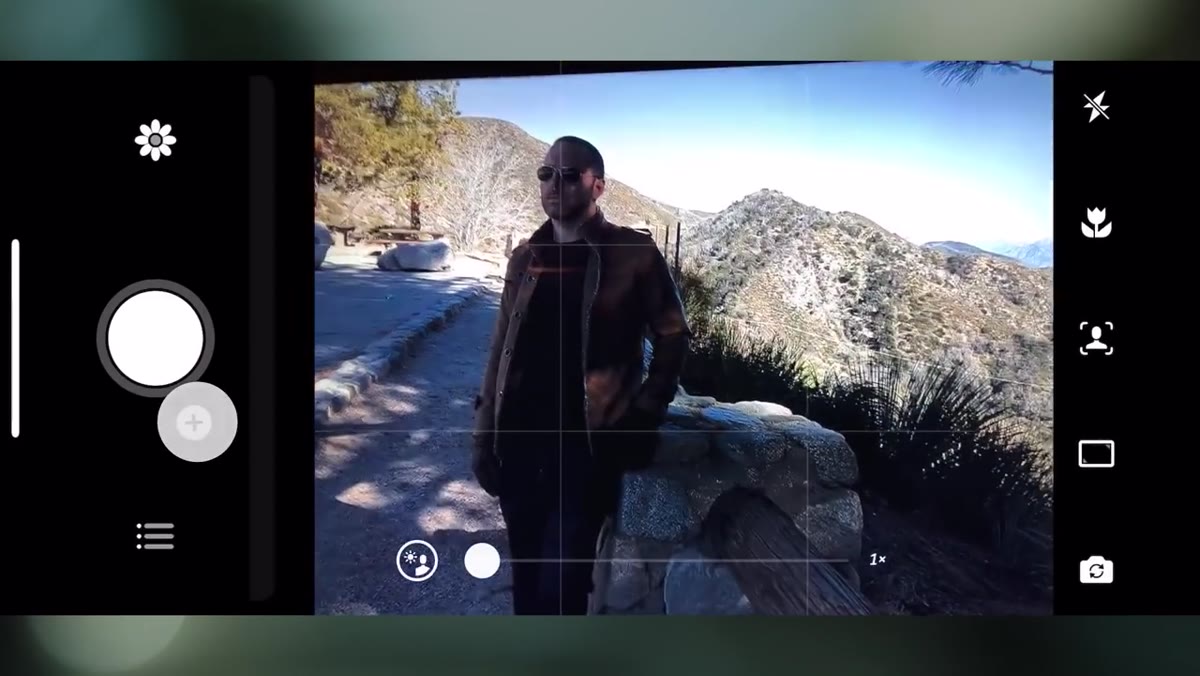 Camera Plus interface showing RAW toggle being enabled
Camera Plus is Kelvin’s app of choice for the actual capture, and the single most important thing you do before shooting is enable RAW capture. Tap the small plus button beside the shutter, and toggle RAW on. If your iPhone model supports it, the app will shoot DNG files instead of compressed JPEGs, which preserves far more tonal data for editing later.
Camera Plus interface showing RAW toggle being enabled
Camera Plus is Kelvin’s app of choice for the actual capture, and the single most important thing you do before shooting is enable RAW capture. Tap the small plus button beside the shutter, and toggle RAW on. If your iPhone model supports it, the app will shoot DNG files instead of compressed JPEGs, which preserves far more tonal data for editing later.
From there, Kelvin’s shooting style is practical. He uses the physical button to trigger the shutter so there’s no screen tap shaking the phone, and he manually adjusts exposure by tapping his subject and sliding brightness up or down. The goal at capture is to protect your highlights, since blown whites are unrecoverable even in RAW. Slightly underexposed is always easier to work with in post than an overexposed sky.
Step 4: Review in the Camera Plus Lightbox
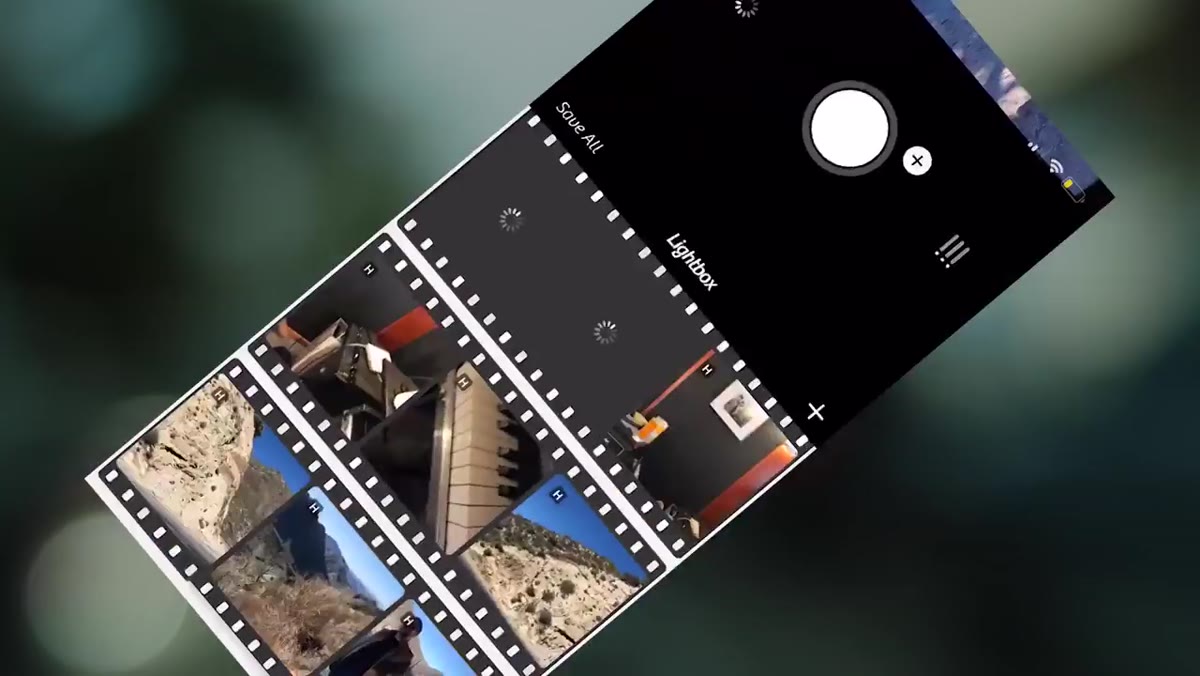 Camera Plus lightbox showing captured photo selected
After shooting, tap the daisy icon in Camera Plus to open your lightbox, which functions as a built-in review gallery. This is where you confirm you’ve got the frame you want before moving to the next stage of the workflow. It’s a quick gut-check step, but it matters because you don’t want to spend time editing a file you’d already decided wasn’t the keeper.
Camera Plus lightbox showing captured photo selected
After shooting, tap the daisy icon in Camera Plus to open your lightbox, which functions as a built-in review gallery. This is where you confirm you’ve got the frame you want before moving to the next stage of the workflow. It’s a quick gut-check step, but it matters because you don’t want to spend time editing a file you’d already decided wasn’t the keeper.
One note from Kelvin worth repeating: Camera Plus does allow some basic RAW adjustments at this stage, including highlight recovery and shadow lifting. He recommends skipping them here. Any tweaks you make won’t actually be saved to the DNG file when you export. Save your editing time for an app that can actually write those changes to the file.
Step 5: Export the RAW DNG Before Editing
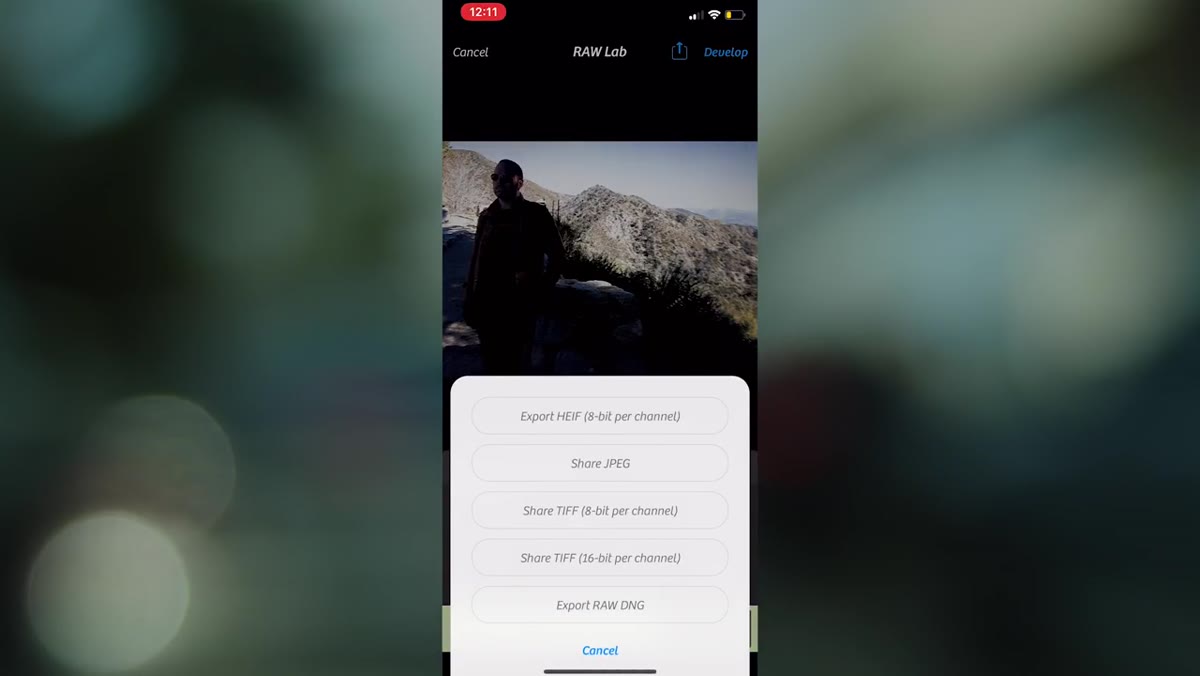 Share button in Camera Plus to export raw DNG file
To move the file into a proper editing environment, tap the share button inside Camera Plus and export the RAW DNG directly. This sends the unedited file to your camera roll or directly into another app, where your edits will actually stick. Skipping this step and editing inside Camera Plus means you’re working on a preview that won’t reflect your changes on export.
Share button in Camera Plus to export raw DNG file
To move the file into a proper editing environment, tap the share button inside Camera Plus and export the RAW DNG directly. This sends the unedited file to your camera roll or directly into another app, where your edits will actually stick. Skipping this step and editing inside Camera Plus means you’re working on a preview that won’t reflect your changes on export.
This is a small thing but it’s where a lot of people lose quality without realizing it. Editing a DNG in a capable app versus editing a JPEG after the fact isn’t even a comparison. Get the RAW out first, then touch the image.
Step 6: Edit in Lightroom CC Mobile
 Lightroom CC Mobile open showing photo in all photos view
Lightroom CC Mobile is where the real editing happens. Kelvin uses it as the final stage of his mobile workflow because it handles DNG files properly and gives you the same essential controls you’d find in desktop Lightroom, including highlights, shadows, whites, blacks, tone curve, and HSL. The app requires an Adobe Creative Cloud subscription, so it’s not a free tool, but if you’re already paying for the desktop version it’s included.
Lightroom CC Mobile open showing photo in all photos view
Lightroom CC Mobile is where the real editing happens. Kelvin uses it as the final stage of his mobile workflow because it handles DNG files properly and gives you the same essential controls you’d find in desktop Lightroom, including highlights, shadows, whites, blacks, tone curve, and HSL. The app requires an Adobe Creative Cloud subscription, so it’s not a free tool, but if you’re already paying for the desktop version it’s included.
Import your exported DNG through the app’s all-photos view and work from there. A conservative starting point is to bring highlights down, open shadows slightly, and let the natural tones of the RAW file breathe. The goal isn’t to over-process. It’s to finish what good light and a clean capture already started.
What I’d Add From My Own Experience
The part of this workflow I want to underscore is the planning stack. Sol and Sun Seeker together take maybe five minutes to consult before a shoot, and they’ve saved me from more bad-timing mistakes than I can count. I used to rely on generic weather apps and rough estimates. Now I treat light planning like I treat lens selection: non-negotiable before I leave the house.
If you’re new to mobile photography and the Creative Cloud subscription feels like too much commitment upfront, start with the two sun apps and Camera Plus. Get the habit of shooting RAW and reviewing your captures before you walk away from a location. The editing workflow is learnable, but the light won’t wait for you to figure out your apps.
The single biggest shift this tutorial offers is framing your phone as a system, not just a convenience. Plan the light, capture in RAW, edit in a real tool. That sequence works whether your camera fits in your pocket or in a backpack. Watch the full tutorial on YouTube to see all twelve apps Kelvin recommends, including several he covers beyond what’s detailed here.
Comments (6)
Just used this on a wedding shoot edit. Client was thrilled.
Printing this out and pinning it next to my monitor. That good.
Printing this out and pinning it next to my monitor. That good.
This is the kind of content that keeps me coming back.
This is fantastic. I've been recommending this approach to my readers too.
I've watched a dozen tutorials on this and yours is the clearest by far.
Leave a Comment