I shoot a lot. Between client work, travel content, and the Sunday photo walks I refuse to give up no matter the Seattle weather, I end up with a genuinely embarrassing amount of footage to sort through. For a long time, my editing workflow was the digital equivalent of throwing clothes on a chair and hoping for the best. Bins named “stuff,” clips in the wrong sequence, color grades applied one painstaking cut at a time. It worked, technically. But it was slow, and slow is the enemy of creative momentum.
That’s why when a friend sent me this Peter McKinnon tutorial on Premiere Pro tips ranging from beginner to pro level, I sat down with my coffee and actually took notes. Watch the full tutorial on YouTube before or after reading this breakdown. McKinnon covers ten tips total, but the two I’m walking through in detail here are the ones that restructured how I start every single project now. If you’ve ever lost twenty minutes searching for one clip you swore you labeled, these are for you.
Step 1: Import Your Folders as Bins with a Single Drag
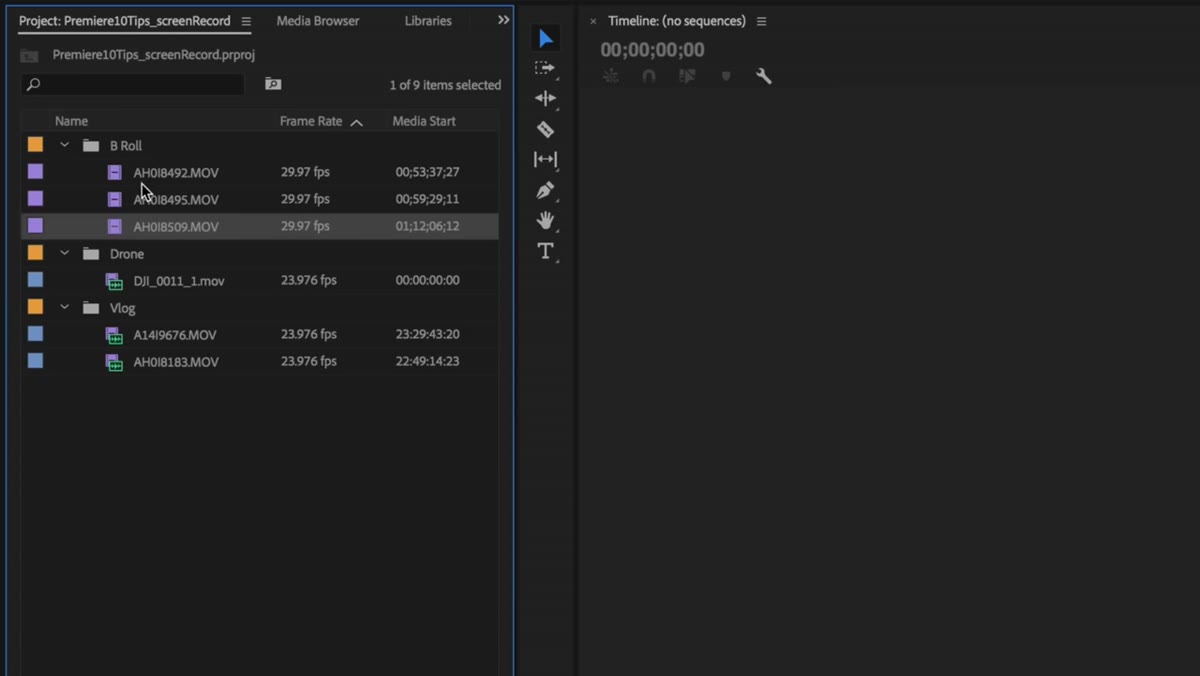
 Dragging a folder directly into the Premiere Pro project window
Before you place a single clip on the timeline, your project window needs to be organized. The old way most people do this, including how McKinnon says he used to do it, involves creating a new bin manually, naming it, then hunting down the footage and dragging it in separately. That’s at least four steps per folder, and if you’re working with footage from multiple cameras or shooting days, it adds up fast.
Dragging a folder directly into the Premiere Pro project window
Before you place a single clip on the timeline, your project window needs to be organized. The old way most people do this, including how McKinnon says he used to do it, involves creating a new bin manually, naming it, then hunting down the footage and dragging it in separately. That’s at least four steps per folder, and if you’re working with footage from multiple cameras or shooting days, it adds up fast.
The faster method is to skip the bin creation entirely and just drag your folders straight from your computer’s file browser into the Premiere Pro project window. Drop a folder in, and Premiere automatically turns it into a named bin with all the contents already inside. Highlight multiple folders at once using Shift-click, drag them all in together, and your entire project structure is built in one motion. Expand each bin after importing and everything is exactly where it should be. This one habit alone has cut my project setup time significantly.
Step 2: Color-Code Your Clips by Camera or Category
 Right-click label menu open on highlighted clips in project window
Once your bins are populated, right-click on the bin itself to select everything inside it at once, then hold Shift and click the bottom clip to make sure the full contents are highlighted. From there, right-click and choose Label, then pick a color. McKinnon assigns a different color to each type of footage, so drone clips might be one color, vlog footage another, and b-roll a third.
Right-click label menu open on highlighted clips in project window
Once your bins are populated, right-click on the bin itself to select everything inside it at once, then hold Shift and click the bottom clip to make sure the full contents are highlighted. From there, right-click and choose Label, then pick a color. McKinnon assigns a different color to each type of footage, so drone clips might be one color, vlog footage another, and b-roll a third.
The payoff comes when you start building your timeline. Every clip carries its color label with it, so when you look down at your sequence, you can read the edit at a glance. Need to find a drone shot in a busy timeline? Your eyes go straight to the right color. It sounds small, but on a long travel edit with hundreds of clips, this visual map becomes genuinely important. I now color-code by camera body rather than footage type, which works especially well when I’m mixing phone footage with mirrorless footage and need to keep track of which cut is which.
Step 3: Apply Color Grades to the Master Clip, Not the Timeline Clip
 Dragging a color effect onto a clip in the project window, not the timeline
This is the tip that made me pause the video and stare at my screen for a moment. If you do jump cuts, which I do constantly when editing tutorial-style content, you know the pain of getting a color grade exactly right on one clip and then realizing you have to paste that grade onto every single cut from the same original clip. With fifteen or twenty cuts, that’s a real time cost.
Dragging a color effect onto a clip in the project window, not the timeline
This is the tip that made me pause the video and stare at my screen for a moment. If you do jump cuts, which I do constantly when editing tutorial-style content, you know the pain of getting a color grade exactly right on one clip and then realizing you have to paste that grade onto every single cut from the same original clip. With fifteen or twenty cuts, that’s a real time cost.
McKinnon’s solution is to apply your color grade or any effect directly to the source clip in the project window rather than to the instance of that clip sitting in the timeline. In Premiere, open your Effects panel, search for the effect you want (he demonstrates with a color grading preset), and drag it onto the clip thumbnail in the project bin. This applies it as a “master clip effect.” From that point forward, every time that source clip appears in your timeline, whether it’s been cut once or thirty times, the effect is already baked into all of them. Change the grade on the master clip and every cut updates instantly. It’s a fundamental shift in thinking about where effects live in your project.
Step 4: Use Master Clip Effects to Protect Consistency Across Edits
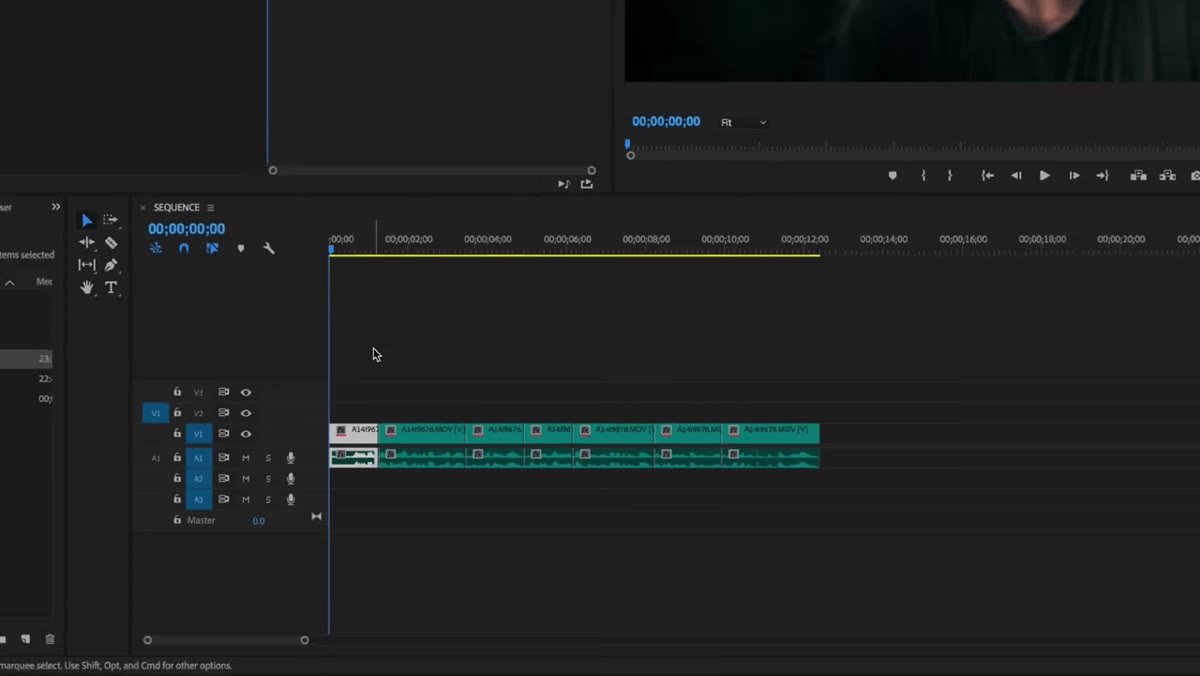 All jump cuts on timeline showing consistent color after master clip effect applied
Extending the master clip concept a little further: because the effect lives on the source file rather than the timeline instance, you can keep refining your color grade all the way through your edit without worrying about consistency falling apart. In a long-form edit where you might revisit a clip weeks after you first placed it, this is genuinely protective.
All jump cuts on timeline showing consistent color after master clip effect applied
Extending the master clip concept a little further: because the effect lives on the source file rather than the timeline instance, you can keep refining your color grade all the way through your edit without worrying about consistency falling apart. In a long-form edit where you might revisit a clip weeks after you first placed it, this is genuinely protective.
The practical habit I’ve built from this is to do a first-pass color adjustment on every source clip in the project window before I even start cutting. Nothing final, just a baseline correction. Then I cut freely, knowing that when I come back to finalize grades, one adjustment in the project window touches every version of that clip across the whole timeline automatically.
What I Do Differently After Watching This
McKinnon demonstrates the master clip effect using a stylized color preset, which is great for vlog-style work. Where I’ve pushed this further is using it for technical corrections first, specifically exposure and white balance fixes. When I’m editing travel footage shot across multiple days with inconsistent light, I’ll correct each source clip for accurate exposure before I touch anything creative. That way my creative grade in the timeline is working with clean, consistent material rather than trying to compensate for blown highlights or green color casts on top of everything else.
If you’re a photographer moving into video, think of the master clip effect the way you think about editing a Raw file before exporting. You want your foundational corrections locked before you build anything on top of them.
These two workflow changes, drag-and-drop bin organization and master clip effects, address the same underlying problem: the more time you spend managing your project, the less time you spend actually editing. The goal is to make the structure so automatic that your brain stays focused on the creative decisions instead. McKinnon’s full tutorial covers eight more tips beyond what I’ve broken down here, including keyboard shortcut tricks and sequence settings that are worth your time even if you’ve been using Premiere for years.
Watch the full tutorial on YouTube and bring a notebook. I’m serious about the notes.
Comments (1)
Just subscribed. If the rest of your content is this good, I'm in.
Leave a Comment